Hello! I'm Lynn.
  • About Me
  • Work With Me
  • Contact Me
  • Subscribe
  • Home
    • About
    • Contact
    • Disclaimer
    • Terms & Conditions
    • Privacy Policy
    • Subscribe
      • Work With Me
        • Media Kit
        • Portfolio and Samples
  • diy
  • lifestyle
    • home decor
  • recipes
  • gifts, parties & holidays
  • health & wellness with lynn

Lynn Mumbing Mejia

Crafting coziness, one recipe, DIY project, and holiday celebration at a time.

diy, gifts/parties/holidays · December 7, 2020

How to DIY Orange Garland

*This post may contain affiliate or sponsored links, which means I may get paid or receive a commission if you purchase through my link, at no extra cost to you!*

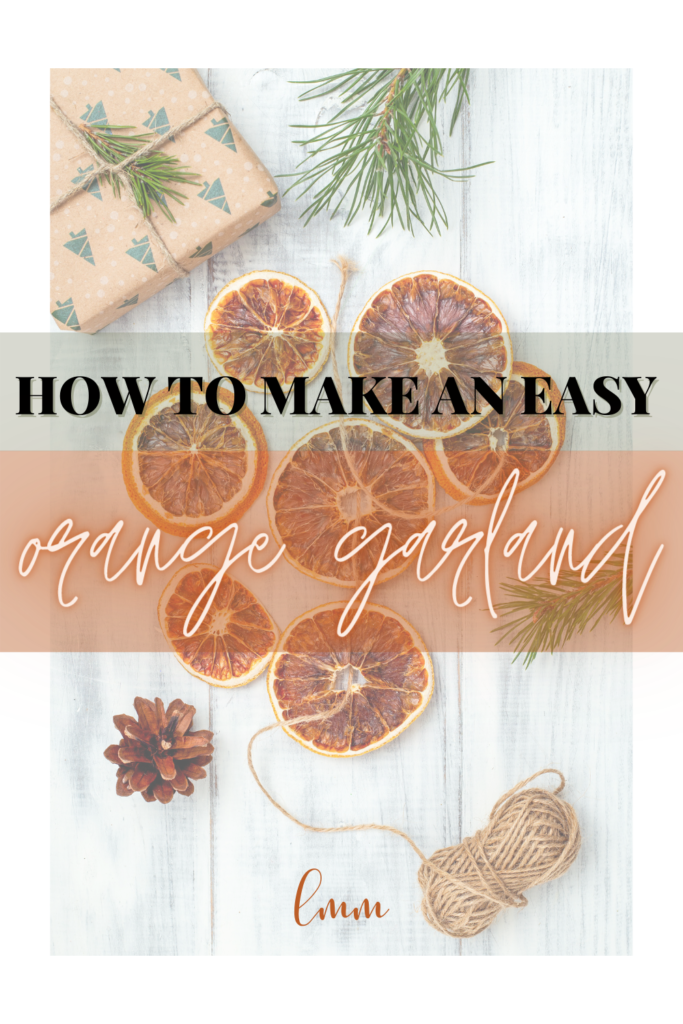
Read more for all the details on DIY Orange Garland.

December is flying by! I know it sounds super weird as it’s only December 7th but I’m having so much fun stuffing my face with chocolates, baking yummy treats, singing Christmas songs, decorating my home and I can’t believe we’re so close to Christmas Eve!

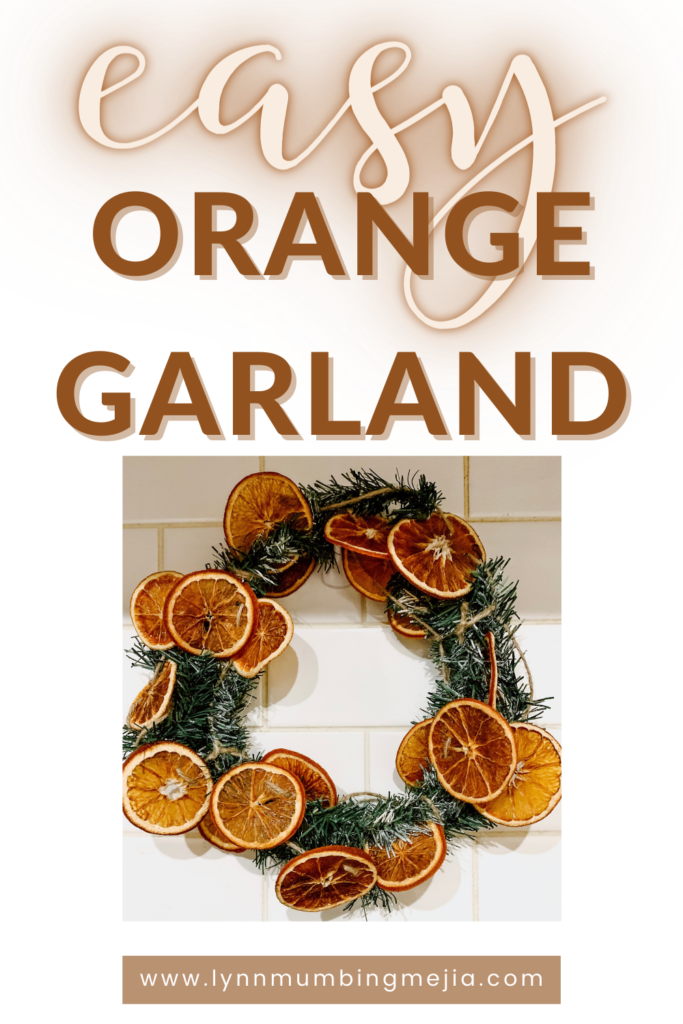
This is my first year trying to DIY an orange garland but it takes a lot of patience! The first time I tried it, I burnt it because I wasn’t patient enough. The next and final time I did it, it was successful! I made a wreath of it behind the stove and it’s such a cute addition to my home decor!

If you want to see my cute Instagram reel I made, click here!

PIN FOR LATER:

DIY Orange Garland - Pin 1

Table of Contents

Toggle
  • HERE ARE THE STEPS TO DIY ORANGE GARLAND:
    • What do I need?
    • What to do?

HERE ARE THE STEPS TO DIY ORANGE GARLAND:

First, let’s gather what we need!

What do I need?

  • Minimum 2-10 Oranges (depending on how big you want the garland to be)
  • Twine
  • Chopstick/Knitting Needle
  • Parchment Paper
  • Baking Sheets/Pans
  • Chopping Board & Knife

What to do?

  1. Preheat oven to 200 degrees F and line your baking sheets with parchment paper
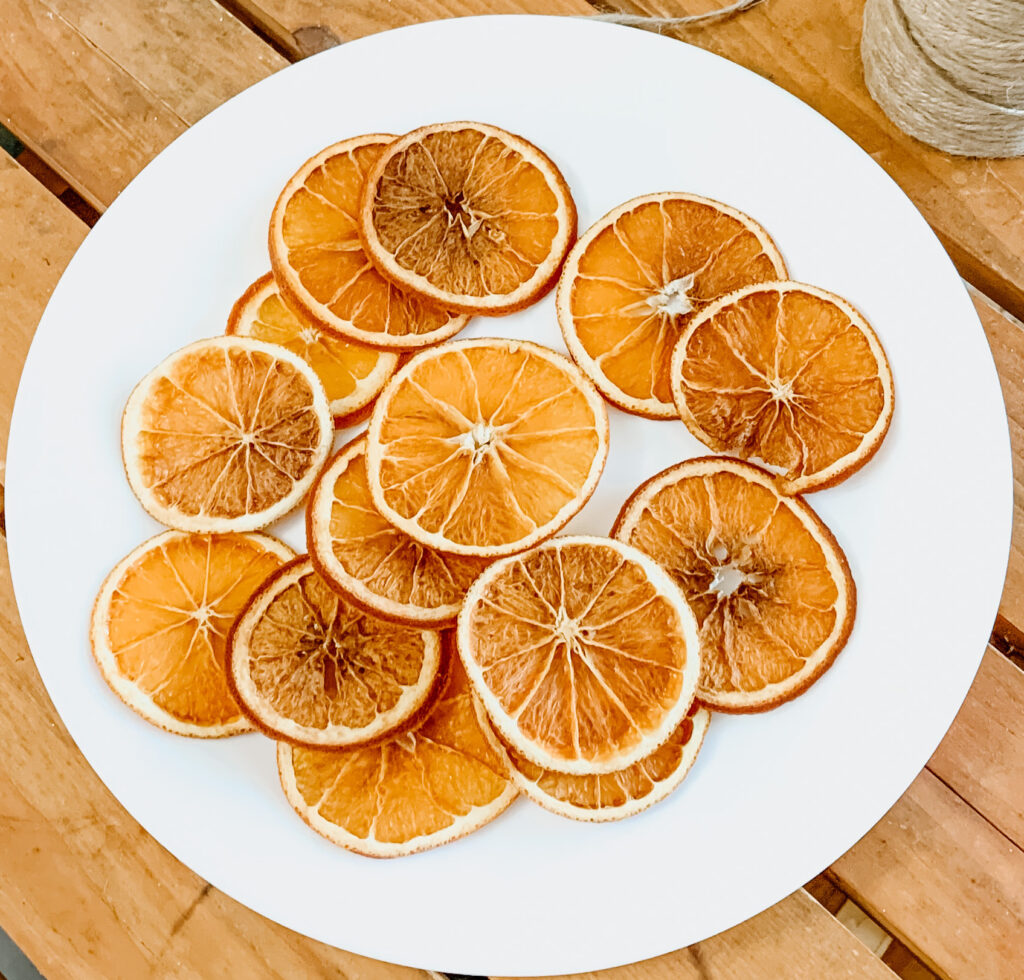
  2. Cut your orange to even thin slices about 1/8″ – 1/4″
  3. Place oranges in a single layer and pat dry any excess juice
  4. Put in trays in the oven and set a timer for one hour at a time for a total of 4 hours, flipping them each hour (if you feel like the oranges aren’t fully dehydrated, feel free to leave them in another 30 mins – 1 hour)
  5. Once the orange slices are fully dehydrated, let them cool
  6. Grab your twine, poke 2 small holes and string in the twine

You can attach it to your garland on the mantel, create a wreath, wrap it around your tree etc! Have fun!

Xo,

Lynn

This blog post is all the details on DIY Orange Garland.

P.S: If you haven’t read my most recent post, click here!

PIN FOR LATER:

DIY Orange Garland - Pin 2

Posted In: diy, gifts/parties/holidays · Tagged: christmas crafts, dried orange garland, dried orange garland dehydrated, dried orange garland meaning, dried orange ornaments, dried orange slices, orange peel garland

Get on the List

You’ll Also Love

Easy Christmas Tree Garland
Easy Snowman Paper Garland
Easy Gingerbread Paper Garland Decor

Comments

  1. Rosie Ireland says

    December 8, 2020 at

    It’s like you read my mind – I’ve been googling how to do this just this morning! Love your snaps and the bitsize chunks of how to get it done!

    Rosie

  2. Your Beauty & Travel World says

    December 8, 2020 at

    Awww, this post is so interesting! I had never thought of a garland of oranges, but I will definitely try this interesting idea! Love DIY!

  3. Alison says

    December 8, 2020 at

    I’ve been really wanting to try making one of these! I love the look of them and the bonus that it’s a low waste and compostable decoration. It looks so easy to do! Thanks for the instructions!

  4. Jenny in Neverland says

    December 8, 2020 at

    Awh this is so pretty and something a bit different too! Love it 🙂 I can’t believe how quickly December is going too. I feel like I have a million things to do and like, 5 minutes to do it in!

  5. Della Driscoll says

    December 8, 2020 at

    This is such a cute and festive idea! I love it xx

    http://www.dellalovesnutella.co.uk/

  6. Tiffany McCullough -Metaphysical Mama says

    December 8, 2020 at

    I love this!! It is so cute! Thanks for sharing the tutorial.

  7. mind.beauty.simplicity says

    December 8, 2020 at

    Love this! thanks for sharing!! 🙂

  8. Hayley says

    December 8, 2020 at

    I absolutely love candles and anything home scent related – I bet this smells amazing!! Such a cute idea!

    Hayley || hayleyxmartin

  9. Demi Le Huray says

    December 8, 2020 at

    I love these, they are so cute! I saw them on your Instagram but thanks for sharing how to make them! ❤️?

  10. Simona says

    December 8, 2020 at

    I had seen these on your Instagram and loved them there – I can’t believe it is that easy to make such a pretty garland!!

  11. Toma Ruh says

    December 8, 2020 at

    They’re so lovely!! ??

  12. Under flowery sky says

    December 8, 2020 at

    So cute, specially combined with greenery..Love the idea..

  13. Cristina Rosano says

    December 9, 2020 at

    Such a great idea and I love the smell of oranges! I have always been put out by the fact that it took so long in the oven to make them, but I will have to try it for sure x

  14. Ali Trigg says

    December 9, 2020 at

    Thanks for sharing – can’t wait to try!

  15. MagicandBliss says

    December 10, 2020 at

    Looks great! Definitely worth a try! Thanks for sharing!

  16. Laila says

    January 4, 2021 at

    Oh I saw these everywhere and never got to make them! I’ve now got oranges at home, and I know I’m a bit late to the party but they just look so beautiful so I definitely want to try and make them. Thanks!

    • lynnmumbingmejia says

      January 5, 2021 at

      Haha, luckily they’re not too Christmasy! You could definitely pull it off any other month too! Thanks for reading 🙂

  17. Heidi Bruaw says

    January 16, 2021 at

    I will have to try this! I’m always looking to switch out my mantle garland. It seems easy, too. Thanks for the idea!

    • lynnmumbingmejia says

      January 17, 2021 at

      Thanks Heidi! They are super pretty x

Trackbacks

  1. 10+ DIY Budget Friendly Christmas Decor For Your Home This Christmas! | Lynn Mumbing Mejia says:
    December 9, 2020 at

    […] 11. Orange Garland […]

  2. Home Decor Trends 2021 | Lynn Mumbing Mejia says:
    January 1, 2021 at

    […] P.S: If you haven’t read my most recent post, click here! […]

  3. How to Make A Christmas Treat Charcuterie Board | Lynn Mumbing Mejia says:
    January 15, 2021 at

    […] P.S: If you haven’t read my most recent post, click here! […]

  4. The Ultimate Christmas Wreath Kit • The Grumpy Olive says:
    March 8, 2021 at

    […] If you fancy making the oranges though, our babe Lynn has the perfect DIY post right here! […]

  5. Christmas Wreath Two ways | Rustic and Luxe | Aimsy's Antics says:
    March 14, 2021 at

    […] If you want to carry on the rustic theme then my friend Lynn has a great tutorial on how to make a Dried Orange Garland! […]

  6. How to make a stunning woolen Advent wreath? - vividlychristmas.com says:
    May 5, 2021 at

    […] And thanks to the fir brushwood, a wonderful smell will spread all over your place! Mmmmm delicious! ? Did this post make you want to do some crafts? Do you love to enchant your home with Christmas smells? If your answers are yes, then check out Lynn’s DIY post! There you’ll find a great tutorial for a homemade orange garland! […]

  7. Minimalist Boho Tassel Decor | Lynn Mumbing Mejia says:
    July 25, 2021 at

    […] DIY Orange Garland […]

  8. 10 Activities to do at Home With Kids This Christmas - A Sustainably Simple Life says:
    August 2, 2021 at

    […] Making an orange garland is a great craft project and they look beautiful! An added bonus is it can be composted when you’re finished! Depending on your kids’ ages, you can choose the steps you want to have them help with. Find all the details in Lynn Mumbing Mejia‘s post: how to make an orange garland. […]

Next Post >

The Best Christmas Treats For Everyone

About Photo
Hey there friend! My name is Lynn and I'm a Canadian Content Creator who's focused on Minimal & Neutral Home Decor Inspo, Simple & Budget Friendly DIY Projects, All Things Holidays and Quick & Easy Recipes. I'm so happy you're here and I hope you'll find something that you love!

Categories

follow lynn

  • Facebook
  • Instagram
  • Pinterest
  • Twitter
  • YouTube

Search

Join Us!

Trending Now

Popular Posts

Links

  • About
  • Contact
  • Disclaimer
  • Privacy Policy
  • Terms & Conditions

Socials

  • Instagram
  • Youtube
  • Facebook
  • Twitter
  • Pinterest

Shop

  • Home Wall Art
  • Recipe Cards
  • Greeting Cards
  • Planner Templates

JOIN THE INNER CIRCLE

Spicy Ground Beef Coleslaw Bowl 🥩🔥 This Spi Spicy Ground Beef Coleslaw Bowl 🥩🔥

This Spicy Ground Beef Coleslaw Bowl is a bold, flavorful meal made with seasoned beef, crunchy coleslaw, and a zesty kick. It’s a quick, protein-packed dish perfect for lunch or dinner!

INGREDIENTS
* 100 g Lean Ground Beef cooked however you’d like
* 120 g Black Beans cooked however you’d like 
* 150 g Raw Coleslaw Mix 
* 1-2 tbsp Buffalo Sauce

INSTRUCTIONS
* In a small bowl, heat up your ground beef and black beans for 45 seconds in the microwave.
* In a large bowl, add in your raw coleslaw mix then top your ground beef and black beans on top.
* Drizzle the bowl with your buffalo sauce, eat and enjoy!


Protein and Calories based on products used:
* 100g Lean Ground Beef – 217 cals, 26g of protein, 12g of fat
* 120g Black Beans – 158 cals, 10.7g of protein, 0.6g of fat, 28.4g of carbs 
* 150g Raw Coleslaw – 45 cals, 1.5g of protein, 0.3g of fat, 10.5g of carbs 
* 2 Tbsp Buffalo Sauce – 50 cals, 4g of fat, 2g of carbs 
 
Total: 470 cals, 42.2g of protein, 16.9g fats, 40.9g carbs

ground beef bowls, ground beef meals, ground beef recipes, high protein snack, high protein low carb, weight loss meals, weight loss recipes, healthy recipes, healthy recipe ideas, high protein recipes, high protein lunch, easy lunch ideas, calorie deficit meals, high fiber meals, low cal meals, coleslaw mix, ground beef salad, salad bowl, quick lunches, filling lunches, filling meals, meal prep lunches, meal prep dinners,
Maple Turkey Sausage ☀️ These Maple Turkey Sa Maple Turkey Sausage ☀️

These Maple Turkey Sausages are a sweet and savory breakfast favorite made with lean ground turkey and a touch of maple syrup. Easy to make and full of flavor, it’s a healthier twist on a classic morning staple. It’s like Thanksgiving dinner in a sausage! 

INGREDIENTS
* 500 g Lean Ground Turkey
* 1 tsp Garlic Powder 
* 1 tsp Onion Powder
* 1/2 tsp Black Pepper
* 1 tsp Salt
* 1/2 tsp Ground Sage
* 1/2 tsp Dried Thyme
* 2 Tbsp Pure Maple Syrup
* 1 tsp Red Pepper Flakes optional

INSTRUCTIONS 
* In a large bowl, add in all the listed ingredients and mix well together. 
* Form into 50g sausage patties or any shape you’d like and cook them how you like it! I like to pan fry them with a touch of avocado oil. 
* Freeze all sausages cooked for later and reheat before enjoying them! 

breakfast sausage, turkey sausage, turkey breakfast sausage, breakfast sausage recipe, breakfast, turkey breakfast sausage patties, homemade turkey breakfast sausage, high protein breakfast, high protein turkey sausages, how to make breakfast sausages, how to cook breakfast sausages, turkey sausage recipe, maple turkey sausage, breakfast ideas, breakfast recipes, meal prep breakfast
unplugged for a week to host my family and spend s unplugged for a week to host my family and spend some quality time with them! it was my moms bday so i did a noodle soup night and some yummy desserts! made chicken ramen and beef pho broth and lots of toppings then for desserts, made some fruit tarts, fruit cake and ube mochi! 💜 HBD MOM LOVE U
High Protein Yogurt Bowl - Easy Breakfast Dessert High Protein Yogurt Bowl - Easy Breakfast Dessert Weight Loss Recipe Idea! 43g of Protein!! 🍓🍫

INGREDIENTS
* 175 g Plain High Protein Yogurt
* 1 scoop Chocolate Protein Powder
* 100 g Fresh Berries Optional
* 70 g Chocolate Chips Optional 
* 1 Tbsp Peanut Butter Optional

INSTRUCTIONS
* In a bowl, add in your high protein yogurt and protein powder and mix well until smooth.
* Top with berries, chocolate chips or any of your favorite toppings! 
* Serve and enjoy!


high protein snack, high protein yogurt, weight loss meals, weight loss recipes, healthy recipes, healthy dessert ideas, high protein recipes, high protein breakfast, breakfast ideas, calorie deficit desserts, easy desserts, low cal meals, yogurt bowls,
3 Ingredient Crunchy Furikake Chickpeas! High Fibe 3 Ingredient Crunchy Furikake Chickpeas! High Fiber High Protein Snack!! 🍙

INGREDIENTS
* 1/4 Cup Chickpeas (dehydrated then rehydrated for 24 hours or canned)
* 1-3 Tbsp Furikake Seasoning put as much as you’d like! I put extra on mine <3
* 1 Tbsp Avocado Oil or any oil you prefer!

INSTRUCTIONS
* In a bowl, add in your chickpeas and oil. Mix well together so that every chickpea is coated in oil.
* Add your chickpeas in a single layer in your air fryer. Air fry at 400F for about 10-15 minutes depending on your preferred level of crunch!
* Pour chickpeas into a bowl and add in your furikake seasoning to toss in.
* Serve and enjoy!


chickpeas recipe, chickpeas recipe, healthy snacks, high fiber snack, high protein snack, weight loss snack, weight loss recipes,

Copyright © 2025 Lynn Mumbing Mejia · Theme by 17th Avenue