Hello! I'm Lynn.
  • About Me
  • Work With Me
  • Contact Me
  • Subscribe
  • Home
    • About
    • Contact
    • Disclaimer
    • Terms & Conditions
    • Privacy Policy
    • Subscribe
      • Work With Me
        • Media Kit
        • Portfolio and Samples
  • diy
  • lifestyle
    • home decor
  • recipes
  • gifts, parties & holidays
  • health & wellness with lynn

Lynn Mumbing Mejia

Crafting coziness, one recipe, DIY project, and holiday celebration at a time.

gifts/parties/holidays, diy · November 20, 2024

Easy Gingerbread Paper Garland Decor

*This post may contain affiliate or sponsored links, which means I may get paid or receive a commission if you purchase through my link, at no extra cost to you!*

Read more for all the details on how to put together an Easy Gingerbread Paper Garland Decor.

I’m a huge fan of decorating for every occasion or holiday but I completely understand being on a budget! I enjoy DIYing decorations for the holidays to save some money yet having a completely cozy home!

These gingerbread paper garland is so cute and easy to do and you only need a few materials that you can reuse over and over again!

PIN Easy Gingerbread Paper Garland Decor FOR LATER:
Easy DIY Gingerbread Paper Garland - Pin 1 - Lynn Mumbing Mejia

This Easy Gingerbread Paper Garland Decor is accompanied by a TikTok Tutorial. If you haven’t followed me on TikTok, don’t forget to!

Table of Contents

Toggle
  • HERE IS HOW TO MAKE A GINGERBREAD PAPER GARLAND DECOR:
    • WHERE CAN YOU FIND THE MATERIALS TO MAKE THIS GINGERBREAD PAPER GARLAND DECOR?
    • WHAT ARE THE MATERIALS NEEDED FOR THIS GINGERBREAD PAPER GARLAND DECOR?
    • WHAT EQUIPMENT DO I NEED?
    • CAN I SUBSTITUTE ANY MATERIALS OUT?
    • DOES THIS DECOR LAST TO USE FOR THE FOLLOWING YEARS?
    • HOW LONG DOES IT TAKE TO PUT TOGETHER?
    • INSPIRATIONS FOR THIS DIY DECOR?
    • STEPS TO PUT TOGETHER THIS GINGERBREAD PAPER GARLAND DECOR:
      • Step 1: Draw Out Gingerbread Shapes & Cut
      • Step 2: Freehand Draw The White “Icing” Designs
      • Step 3: Cut Twine To The Desired Length
      • Step 4: Use Mini Pins To Attach Gingerbread Shapes To Twine
      • Step 5: Hang Garland And Space Out Gingerbread Shapes Accordingly

HERE IS HOW TO MAKE A GINGERBREAD PAPER GARLAND DECOR:

WHERE CAN YOU FIND THE MATERIALS TO MAKE THIS GINGERBREAD PAPER GARLAND DECOR?

You can find the materials to make this gingerbread paper garland anywhere! I bought my materials from the dollar store and also on Amazon!

WHAT ARE THE MATERIALS NEEDED FOR THIS GINGERBREAD PAPER GARLAND DECOR?

You’ll need the following materials to make this!

  • Brown Craft Paper
  • White Paint Markers
  • Mini Craft Clothespins
  • Thin Twine

WHAT EQUIPMENT DO I NEED?

Aside from the material listed above, you’ll also need basic crafting materials like scissors and tape! You’ll need scissors to cut all the gingerbread shapes then tape for the twine! I’m telling you guys, this craft is super easy!

CAN I SUBSTITUTE ANY MATERIALS OUT?

This craft is super easy but of course, you can do any substitutions to this paper garland! Here are some ideas!

  • Using ribbon or different coloured twine! Christmas colors would be super cute!
  • Adding pom poms or bows in between each gingerbread house/man/shape
  • Using different colored craft paper
  • Using red or green clips!

DOES THIS DECOR LAST TO USE FOR THE FOLLOWING YEARS?

Yes! This gingerbread garland can be reused every year! What you want to do when you’re packing it away is just neatly place the paper shapes in a ziplock baggie and store away. Of course, since it is paper, they are more fragile but as long as you keep it away from moisture, this will last forever even!

HOW LONG DOES IT TAKE TO PUT TOGETHER?

Honestly, the most time consuming part of this craft is the cutting! For me at least, it takes me a really long time to cut shapes! I love doing crafts while I am watching TV so you can do that and it’ll go by so quickly! You can also be a master with scissors and it will take you half the time to do this! For me, in total, it took me about 30 minutes.

INSPIRATIONS FOR THIS DIY DECOR?

If you’ve been following the blog for a while, you probably have already seen that I love DIY decor! I love crafting for one and two I love making decor that doesn’t break the bank. I’m very much a person who loves spending money on experiences so I don’t like spending lots of money on material things.

I started making paper garlands because it was a cheap and affordable way to get into any holiday season and I’m obsessed!

STEPS TO PUT TOGETHER THIS GINGERBREAD PAPER GARLAND DECOR:

Step 1: Draw Out Gingerbread Shapes & Cut

I literally just Googled a gingerbread house, man, woman and cookie and cut those shapes! You can free hand or cut templates to help you trace and cut!

Step 2: Freehand Draw The White “Icing” Designs

Again, I just used Google to gain inspiration but I just free handed all the icing designs on the gingerbread and it turned out so cute!

Step 3: Cut Twine To The Desired Length

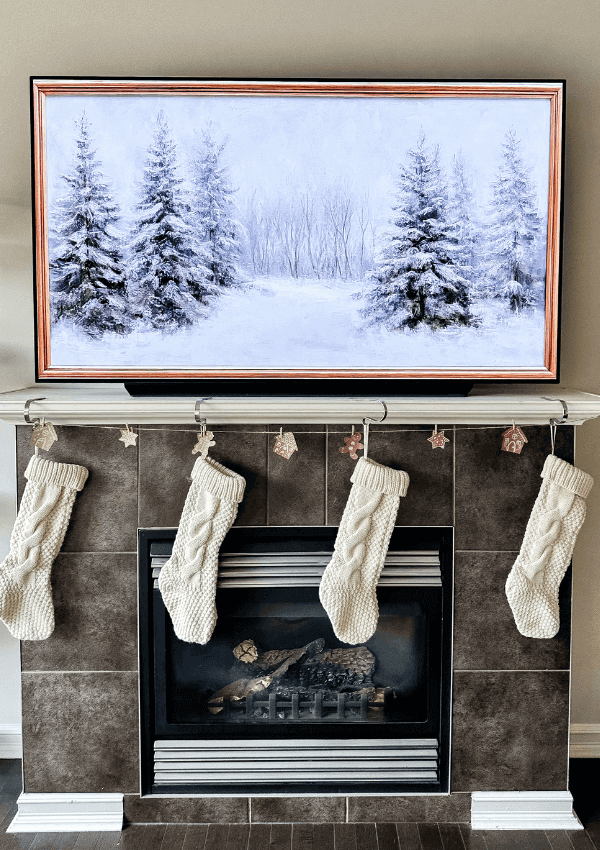
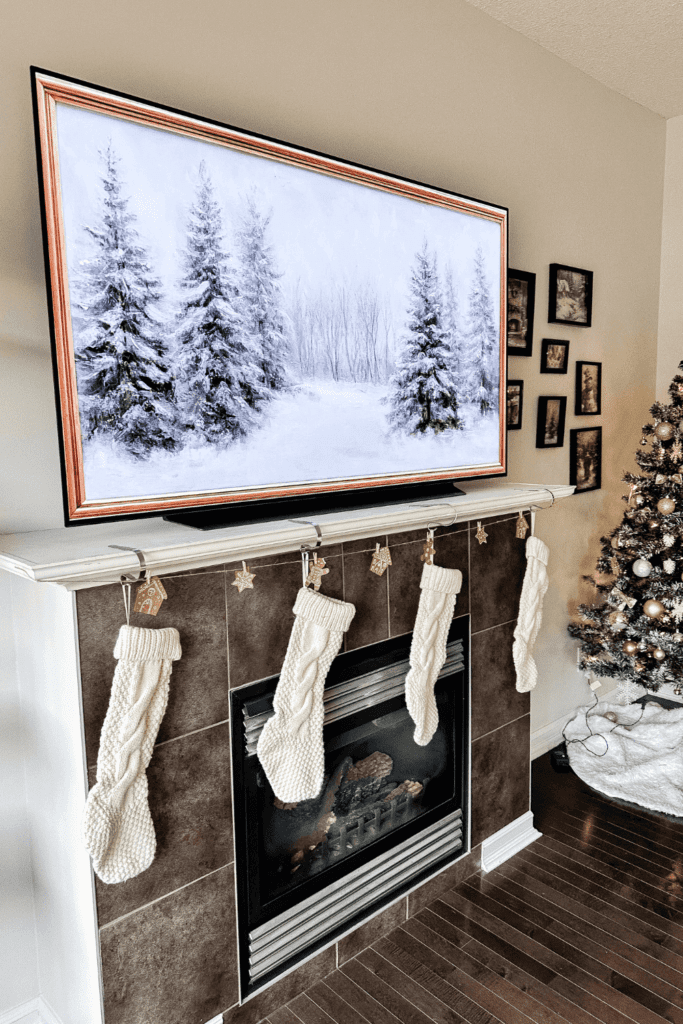
Pick where you’d like to hang your garland and cut your twine to the length of that. You can use tape if you’d like as it’s super light but you can also use a thumb tacks/pushpins! I love hanging my garlands on my mantel, office mirror and shelf!

Step 4: Use Mini Pins To Attach Gingerbread Shapes To Twine

Attach the paper gingerbread shapes to the twine using your mini pins. I love to tilt the paper shapes to one side and have them hanging angled but you can do what works for you!

Step 5: Hang Garland And Space Out Gingerbread Shapes Accordingly

Lastly, hang your garland and space out the shapes evenly throughout and you’re done! Such a cute and simple garland idea and honestly, it gives your home such a nice homemade touch to your Christmas decor!

Xo,

Lynn

Are you going to try making this Easy Gingerbread Paper Garland Decor?! Don’t forget to tag me if you do!

Easy DIY Gingerbread Paper Garland Decor - Lynn Mumbing Mejia - Tag Us

This blog post is all the details on Easy Gingerbread Paper Garland Decor.

P.S: If you haven’t read my most recent post, click here!

PIN Easy Gingerbread Paper Garland Decor FOR LATER:
Easy DIY Gingerbread Paper Garland - Pin 2 - Lynn Mumbing Mejia

If you liked reading Easy Gingerbread Paper Garland Decor, you might like these are well!

15+ Super Easy Christmas Crafts for Kids

10+ DIY Budget Friendly Christmas Decor For Your Home This Christmas!

DIY Dollar Tree Ornament Wreath

DIY Ghost Paper Garland

St. Patrick’s Day Paper Clover Garland

Cute Paper Easter Bunny Garland – Easy DIY!

Easy Neutral Paper Pumpkin Garland

How to DIY Orange Garland

This is the end of Easy Gingerbread Paper Garland Decor.

Shop The Post

Posted In: gifts/parties/holidays, diy · Tagged: christmas craft, christmas craft ideas, christmas crafts, christmas crafts for adults, diy christmas crafts, easy christmas crafts to make and sell, gingerbread garland, gingerbread men, holiday crafts, paper gingerbread

Get on the List

You’ll Also Love

Easy Christmas Tree Garland
Easy Snowman Paper Garland
DIY Dollar Tree Ornament Wreath

Comments

  1. Danielle says

    November 23, 2024 at

    How adorable!

    Danielle Writes | danielle-writes.co.uk

Trackbacks

  1. Easy Snowman Paper Garland | Lynn Mumbing Mejia says:
    November 21, 2024 at

    […] P.S: If you haven’t read my most recent post, click here! […]

  2. Valentine's Paper Heart Garland | Lynn Mumbing Mejia says:
    February 6, 2025 at

    […] Easy Gingerbread Paper Garland Decor […]

Next Post >

Not So Sweet Eggnog Loaf

About Photo
Hey there friend! My name is Lynn and I'm a Canadian Content Creator who's focused on Minimal & Neutral Home Decor Inspo, Simple & Budget Friendly DIY Projects, All Things Holidays and Quick & Easy Recipes. I'm so happy you're here and I hope you'll find something that you love!

Categories

follow lynn

  • Facebook
  • Instagram
  • Pinterest
  • Twitter
  • YouTube

Search

Join Us!

Trending Now

Popular Posts

Links

  • About
  • Contact
  • Disclaimer
  • Privacy Policy
  • Terms & Conditions

Socials

  • Instagram
  • Youtube
  • Facebook
  • Twitter
  • Pinterest

Shop

  • Home Wall Art
  • Recipe Cards
  • Greeting Cards
  • Planner Templates

JOIN THE INNER CIRCLE

Asian Sesame Vermicelli Salad 🥗 This Asian Sesam Asian Sesame Vermicelli Salad 🥗 

This Asian Sesame Vermicelli Salad is light, refreshing, and packed with flavor! Tender vermicelli noodles are tossed with crisp veggies and a savory sesame dressing for an easy, vibrant dish that’s perfect for lunches, meal prep, or summer gatherings.

INGREDIENTS
* 3 Bundles Vermicelli about 150g uncooked
* 1 Cup Purple Cabbage thinly shredded 
* 1 Cup Red Peppers thinly shredded 
* 1 Cup Carrots thinly shredded 
* 1/2 Cup Edamame
* 2 Stalks Green Onion thinly sliced 

Sauce
* 1 Clove Garlic grated
* 2 Tbsp Sesame Oil
* 1 tsp Sesame Oil
* 2 Tbsp Soy Sauce
* 1 Tbsp Brown Sugar
* 1 Tbsp Rice Vinegar

INSTRUCTIONS
* Cook the vermicelli noodles according to package instructions. Drain and rinse under cold water.
* In a large bowl, combine the cooked vermicelli, cabbage, red bell pepper, carrot, edamame, and green onions.
* In a small bowl, whisk together garlic, sesame oil, sesame seeds, soy sauce, brown sugar, and rice vinegar until well combined.
* Pour the sauce over the salad and toss until evenly coated.
* Chill in the fridge before serving for extra flavor for minimally 12 hours! Enjoy!

vietnamese vermicelli salad recipe, vermicelli noodle salad, vermicelli salad recipe, how to make vermicelli noodle salad, vermicelli noodles salad recipe, asian salad, asian salad dressing, how to make vietnamese vermicelli noodle salad recipe, asian noodle salad, asian salad recipe, easy sesame noodle salad, asian cold noodle salad, glass noodle salad with sesame dressing, bean vermicelli, ramen salad, vegan salad, vegetarian salad, sesame sauce, sesame sauce recipe
Poppy Seed Almond Muffins 🤎 Have you ever tried C Poppy Seed Almond Muffins 🤎

Have you ever tried Costco’s almond poppy seed muffins? If you have, this is a copycat version of it! It’s my fav muffin and I knew I had to recreate it at home!

These Poppy Seed Almond Muffins are soft, fluffy, and bursting with sweet almond flavor. With a tender crumb and delicate crunch from the poppy seeds, they’re the perfect cozy bakery-style treat for breakfast, snacking, or coffee breaks.

INGREDIENTS
* 2 1/4 Cups Flour
* 1/2 tsp Salt
* 1/2 tsp Baking Soda
* 1/2 tsp Baking Powder
* 3/4 Cup Oil 
* 1 Cup White Sugar
* 2 Eggs
* 1 tsp Vanilla Extract
* 1 Tbsp Almond Extract 
* 3/4 Cup Sour Cream
* 1/4 Cup Milk
* 2 Tbsp Poppy Seeds
* 1/4 Cup Slivered Almonds sprinkle on top

INSTRUCTIONS
* Preheat oven to 350°F and line a 12-cup muffin tin with liners or lightly grease it.
* In a large bowl, whisk together oil, sugar, eggs, vanilla extract, almond extract, sour cream, and milk until smooth.
* Add flour, salt, baking soda, and baking powder directly into the same bowl. Gently mix until just combined.
* Fold in the poppy seeds.
* Divide the batter evenly between the 12 muffin cups and sprinkle slivered almonds on top.
* Bake for 25 minutes, or until a toothpick inserted into the center comes out clean.
* Let cool slightly before serving.


almond poppy seed muffins, poppy seed muffins, costco copycat, costco copycat recipes, almond muffins, easy muffin recipes, simple muffins, poppy seed almond muffins
Spicy Canned Tuna Sushi Bake 🐟🍣 This Spicy Canned Spicy Canned Tuna Sushi Bake 🐟🍣

This Spicy Canned Tuna Sushi Bake is creamy, savory, and packed with bold flavor! Made with simple pantry ingredients, it’s an easy, budget-friendly twist on sushi! It is perfect for sharing, scooping with seaweed, and satisfying all your sushi cravings at home.

INGREDIENTS
* 1 Can Tuna drained
* 2 Tbsp Sriracha
* 1/4 Cup Mayo
* 1 Tbsp Sesame Oil
* 2 Tbsp Furikake
* 1 Cup White Rice cooked
* 1 tsp Sugar
* 1/2 Tbsp Rice Vinegar
* 1 Packet Seasoned Seaweed

INSTRUCTIONS
* Preheat your oven to 400F and prepare a 6-inch baking pan.
* In a bowl, add in your rice and heat it in the microwave for 1 minute. This is so it’s easier for the sugar and rice vinegar to soak in. Add in your rice vinegar and sugar and mix well.
* Next, add in the rice mixture to your baking pan in an even layer. Sprinkle furikake on top.
* Use the same bowl that you mixed up your rice in and add in your drained canned tuna, sesame oil, sriracha, and mayo and mix well.
* Add the layer of saucy tuna on your rice layer evenly on top. Sprinkle with furikake.
* Bake at 400F for 20-30 minutes or until the top is golden brown.
* Serve with a side of seasoned seaweed and enjoy!


sushi bake canned tuna, spicy tuna sushi bake, tuna sushi bake, spicy tuna sushi, sushi bake tuna, spicy tuna mayo sushi, canned tuna, sushi bake, easy sushi bake, sushi bake dish, sushi bake asmr, baked sushi, easy baked sushi, sushi bake tutorial, spicy tuna, easy sushi bake ideas, sushi bake steps, viral sushi bake, sushi bake how to, sushi bake trend, sushi baked recipe, easy sushi bake recipe, how to make a sushi bake, sushi bake recipe, tiktok sushi bake, sushi bake tiktok
Spicy Canned Tuna Sushi Bake 🐟🍣 This Spicy Canned Spicy Canned Tuna Sushi Bake 🐟🍣

This Spicy Canned Tuna Sushi Bake is creamy, savory, and packed with bold flavor! Made with simple pantry ingredients, it’s an easy, budget-friendly twist on sushi! It is perfect for sharing, scooping with seaweed, and satisfying all your sushi cravings at home.

INGREDIENTS
* 1 Can Tuna drained
* 2 Tbsp Sriracha
* 1/4 Cup Mayo
* 1 Tbsp Sesame Oil
* 2 Tbsp Furikake
* 1 Cup White Rice cooked
* 1 tsp Sugar
* 1/2 Tbsp Rice Vinegar
* 1 Packet Seasoned Seaweed

INSTRUCTIONS
* Preheat your oven to 400F and prepare a 6-inch baking pan.
* In a bowl, add in your rice and heat it in the microwave for 1 minute. This is so it’s easier for the sugar and rice vinegar to soak in. Add in your rice vinegar and sugar and mix well.
* Next, add in the rice mixture to your baking pan in an even layer. Sprinkle furikake on top.
* Use the same bowl that you mixed up your rice in and add in your drained canned tuna, sesame oil, sriracha, and mayo and mix well.
* Add the layer of saucy tuna on your rice layer evenly on top. Sprinkle with furikake.
* Bake at 400F for 20-30 minutes or until the top is golden brown.
* Serve with a side of seasoned seaweed and enjoy!�

sushi bake canned tuna, spicy tuna sushi bake, tuna sushi bake, spicy tuna sushi, sushi bake tuna, spicy tuna mayo sushi, canned tuna, sushi bake, easy sushi bake, sushi bake dish, sushi bake asmr, baked sushi, easy baked sushi, sushi bake tutorial, spicy tuna, easy sushi bake ideas, sushi bake steps, viral sushi bake, sushi bake how to, sushi bake trend, sushi baked recipe, easy sushi bake recipe, how to make a sushi bake, sushi bake recipe, tiktok sushi bake, sushi bake tiktok
Banana Bread Syrup 🍌 This Banana Bread Syrup is Banana Bread Syrup 🍌 

This Banana Bread Syrup is warm, sweet, and full of cozy flavor just like your favorite homemade loaf in liquid form! Perfect for coffee, pancakes, waffles, or desserts, it’s an easy homemade syrup that adds a comforting, bakery-style touch to any treat 💛

INGREDIENTS
* 1/2 Cup White Sugar
* 1/2 Cup Brown Sugar
* 1 Mashed Ripe Banana
* 1 tsp Vanilla Extract
* 1/2 tsp Cinnamon
* 1 Cup Water

INSTRUCTIONS
* In a small saucepan over medium heat, combine water, white sugar, and brown sugar.
* Stir until the sugars fully dissolve and the mixture begins to gently simmer.
* Add the mashed banana and cinnamon. Simmer for 5–8 minutes, stirring occasionally.
* Remove from heat and stir in the vanilla extract.
* Strain the syrup (optional for a smoother texture) and let cool.
* Transfer to a jar or bottle and store in the fridge.

banana bread syrup, banana bread, banana latte, banana bread latte, banana bread matcha latte, copycat starbucks banana bread matcha latte, banana bread breve, banana bread, copycat starbucks iced banana bread matcha latte, copycat starbucks banana bread matcha, copycat starbucks iced banana bread matcha recipe, iced latte, banana milk, banana coffee, banana coffee recipe, fun latte recipes, banana coffee syrup,
Banana Bread Syrup 🍌 This Banana Bread Syrup is Banana Bread Syrup 🍌 

This Banana Bread Syrup is warm, sweet, and full of cozy flavor just like your favorite homemade loaf in liquid form! Perfect for coffee, pancakes, waffles, or desserts, it’s an easy homemade syrup that adds a comforting, bakery-style touch to any treat 💛

INGREDIENTS
* 1/2 Cup White Sugar
* 1/2 Cup Brown Sugar
* 1 Mashed Ripe Banana
* 1 tsp Vanilla Extract
* 1/2 tsp Cinnamon
* 1 Cup Water

INSTRUCTIONS
* In a small saucepan over medium heat, combine water, white sugar, and brown sugar.
* Stir until the sugars fully dissolve and the mixture begins to gently simmer.
* Add the mashed banana and cinnamon. Simmer for 5–8 minutes, stirring occasionally.
* Remove from heat and stir in the vanilla extract.
* Strain the syrup (optional for a smoother texture) and let cool.
* Transfer to a jar or bottle and store in the fridge.�
banana bread syrup, banana bread, banana latte, banana bread latte, banana bread matcha latte, copycat starbucks banana bread matcha latte, banana bread breve, banana bread, copycat starbucks iced banana bread matcha latte, copycat starbucks banana bread matcha, copycat starbucks iced banana bread matcha recipe, iced latte, banana milk, banana coffee, banana coffee recipe, fun latte recipes, banana coffee syrup,

Copyright © 2026 Lynn Mumbing Mejia · Theme by 17th Avenue