Hello! I'm Lynn.
  • About Me
  • Work With Me
  • Contact Me
  • Subscribe
  • Home
    • About
    • Contact
    • Disclaimer
    • Terms & Conditions
    • Privacy Policy
    • Subscribe
      • Work With Me
        • Media Kit
        • Portfolio and Samples
  • diy
  • lifestyle
    • home decor
  • recipes
  • gifts, parties & holidays
  • health & wellness with lynn

Lynn Mumbing Mejia

Crafting coziness, one recipe, DIY project, and holiday celebration at a time.

recipes · March 3, 2023

Quick & Easy Pork Lumpia

*This post may contain affiliate or sponsored links, which means I may get paid or receive a commission if you purchase through my link, at no extra cost to you!*
Jump to Recipe Print Recipe

Read more for all the details on Quick & Easy Pork Lumpia.

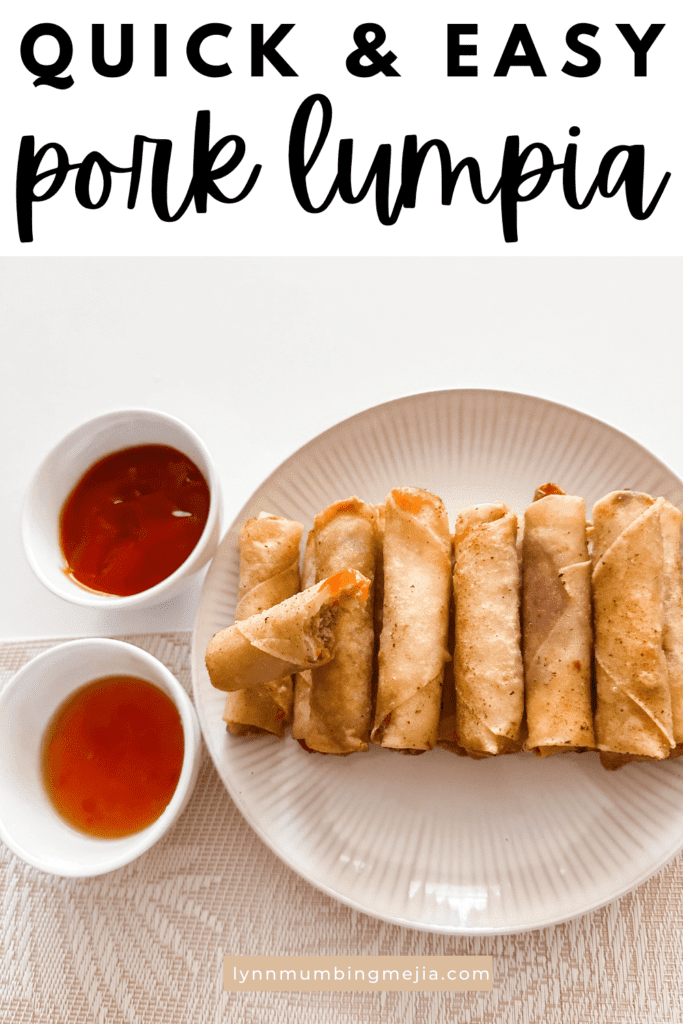
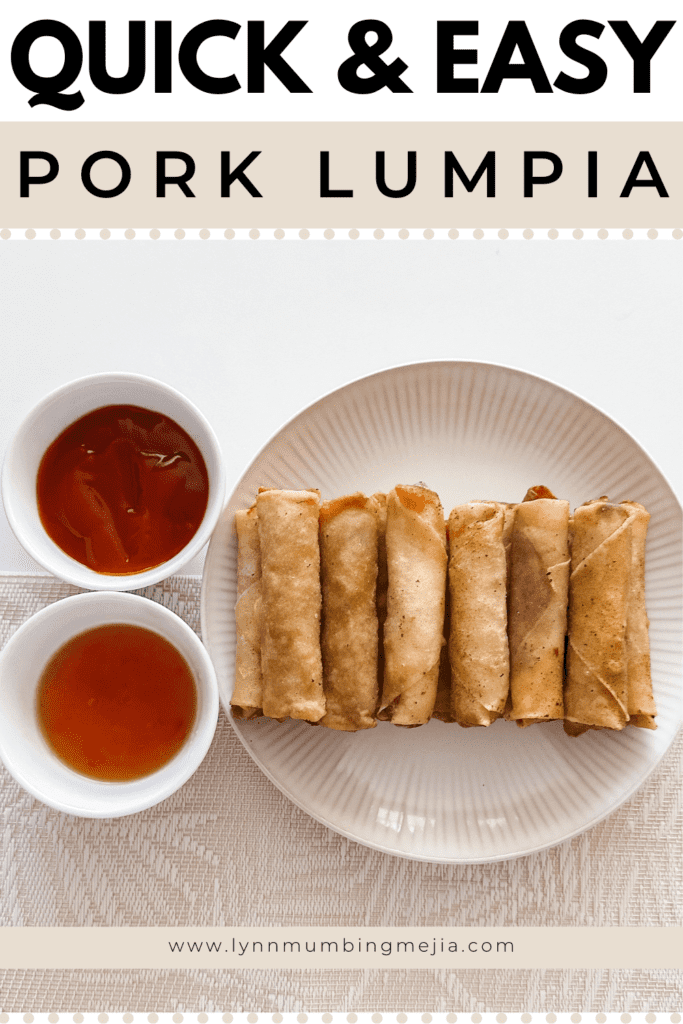
If there is one thing that everyone at Filipino parties goes crazy for, it is lumpia! Lumpia is a Filipino version of fried spring rolls that have the perfect meaty filling and is super crunchy and is the best party food! These hands down are the first things to be finished from the food table and it just leaves you wanting more.

PIN Quick & Easy Pork Lumpia FOR LATER:

Quick and Easy Pork Lumpia - Lynn Mumbing Mejia - Pin 1

This Quick & Easy Pork Lumpia recipe is accompanied by a YouTube Tutorial. If you haven’t subscribed to me on YouTube, don’t forget to!

Table of Contents

Toggle
  • HERE IS HOW TO MAKE QUICK & EASY PORK LUMPIA:
    • WHERE CAN I FIND THESE INGREDIENTS?
    • WHAT ARE THE INGREDIENTS?
    • WHAT EQUIPMENT DO I NEED?
    • CAN I SUBSTITUTE/ADD ANYTHING OUT?
    • WHAT DOES QUICK & EASY PORK LUMPIA TASTE LIKE?
    • HOW LONG DOES IT KEEP FOR?
    • INSPIRATIONS FOR THIS RECIPE?
    • ANY OTHER NOTES?
    • Quick & Easy Pork Lumpia
      • Ingredients  
      • Instructions 

HERE IS HOW TO MAKE QUICK & EASY PORK LUMPIA:

WHERE CAN I FIND THESE INGREDIENTS?

You can find the ingredients to make these lumpias from the grocery store! You can get the ground pork from the meat section, the egg roll/lumpia wrappers from the frozen section, the eggs from the dairy section, the carrot from the product section, and the chicken bouillion and seasoning salt from the pantry section!

I believe every country pretty much has its own way of making fried spring rolls so all of the ingredients should be easily available!

WHAT ARE THE INGREDIENTS?

The ingredients to make this delicious lumpia are:

  • Spring Roll Wrappers
  • Ground Pork
  • Shredded Carrots
  • Eggs
  • Seasoning Salt
  • Chicken Bouillon Powder
  • Grated Onion/Garlic (Optional)
  • Extra Ground Black Pepper (Optional)

WHAT EQUIPMENT DO I NEED?

The equipment you need for this recipe is basically just a bowl and a plate to make the lumpia! Other than that, a shallow frying pan to fry them up, or you can also use an air fryer.

CAN I SUBSTITUTE/ADD ANYTHING OUT?

You sure can! I generally only use this recipe as it is foolproof and everyone goes wild for them but you are welcome to swap out the meat for ground beef, chicken, or turkey and also add in any other veggies or other fillings you’d like!

Vietnamese egg rolls often include vermicelli, shrimp, and dried black fungus which I also love! You can really add in what you’d like or leave it as it is! It’s an awesome recipe!

WHAT DOES QUICK & EASY PORK LUMPIA TASTE LIKE?

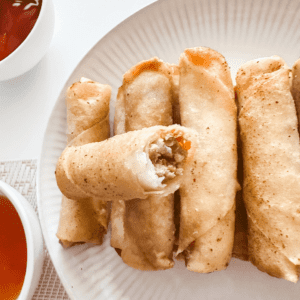
Honestly, lumpia tastes like a deep-fried, meat-filled snack! You get the crunchiness from the fried golden spring roll and the meaty filling which each bite. Perfect to dip in sweet Thai chili, vinegar, or ketchup sauces and they are super addicting! Just like chips, you can’t have just one!

HOW LONG DOES IT KEEP FOR?

I usually make a huge batch and store them in the freezer to enjoy for the month, frying only when I want to eat them so they are crunchy and fresh however if you want to sort of meal prep this and cook ahead, you definitely can but to keep the crispiness, be sure to heat them up in the air fryer prior to eating!

If you store these in the fridge, they will get soggy and the wrapper won’t be crunchy. If you can help it, I recommend frying fresh and storing the uncooked lumpia in the freezer for up to 1 month.

INSPIRATIONS FOR THIS RECIPE?

Actually, this recipe is passed down from me from my mama! My mom is a wonderful cook and I always enjoy her cooking. When I moved out of the house and into a home with my boyfriend at the time/husband now, I asked her to tell me how she makes her lumpia and she taught me what she does! It’s pretty much the exact same way and I’ve made it for many people at many events and it’s always a hit.

My husband loves lumpia and requests it often!

ANY OTHER NOTES?

No other notes for this one! It gets super tiring wrapping lumpia so if you have someone that can help you, that would be great! You end up wrapping so many for a long period of time for it to be gone within the hour 😂

Quick & Easy Pork Lumpia

Pork Lumpia is super easy to make, crispy, and full of delicious pork filling. These Filipino spring rolls are fried golden brown and are a favorite for any occasion.
Print Recipe Pin Recipe
Prep Time 20 minutes mins
Cook Time 20 minutes mins
Course Snack
Servings 50 Pieces

Ingredients
  

  • 50 Spring Roll Wrappers
  • 500 g Ground Pork
  • 2 Large Eggs
  • 1/2 Cup Shredded Carrots
  • 1/2 Tsp Seasoning Salt (add more to taste)
  • 1/2 Tsp Knorr Chicken Bouillon
  • Grated Onio/Garlic optional

Instructions
 

  • In a large mixing bowl, add in your ground pork, 1 egg, shredded carrots, seasoning salt, and chicken bouillon. Mix together until everything is well combined.
  • Once the filling is well combined, set aside. Next, grab a small bowl and crack the other egg and whisk with a fork until the egg yolk and white is fully mixed together.
  • Grab a plate and place one spring roll wrapper so it looks like a diamond towards you then at the bottom, scoop one tbsp of the lumpia filling about 1/4 of the wrapper down and shape it to be about 2 inches long. See photo!
  • Take the bottom edge and roll the filling in then fold in the sides of the wrapper and continue rolling up. Once you get about 1/4 to the top edge, place some of your whisked egg to act as a seal for the lumpia.
  • Once all rolled, heat a shallow frying pan medium heat with about half an inch of oil and fry the lumpia, flipping every few minutes until all sides are golden brown.
  • Serve with sauce of your choice and enjoy!
Keyword Quick & Easy Pork Lumpia

I hope you enjoyed really this super easy recipe for Filipino spring rolls! Fried spring rolls like this lumpia recipe will ALWAYS be a hit! Enjoy!

Xo,

Lynn

Are you adding this Quick & Easy Pork Lumpia recipe to your list?! Don’t forget to tag me if you do!

Tag Us - Quick & Easy Pork Lumpia - Lynn Mumbing Mejia

This blog post is all the details on Quick & Easy Pork Lumpia.

P.S: If you haven’t read my most recent post, click here!

PIN Quick & Easy Pork Lumpia FOR LATER:

Quick and Easy Pork Lumpia - Lynn Mumbing Mejia - Pin 2

If you liked reading Quick & Easy Pork Lumpia, you might like these are well!

My Favorite Filipino Pantry Staples

Ube Cold Foam

Easy Ube Crinkle Cookies

This is the end of Quick & Easy Pork Lumpia.

Shop The Post

Posted In: recipes · Tagged: best lumpia recipe, easy lumpia recipe, egg rolls, filipino recipes, filipino spring rolls, fried spring rolls, ground black pepper, ground pork, lumpia recipe, lumpia wrapper, lumpiang shanghai, pork lumpia, pork lumpia ingredients, spring roll, spring roll wrappers, spring rolls, the best filipino lumpia shanghai recipe

Get on the List

You’ll Also Love

Instant Pot Chicken Tinola
Ground Pork Stuffed Peppers
Spicy Adobo Chicken

Trackbacks

  1. 20 Hobbies for People with Anxiety | Lynn Mumbing Mejia says:
    March 9, 2023 at

    […] P.S: If you haven’t read my most recent post, click here! […]

  2. Cute Paper Easter Bunny Garland - Easy DIY! | Lynn Mumbing Mejia says:
    March 9, 2023 at

    […] P.S: If you haven’t read my most recent post, click here! […]

  3. 3 Ingredient Cheesy Stuffing Meatballs | Lynn Mumbing Mejia says:
    April 4, 2023 at

    […] Quick & Easy Pork Lumpia […]

  4. Filipino Adobo-Inspired Soy Marinated Eggs | Lynn Mumbing Mejia says:
    May 17, 2023 at

    […] Quick & Easy Pork Lumpia […]

  5. Tofu Adobo | Lynn Mumbing Mejia says:
    January 14, 2024 at

    […] Quick & Easy Pork Lumpia […]

  6. Smoky Air Fryer Pork Bites | Lynn Mumbing Mejia says:
    April 11, 2024 at

    […] Quick & Easy Pork Lumpia […]

  7. Spicy Adobo Chicken | Lynn Mumbing Mejia says:
    June 10, 2024 at

    […] Quick & Easy Pork Lumpia […]

Next Post >

Peanut Butter Cereal Bars

About Photo
Hey there friend! My name is Lynn and I'm a Canadian Content Creator who's focused on Minimal & Neutral Home Decor Inspo, Simple & Budget Friendly DIY Projects, All Things Holidays and Quick & Easy Recipes. I'm so happy you're here and I hope you'll find something that you love!

Categories

follow lynn

  • Facebook
  • Instagram
  • Pinterest
  • Twitter
  • YouTube

Search

Join Us!

Trending Now

Popular Posts

Links

  • About
  • Contact
  • Disclaimer
  • Privacy Policy
  • Terms & Conditions

Socials

  • Instagram
  • Youtube
  • Facebook
  • Twitter
  • Pinterest

Shop

  • Home Wall Art
  • Recipe Cards
  • Greeting Cards
  • Planner Templates

JOIN THE INNER CIRCLE

Asian Sesame Vermicelli Salad 🥗 This Asian Sesam Asian Sesame Vermicelli Salad 🥗 

This Asian Sesame Vermicelli Salad is light, refreshing, and packed with flavor! Tender vermicelli noodles are tossed with crisp veggies and a savory sesame dressing for an easy, vibrant dish that’s perfect for lunches, meal prep, or summer gatherings.

INGREDIENTS
* 3 Bundles Vermicelli about 150g uncooked
* 1 Cup Purple Cabbage thinly shredded 
* 1 Cup Red Peppers thinly shredded 
* 1 Cup Carrots thinly shredded 
* 1/2 Cup Edamame
* 2 Stalks Green Onion thinly sliced 

Sauce
* 1 Clove Garlic grated
* 2 Tbsp Sesame Oil
* 1 tsp Sesame Oil
* 2 Tbsp Soy Sauce
* 1 Tbsp Brown Sugar
* 1 Tbsp Rice Vinegar

INSTRUCTIONS
* Cook the vermicelli noodles according to package instructions. Drain and rinse under cold water.
* In a large bowl, combine the cooked vermicelli, cabbage, red bell pepper, carrot, edamame, and green onions.
* In a small bowl, whisk together garlic, sesame oil, sesame seeds, soy sauce, brown sugar, and rice vinegar until well combined.
* Pour the sauce over the salad and toss until evenly coated.
* Chill in the fridge before serving for extra flavor for minimally 12 hours! Enjoy!

vietnamese vermicelli salad recipe, vermicelli noodle salad, vermicelli salad recipe, how to make vermicelli noodle salad, vermicelli noodles salad recipe, asian salad, asian salad dressing, how to make vietnamese vermicelli noodle salad recipe, asian noodle salad, asian salad recipe, easy sesame noodle salad, asian cold noodle salad, glass noodle salad with sesame dressing, bean vermicelli, ramen salad, vegan salad, vegetarian salad, sesame sauce, sesame sauce recipe
Poppy Seed Almond Muffins 🤎 Have you ever tried C Poppy Seed Almond Muffins 🤎

Have you ever tried Costco’s almond poppy seed muffins? If you have, this is a copycat version of it! It’s my fav muffin and I knew I had to recreate it at home!

These Poppy Seed Almond Muffins are soft, fluffy, and bursting with sweet almond flavor. With a tender crumb and delicate crunch from the poppy seeds, they’re the perfect cozy bakery-style treat for breakfast, snacking, or coffee breaks.

INGREDIENTS
* 2 1/4 Cups Flour
* 1/2 tsp Salt
* 1/2 tsp Baking Soda
* 1/2 tsp Baking Powder
* 3/4 Cup Oil 
* 1 Cup White Sugar
* 2 Eggs
* 1 tsp Vanilla Extract
* 1 Tbsp Almond Extract 
* 3/4 Cup Sour Cream
* 1/4 Cup Milk
* 2 Tbsp Poppy Seeds
* 1/4 Cup Slivered Almonds sprinkle on top

INSTRUCTIONS
* Preheat oven to 350°F and line a 12-cup muffin tin with liners or lightly grease it.
* In a large bowl, whisk together oil, sugar, eggs, vanilla extract, almond extract, sour cream, and milk until smooth.
* Add flour, salt, baking soda, and baking powder directly into the same bowl. Gently mix until just combined.
* Fold in the poppy seeds.
* Divide the batter evenly between the 12 muffin cups and sprinkle slivered almonds on top.
* Bake for 25 minutes, or until a toothpick inserted into the center comes out clean.
* Let cool slightly before serving.


almond poppy seed muffins, poppy seed muffins, costco copycat, costco copycat recipes, almond muffins, easy muffin recipes, simple muffins, poppy seed almond muffins
Spicy Canned Tuna Sushi Bake 🐟🍣 This Spicy Canned Spicy Canned Tuna Sushi Bake 🐟🍣

This Spicy Canned Tuna Sushi Bake is creamy, savory, and packed with bold flavor! Made with simple pantry ingredients, it’s an easy, budget-friendly twist on sushi! It is perfect for sharing, scooping with seaweed, and satisfying all your sushi cravings at home.

INGREDIENTS
* 1 Can Tuna drained
* 2 Tbsp Sriracha
* 1/4 Cup Mayo
* 1 Tbsp Sesame Oil
* 2 Tbsp Furikake
* 1 Cup White Rice cooked
* 1 tsp Sugar
* 1/2 Tbsp Rice Vinegar
* 1 Packet Seasoned Seaweed

INSTRUCTIONS
* Preheat your oven to 400F and prepare a 6-inch baking pan.
* In a bowl, add in your rice and heat it in the microwave for 1 minute. This is so it’s easier for the sugar and rice vinegar to soak in. Add in your rice vinegar and sugar and mix well.
* Next, add in the rice mixture to your baking pan in an even layer. Sprinkle furikake on top.
* Use the same bowl that you mixed up your rice in and add in your drained canned tuna, sesame oil, sriracha, and mayo and mix well.
* Add the layer of saucy tuna on your rice layer evenly on top. Sprinkle with furikake.
* Bake at 400F for 20-30 minutes or until the top is golden brown.
* Serve with a side of seasoned seaweed and enjoy!


sushi bake canned tuna, spicy tuna sushi bake, tuna sushi bake, spicy tuna sushi, sushi bake tuna, spicy tuna mayo sushi, canned tuna, sushi bake, easy sushi bake, sushi bake dish, sushi bake asmr, baked sushi, easy baked sushi, sushi bake tutorial, spicy tuna, easy sushi bake ideas, sushi bake steps, viral sushi bake, sushi bake how to, sushi bake trend, sushi baked recipe, easy sushi bake recipe, how to make a sushi bake, sushi bake recipe, tiktok sushi bake, sushi bake tiktok
Spicy Canned Tuna Sushi Bake 🐟🍣 This Spicy Canned Spicy Canned Tuna Sushi Bake 🐟🍣

This Spicy Canned Tuna Sushi Bake is creamy, savory, and packed with bold flavor! Made with simple pantry ingredients, it’s an easy, budget-friendly twist on sushi! It is perfect for sharing, scooping with seaweed, and satisfying all your sushi cravings at home.

INGREDIENTS
* 1 Can Tuna drained
* 2 Tbsp Sriracha
* 1/4 Cup Mayo
* 1 Tbsp Sesame Oil
* 2 Tbsp Furikake
* 1 Cup White Rice cooked
* 1 tsp Sugar
* 1/2 Tbsp Rice Vinegar
* 1 Packet Seasoned Seaweed

INSTRUCTIONS
* Preheat your oven to 400F and prepare a 6-inch baking pan.
* In a bowl, add in your rice and heat it in the microwave for 1 minute. This is so it’s easier for the sugar and rice vinegar to soak in. Add in your rice vinegar and sugar and mix well.
* Next, add in the rice mixture to your baking pan in an even layer. Sprinkle furikake on top.
* Use the same bowl that you mixed up your rice in and add in your drained canned tuna, sesame oil, sriracha, and mayo and mix well.
* Add the layer of saucy tuna on your rice layer evenly on top. Sprinkle with furikake.
* Bake at 400F for 20-30 minutes or until the top is golden brown.
* Serve with a side of seasoned seaweed and enjoy!�

sushi bake canned tuna, spicy tuna sushi bake, tuna sushi bake, spicy tuna sushi, sushi bake tuna, spicy tuna mayo sushi, canned tuna, sushi bake, easy sushi bake, sushi bake dish, sushi bake asmr, baked sushi, easy baked sushi, sushi bake tutorial, spicy tuna, easy sushi bake ideas, sushi bake steps, viral sushi bake, sushi bake how to, sushi bake trend, sushi baked recipe, easy sushi bake recipe, how to make a sushi bake, sushi bake recipe, tiktok sushi bake, sushi bake tiktok
Banana Bread Syrup 🍌 This Banana Bread Syrup is Banana Bread Syrup 🍌 

This Banana Bread Syrup is warm, sweet, and full of cozy flavor just like your favorite homemade loaf in liquid form! Perfect for coffee, pancakes, waffles, or desserts, it’s an easy homemade syrup that adds a comforting, bakery-style touch to any treat 💛

INGREDIENTS
* 1/2 Cup White Sugar
* 1/2 Cup Brown Sugar
* 1 Mashed Ripe Banana
* 1 tsp Vanilla Extract
* 1/2 tsp Cinnamon
* 1 Cup Water

INSTRUCTIONS
* In a small saucepan over medium heat, combine water, white sugar, and brown sugar.
* Stir until the sugars fully dissolve and the mixture begins to gently simmer.
* Add the mashed banana and cinnamon. Simmer for 5–8 minutes, stirring occasionally.
* Remove from heat and stir in the vanilla extract.
* Strain the syrup (optional for a smoother texture) and let cool.
* Transfer to a jar or bottle and store in the fridge.

banana bread syrup, banana bread, banana latte, banana bread latte, banana bread matcha latte, copycat starbucks banana bread matcha latte, banana bread breve, banana bread, copycat starbucks iced banana bread matcha latte, copycat starbucks banana bread matcha, copycat starbucks iced banana bread matcha recipe, iced latte, banana milk, banana coffee, banana coffee recipe, fun latte recipes, banana coffee syrup,
Banana Bread Syrup 🍌 This Banana Bread Syrup is Banana Bread Syrup 🍌 

This Banana Bread Syrup is warm, sweet, and full of cozy flavor just like your favorite homemade loaf in liquid form! Perfect for coffee, pancakes, waffles, or desserts, it’s an easy homemade syrup that adds a comforting, bakery-style touch to any treat 💛

INGREDIENTS
* 1/2 Cup White Sugar
* 1/2 Cup Brown Sugar
* 1 Mashed Ripe Banana
* 1 tsp Vanilla Extract
* 1/2 tsp Cinnamon
* 1 Cup Water

INSTRUCTIONS
* In a small saucepan over medium heat, combine water, white sugar, and brown sugar.
* Stir until the sugars fully dissolve and the mixture begins to gently simmer.
* Add the mashed banana and cinnamon. Simmer for 5–8 minutes, stirring occasionally.
* Remove from heat and stir in the vanilla extract.
* Strain the syrup (optional for a smoother texture) and let cool.
* Transfer to a jar or bottle and store in the fridge.�
banana bread syrup, banana bread, banana latte, banana bread latte, banana bread matcha latte, copycat starbucks banana bread matcha latte, banana bread breve, banana bread, copycat starbucks iced banana bread matcha latte, copycat starbucks banana bread matcha, copycat starbucks iced banana bread matcha recipe, iced latte, banana milk, banana coffee, banana coffee recipe, fun latte recipes, banana coffee syrup,

Copyright © 2026 Lynn Mumbing Mejia · Theme by 17th Avenue