DIY All-year Round Neutral Wreath
Read more for all the details on DIY All-year Round Neutral Wreath.
It’s super hard to choose but I think wreaths are my fav piece of home decor! I’ve always loved making wreaths for every season and they are just overall cute and pretty to hang! Normally, I make wreaths per the holiday or occassion but I thought of making an all-year round wreath this time because my front door feels empty from February to August!
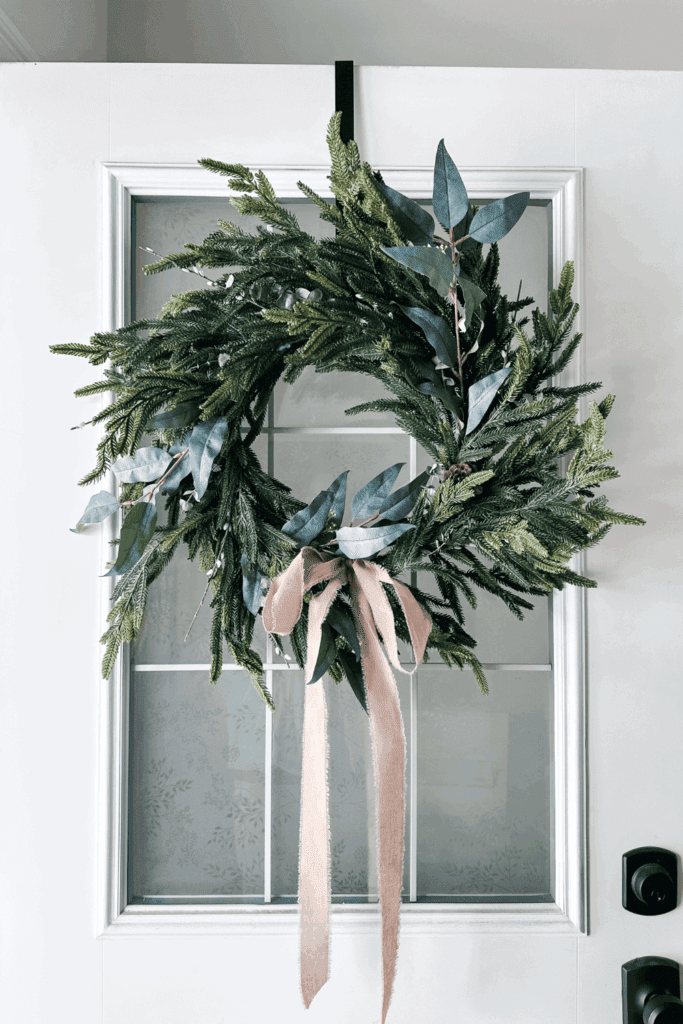
This DIY All-Year Round Neutral Wreath is the perfect timeless décor piece for any season. With soft, neutral tones and simple textures, it adds a cozy, elegant touch to your front door or home without needing to swap it out every few months.
PIN DIY All-year Round Neutral Wreath FOR LATER:
This DIY All-year Round Neutral Wreath is accompanied by a YouTube Tutorial. If you haven’t subscribed to me on YouTube, don’t forget to!
HERE IS HOW TO MAKE THIS DIY ALL-YEAR ROUND NEUTRAL WREATH:
WHERE CAN YOU FIND THE MATERIALS TO MAKE THIS DIY ALL-YEAR ROUND NEUTRAL WREATH?
The materials for this all-year round wreath came from a mixture of places! I got a few things from the dollar store, a few things on Amazon and had some things from home already that I just reused! I also went to Michaels but didn’t feel like they didn’t have what I envisioned so I ended up buying the garland I wanted from Amazon.
WHAT ARE THE MATERIALS/EQUIPMENT NEEDED FOR THIS DIY ALL-YEAR ROUND NEUTRAL WREATH?
Here is everything you’ll need to create this beautiful DIY wreath:
- Wreath Hoop
- Green Garland
- Linen Ribbon
- Dried Stems
- Black Zip Ties (blends in easier than white)
- Hot Glue Gun
Here are some of my Amazon Favs!

CAN I SUBSTITUTE ANY MATERIALS OUT?
You sure can! I had a specific vision in mind but of course, make your wreath exactly to your liking! I used a hot glue gun but you can use super glue if that works better for you or other heavy duty glue! I used zip ties to tie up the garland on the wreath hoop and it is super secure! I love how sturdy it is,
I used a linen ribbon but you can use any ribbon you like! I wanted my wreath to be a bit softer and not shiny in any way but satin ribbons are beautiful too! For the greenery, I used eucalyptus and a cotton stem which worked perfectly for what I wanted!
DOES THIS DIY LAST TO USE FOR THE FOLLOWING YEARS?
Yes! I have had my wreath hanging up in the front door in perfect condition for the past week and despite high winds on some days where I live, it’s held up! I would assume though that I would have to do maintenance on this at least once a year, I’m thinking that I would add some branches as some will most likely fall off, every Fall season when I put my Fall wreath up!
HOW LONG DOES IT TAKE TO PUT TOGETHER?
This wreath was actually surprisingly quick to make! I was very surprised as I thought it would take me a lot longer to throw together. In total, it took me about 30 minutes to 1 hour to put together start to finish! Depending on your materials, it can take longer or less time.
INSPIRATIONS FOR THIS DIY?
I love wreaths! They are so pretty to hang and just make the house more feminine in my opinion. It just feels so cozy and homey! I usually have a front door wreath up from August to January and I’ve been looking to purchase a wreath to hang all year round but haven’t found one that really matched my vision. When that happens, I generally get led to making it on my own!
STEPS TO MAKE THIS DIY ALL-YEAR ROUND NEUTRAL WREATH:
Step 1: Secure the garland to your wreath hook
Use black zip ties to secure the garland onto the wreath hook and follow the shape of the hook! I used 5 in total all around the wreath.
Step 2: Glue the eucalyptus stems and pieces
Cut your eucalyptus, greenery stems and other pieces and glue them all around the wreath. I like to scatter it around so that the wreath looks overall balanced.
Step 3: Add your linen ribbon
Cut a very long piece of ribbon and add it to the bottom of your wreath. I wanted my ribbon to hang naturally but you can of course tie a tighter bow and have shorter strands!
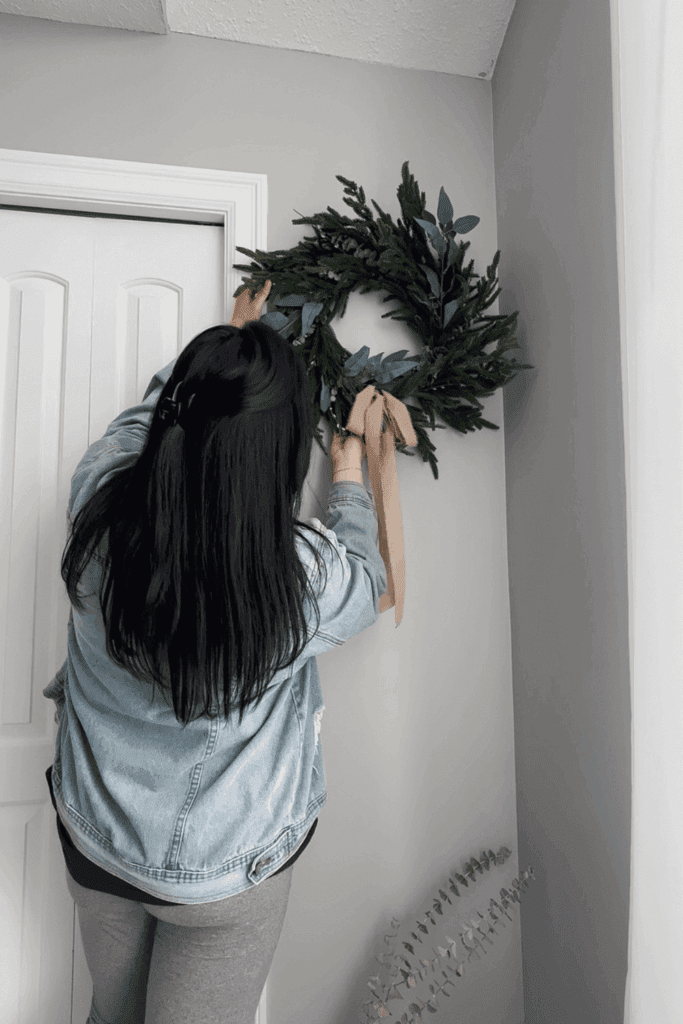
Step 4: Hang and enjoy!
Hang the wrreath however you choose and enjoy!
Thank you so much for following this blog post on how to make a DIY All-year Round Neutral Wreath!
Xo,
Lynn
Are you going to try making this DIY All-year Round Neutral Wreath?! Don’t forget to tag me if you do!

This blog post is all the details on DIY All-year Round Neutral Wreath.
P.S: If you haven’t read my most recent post, click here!
PIN DIY All-year Round Neutral Wreath FOR LATER:
If you liked reading DIY All-year Round Neutral Wreath, you might like these as well!
This is the end of DIY All-year Round Neutral Wreath.