DIY Scream Ghost Face Costume
Read more for all the details on how to put together a DIY Scream Ghost Face Costume.
In a pinch to find a cute but affordable costume?! Look no further! This Scream Ghost Face costume is such a fun and easy costume to make! You can find everything for under $10 and reuse this for years to come! It’s a mix of both cute and spooky! 👻
PIN DIY Scream Ghost Face Costume FOR LATER:

This DIY Scream Ghost Face Costume is accompanied by a YouTube Tutorial. If you haven’t subscribed to me on YouTube, don’t forget to!
HERE IS HOW TO MAKE A DIY SCREAM GHOST FACE COSTUME:
WHERE CAN YOU FIND THE MATERIALS TO MAKE THIS DIY SCREAM GHOST FACE COSTUME?
This probably is the easiest costume to put together EVER! Almost everyone has black and white clothes in their closet, so you hopefully do not need to purchase anything extra. Aside from this, closer to Halloween, all the dollar stores start to sell Halloween decor! You can grab a bloody blade for less than $5! I picked up a felt sheet from Michaels for less than $2! You may even already have spare felt sheets or fabric at home.
WHAT ARE THE MATERIALS/EQUIPMENT NEEDED FOR THIS DIY SCREAM GHOST FACE COSTUME?
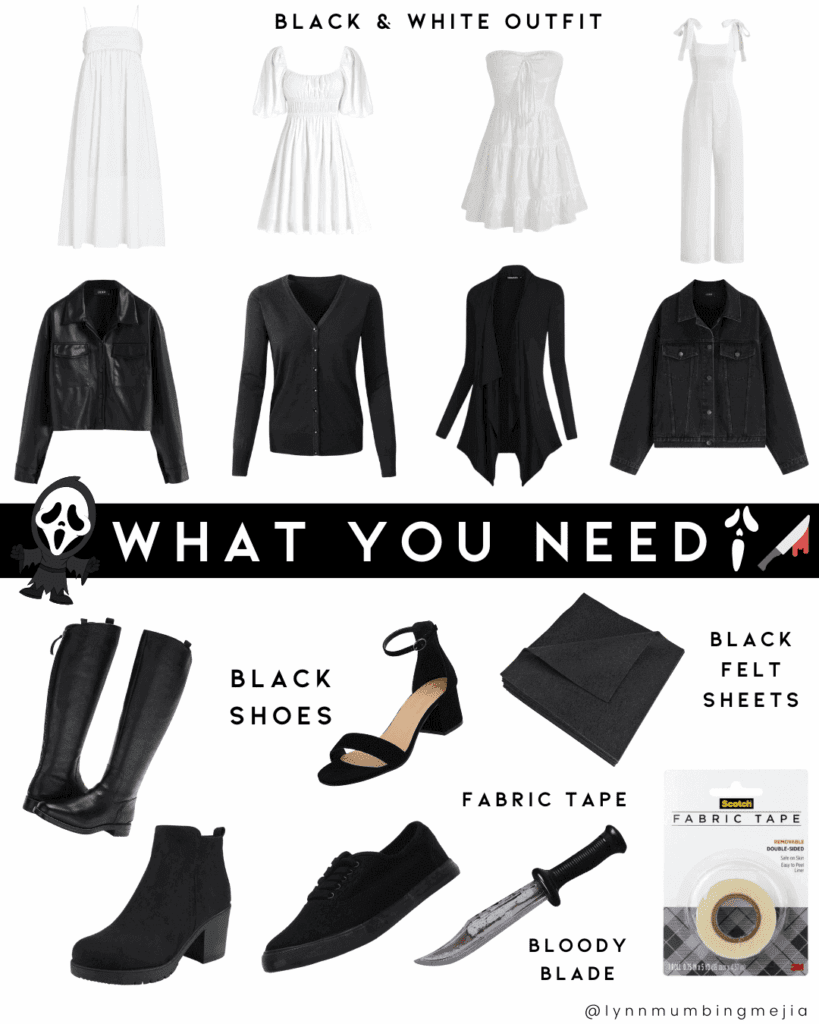
CAN I SUBSTITUTE ANY MATERIALS OUT?
Of course you can! I always recommend substituting any materials that I mention or using what you already have at home! One of my favourite things about coming up with DIY costumes is the fact that they are so easy and budget-friendly! Growing up, I lived in a lower-income household, so my parents did not have $50-100 to spend on a costume for a one-time use. I used to use normal clothes and just put on makeup, so I LOVE being creative with what I already have!
If you don’t have access to black felt sheets or want to save some money, you can use just paper or even spare fabric! Just beware that it may not hold for long, so depending on how long you wear the costume, just keep that in mind! The ghost face may fall off haha
DOES THE COSTUME LAST TO USE FOR THE FOLLOWING YEARS?
Oh, absolutely! Once you’re done with using the costume for the day, what you can do is store the ghost face pieces in a ziplock and reuse them whenever you want! You can just use fresh fabric tape and tape it on yourself when you plan to wear the costume! You can reuse this costume for years!
HOW LONG DOES IT TAKE TO PUT TOGETHER?
This has got to be the easiest costume that I have put together to date! This took me about 15 minutes to put together, as I only needed to cut out the ghost face and tape it onto my dress! I was watching a movie while doing this, and it was the best! So easy to put together and a bonus, MESS FREE!! We love that here!
INSPIRATIONS FOR THIS COSTUME?
This was honestly so last-minute, but I was thinking about what costumes I could make with what I already have and thought of this! I feel like Ghostface is ICONIC in the Halloween world, and people usually wear the mask and black outfit! I love looking cute and pretty, so I came up with a mix of both worlds! Both cute and scary put together!
Here are some of the costume elements you can buy online!

STEPS TO PUT TOGETHER THIS DIY SCREAM GHOST FACE COSTUME:
Step 1: Cut the ghost face out of your black felt sheet.
I did this free hand but I searched up Scream Ghost Face Pumpkin and found this outline! I just copied the shape onto a scrap piece of paper and cut it out myself. It does not need to be perfect!
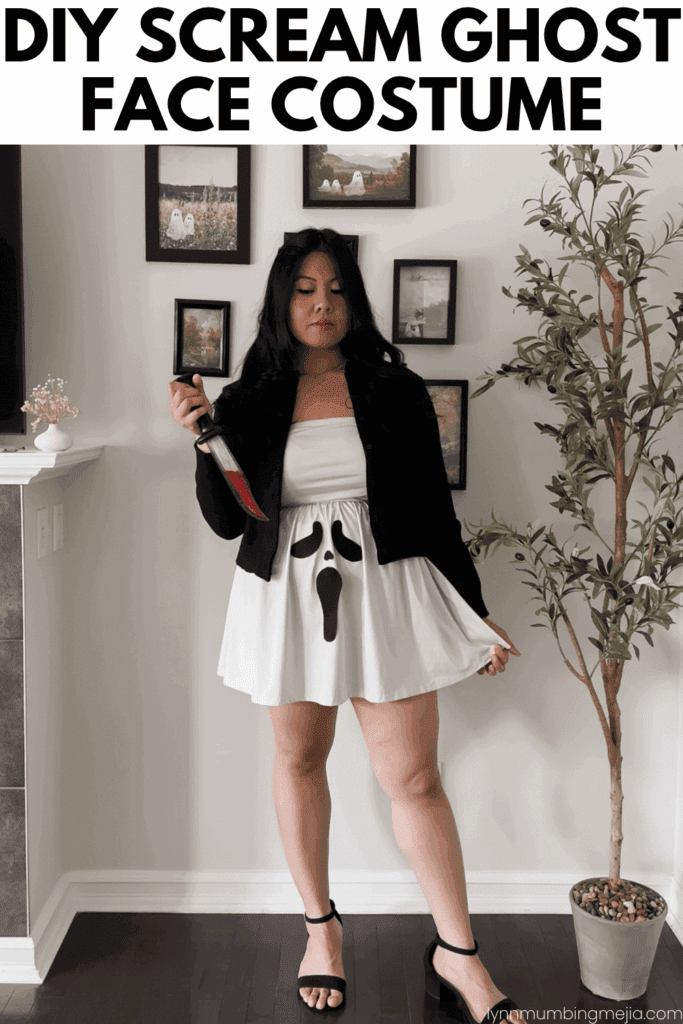
Step 2: Use fabric tape to tape the ghost face pieces to your white dress.
I placed my ghost face pieces onto my white dress and used fabric tape to securely fasten everything. Place it whenever you want but I just placed it at the top of my abdomen!
Step 3: Put the costume together!
Wear your outfit, shoes, carry around your bloody blade and enjoy your evening!
Thank you so much for following this blog post on how to create a DIY Scream Ghost Face Costume! 👻
Xo,
Lynn
Are you going to try making this DIY Scream Ghost Face Costume?! Don’t forget to tag me if you do!

This blog post is all the details on DIY Scream Ghost Face Costume.
P.S: If you haven’t read my most recent post, click here!
PIN DIY Scream Ghost Face Costume FOR LATER:
If you liked reading DIY Scream Ghost Face Costume, you might like these are well!
This is the end of DIY Scream Ghost Face Costume.