Hello! I'm Lynn.
  • About Me
  • Work With Me
  • Contact Me
  • Subscribe
  • Home
    • About
    • Contact
    • Disclaimer
    • Terms & Conditions
    • Privacy Policy
    • Subscribe
      • Work With Me
        • Media Kit
        • Portfolio and Samples
  • diy
  • lifestyle
    • home decor
  • recipes
  • gifts, parties & holidays
  • health & wellness with lynn

Lynn Mumbing Mejia

Crafting coziness, one recipe, DIY project, and holiday celebration at a time.

diy · June 23, 2021

DIY Trendy Bendy Candles

*This post may contain affiliate or sponsored links, which means I may get paid or receive a commission if you purchase through my link, at no extra cost to you!*

Read more for all the details on DIY Trendy Bendy Candles.

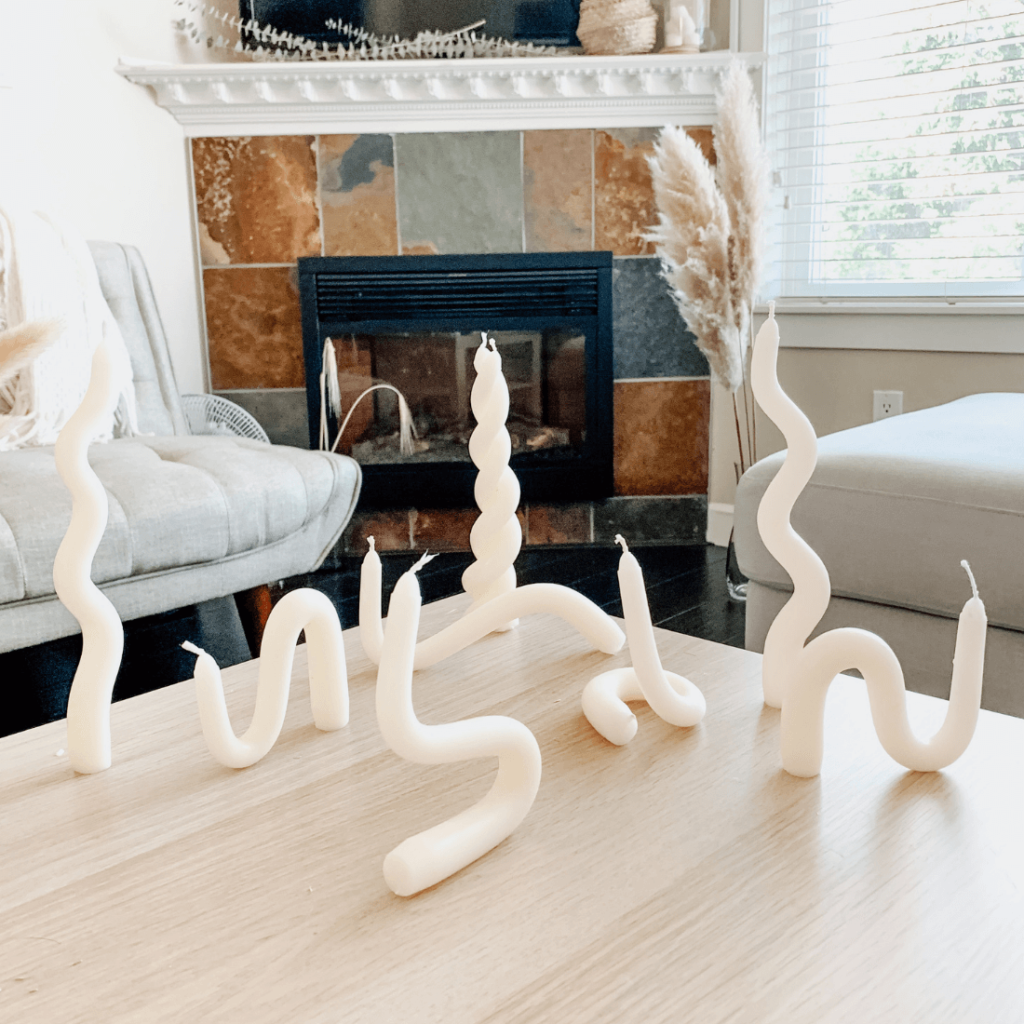
Have you seen these trendy bendy candles all over social media?! I sure have!

I am super weird about trends. For some reason, I can’t get myself to try them out when they are trending and it takes me a while to fully decide whether or not I want to do it.

When I saw these bendy candles all over I knew I wanted to hop on and do it ASAP! I thought they were the cutest simple and minimal home decor and thought they would be excellent as gifts too!

As you get to know me more as a Content Creator, you’d know how much I love DIY projects especially home décor ones. I’m super proud of anything I create and love seeing it displayed in my home.

I’ve always loved candles and light them up often. I find them as a form of self-care for me especially in the Fall/Winter months where everything I do is super cozy. I absolutely adore scented candles and pick up a stash every September that’ll last me until Spring!

I love the Fall scents as well as fruity scents as well.

PIN DIY Trendy Bendy Candles DIY FOR LATER:

Bendy Candles - Pin 1

This DIY Trendy Bendy Candles Tutorial is accompanied by a YouTube Tutorial. If you haven’t subscribed to my channel on YouTube, don’t forget to!

Table of Contents

Toggle
  • HERE IS HOW TO MAKE DIY Trendy Bendy Candles:
    • WHERE CAN I FIND ALL THE MATERIALS?
    • WHAT MATERIALS DO YOU NEED FOR THIS?
    • WHAT OTHER EQUIPMENT DO I NEED?
    • WHERE CAN I USE/PUT IT?
    • HOW DO I STORE THIS?
    • ANY OTHER NOTES?
    • STEPS TO DO THIS DIY TRENDY BENDY CANDLES PROJECT:

HERE IS HOW TO MAKE DIY Trendy Bendy Candles:

WHERE CAN I FIND ALL THE MATERIALS?

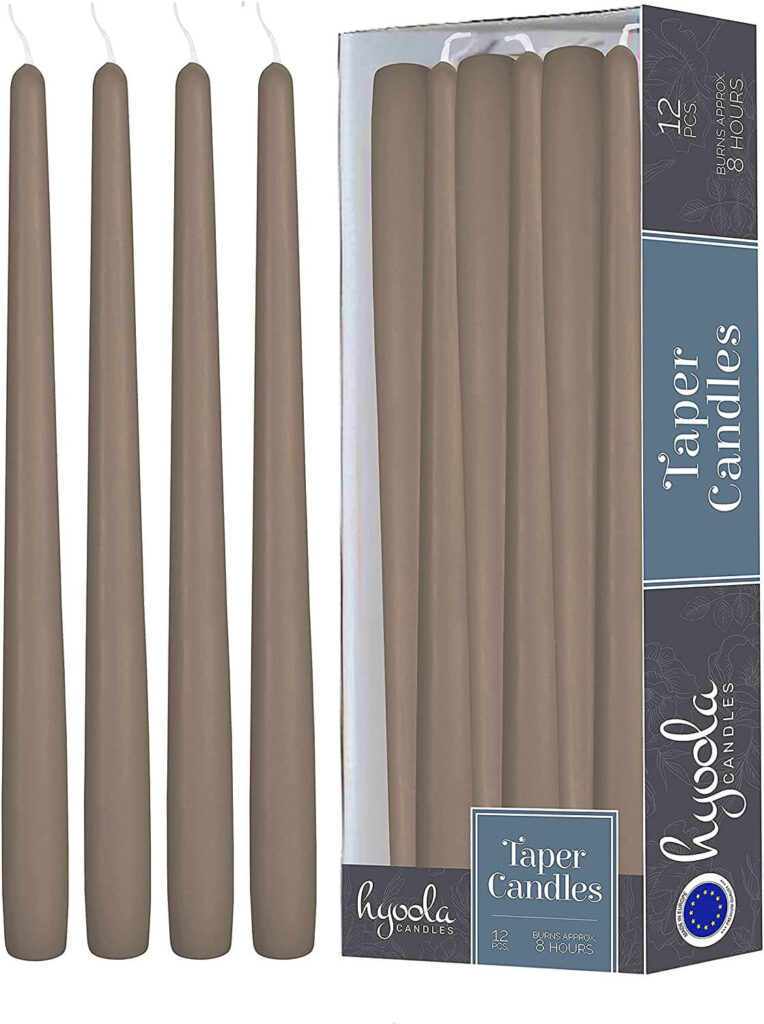
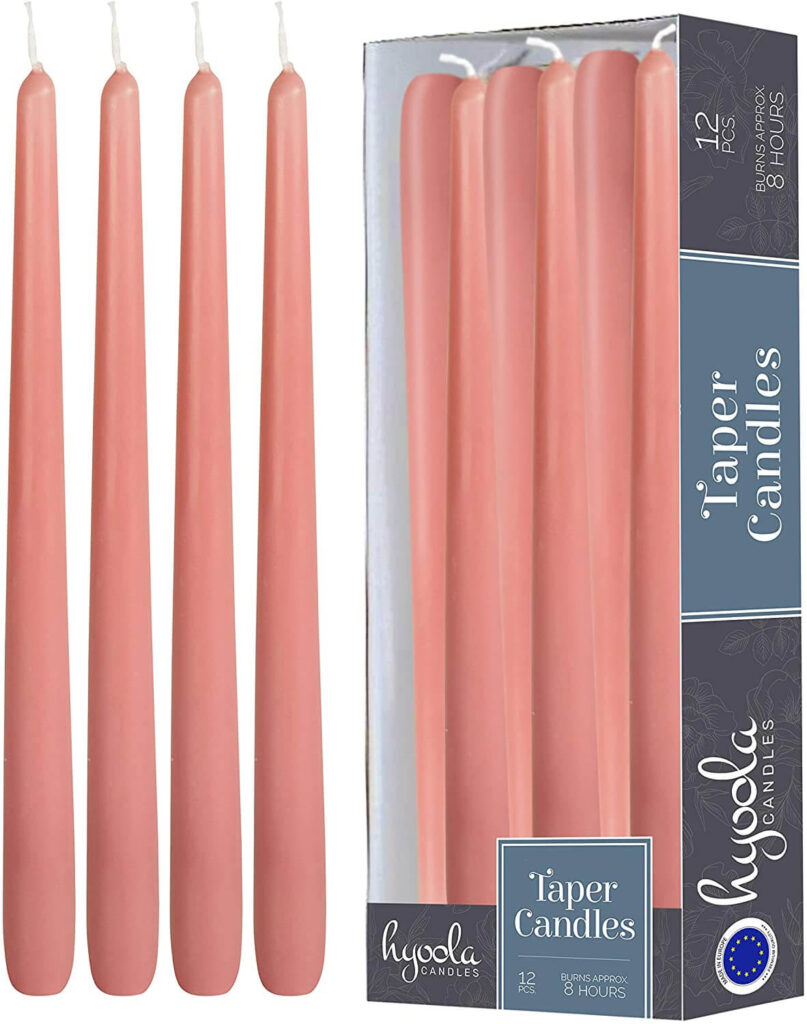
You can easily can all the materials for this anywhere! Depending on the quality you want, you can find tapered candles from the Dollar store, Grocery store, Amazon, art store like Michael’s, and home decor shops like HomeSense and Winners!

WHAT MATERIALS DO YOU NEED FOR THIS?

The materials you’ll need for these trendy bendy candles are:

  • Long Tapered Candles
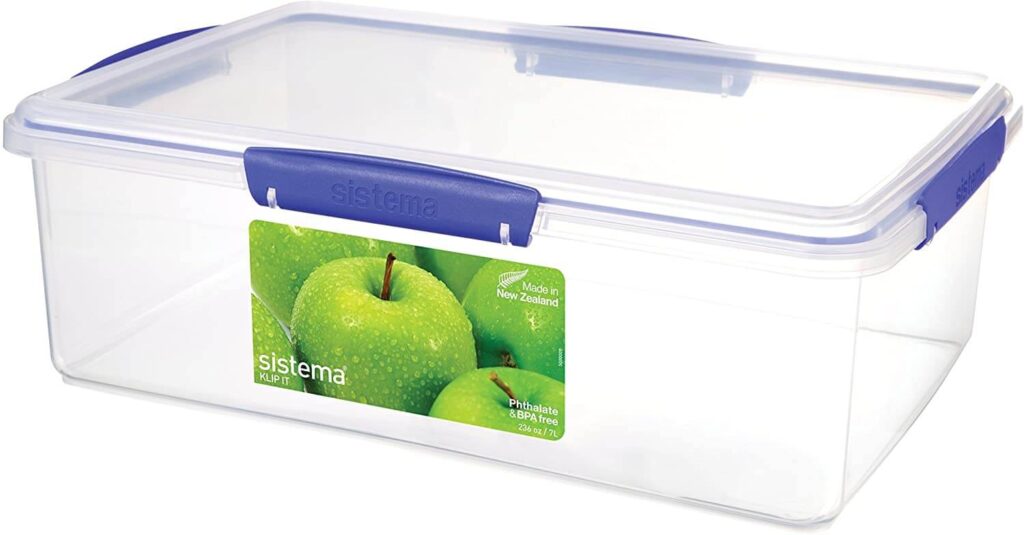
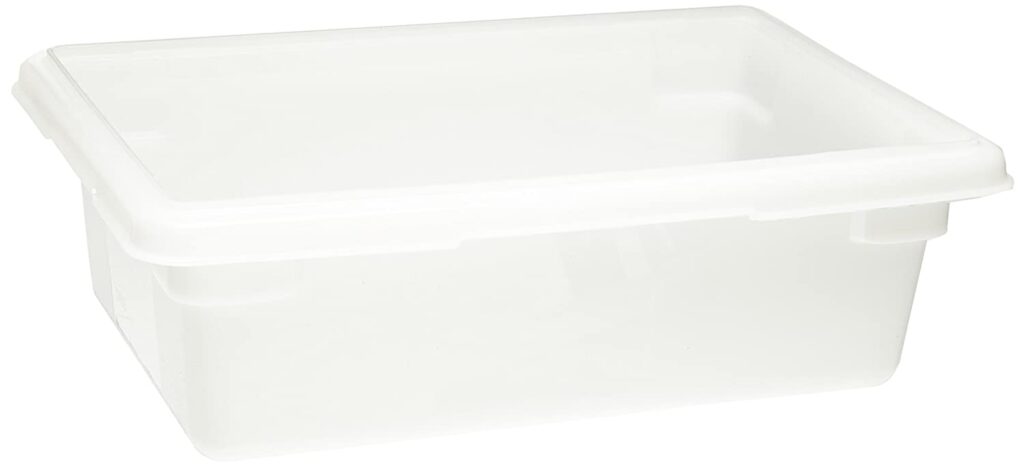
  • A large container that can hold warm/hot water
  • Rolling Pin (optional)
  • Wood Board (optional)

WHAT OTHER EQUIPMENT DO I NEED?

For this project, there is no other equipment used! You bend the candles with your hands and it dries and hardens by itself so you do not need any additional equipment.

WHERE CAN I USE/PUT IT?

These bendy candles are so gorgeous and can be put anywhere as home decor! I’ve put them on my shelves, on the coffee table, mantle etc. You can even burn them as well as lot as you have a plate or large candle holder so it doesnt burn or hot wax doesn’t drip anywhere you don’t want!

HOW DO I STORE THIS?

Like candle sticks, they are quite fragile so if you’re storing it, you’ll need to store it in a hard container or box, spaced apart in a single layer. Be sure to label your box and not stack anything on top of it otherwise there is a risk of cracking.

ANY OTHER NOTES?

Lots of notes for this DIY! You’ll need to make sure that the water is warm-hot and submerged if you can. You’ll also need to work a bit fast to ensure that the candles don’t harden quickly.

If you can’t get the candles to stand, you can always shave the bottom or base so that it will be flat on the ground!

STEPS TO DO THIS DIY TRENDY BENDY CANDLES PROJECT:

Step 1: Grab a clean food container and add in the amount of candles you’d like it in.

Step 2: Fill up the container with hot water with your candles and leave to soften for about 20-25 minutes.

Step 3: Once soft, shape the candles to however you’d like. Here are some examples:

Step 4: Let harden and decorate your home.

Hope you can try and make these DIY Trendy Bendy Candles at home!

They are super easy and add such an elegant touch to your home décor. I can’t wait to try this again using other candle colours!

Xo,

Lynn

This blog post is all the details on DIY Trendy Bendy Candles.

P.S: If you haven’t read my most recent post, click here!

PIN DIY Trendy Bendy Candles FOR LATER:

Bendy Candles - Pin 2

If you liked reading DIY Trendy Bendy Candles, you might like these are well!

DIY Easy Ice Cream Garland

Cute DIY Wedding Favors

DIY Home Wall Art

Posted In: diy · Tagged: bendy candles, candle bending diy, DIY, diy twisted candles, Easy DIY, how to bend a candle, how to make bendy candles tiktok, how to make swirl candles, how to make twist candles

Get on the List

You’ll Also Love

DIY Watercolor Home Cafe Sign
DIY Pumpkin Jack-O-Lantern Costume
How You Can Make Paper Crafts Last For a Long Time | GUEST POST

Comments

  1. TeaPartyPrincess says

    June 24, 2021 at

    I can’t believe something that looks so freaking good can be so simple! I am definitely going to give this a go.
    I think it’d make a great gift for that person who has it all too.
    Cora | https://www.teapartyprincess.co.uk/

    • Lynn Mumbing Mejia says

      July 5, 2021 at

      Agreed! Thanks so much for reading, Cora! x

  2. Not-So-Modern-Girl says

    June 24, 2021 at

    Ooh I’ve not heard of these candles before! Thank you for sharing these suggestions Lynn x

    • Lynn Mumbing Mejia says

      July 5, 2021 at

      Thanks so much for reading, Eleanor! x

  3. lucymarytaylor says

    June 24, 2021 at

    What a great idea these candles are! I want some for my house now! x

    Lucy | http://www.lucymary.co.uk

    • Lynn Mumbing Mejia says

      July 5, 2021 at

      Right! They are so cute, thanks Lucy x

  4. Jenny in Neverland says

    June 24, 2021 at

    These literally look so cool! I’d love to try making these – you could get so creative! x

    • Sunshine Sarah says

      June 24, 2021 at

      These look amazing Lynn! So fun and creative! ?️?️?️ Xo

      • Lynn Mumbing Mejia says

        July 5, 2021 at

        Thank so much for stopping by, Sarah! x

    • Lynn Mumbing Mejia says

      July 5, 2021 at

      Totally1 Thanks for reading, Jenny xx

  5. Tiziana Olbrich says

    June 24, 2021 at

    Oh I really wanna try this trend out too! They look so cool 🙂
    have a great day,
    Tiziana

    • Lynn Mumbing Mejia says

      July 5, 2021 at

      Thank you so much for reading, Tiziana x

  6. crystalsandcurls says

    June 24, 2021 at

    These turned out beautifully! Heading over to watch your video now 🙂

  7. Nyxinked says

    June 24, 2021 at

    I love odd and wonderful candles rather than the standard up and down. These are so quirky and cool!

    • Lynn Mumbing Mejia says

      July 5, 2021 at

      Thanks so much Nyxie x

  8. Della Driscoll says

    June 24, 2021 at

    These are the coolest candles ever and I love your guide on how to make them xx

    • Lynn Mumbing Mejia says

      July 5, 2021 at

      Thanks so much Della! xx

  9. Karalee says

    June 24, 2021 at

    This is such a simple DIY, but the result looks amazing! The candles look so cool now!

    • Lynn Mumbing Mejia says

      July 5, 2021 at

      Thanks so much for reading, Karalee!x

  10. Jodie | That Happy Reader says

    June 24, 2021 at

    These bendy candles look amazing! Thanks for sharing a cool DIY project!

    • Lynn Mumbing Mejia says

      July 5, 2021 at

      Thank you for stopping by, Jodie! x

  11. theyorkshiredreamer says

    June 24, 2021 at

    I haven’t seen this trend, but it looks like so much fun! ? I love fall and fruity scents as well.

    Your YouTube Tutorial is great – you explained everything perfectly. Wax is hard to get off plastic surfaces; I still have a jug with wax on the sides.

    This is such a creative way to reimagine basic candles into something more artistic! Thank you for sharing all your tips.

    • Melissa Alvarado says

      June 25, 2021 at

      Those candles are so interesting and look good for decorating the living room. Thank you for sharing this.

      • Lynn Mumbing Mejia says

        July 6, 2021 at

        Thanks so much for reading! x

    • Lynn Mumbing Mejia says

      July 5, 2021 at

      Thanks so much for reading and watching! It means a lot xx

  12. Simona ~ The Grumpy Olive says

    June 24, 2021 at

    I’m going to buy candles pronto because these just look insanely great Lynn! I can’t believe they are this easy! Hopefully I can get some lavender or rainbow candles now!

    • Lynn Mumbing Mejia says

      July 5, 2021 at

      Thank you so much for reading, Simona! x

  13. A Sustainably Simple Life says

    June 24, 2021 at

    Wow! I love these! They look so awesome and I would never have guessed they were so easy to make. I’m really wanting to try making them!

    • Lynn Mumbing Mejia says

      July 5, 2021 at

      Thanks so much! They are the cutest xx

  14. Tiffany McCullough - Metaphysical Mama says

    June 24, 2021 at

    These are so cool Lynn! This is the first time I’ve seen them, I’m a little out of the loop. I can’t believe they are so simple to make. I definitely have to try my hand at these. Thanks for sharing the how-to!

    • Lynn Mumbing Mejia says

      July 5, 2021 at

      Thank you so much for reading, Tiffany xx

  15. Rachel Duerden says

    June 24, 2021 at

    Wow. I’ve never seen these candles before!

    • Lynn Mumbing Mejia says

      July 5, 2021 at

      Right! They are gorgeous!

  16. Nancy says

    June 24, 2021 at

    I’ve seen these bendy candles in different videos lately! They look super cool because they’re easy to make and you can be super creative with them. My favorite is the twist. Thanks for sharing this tutorial!

    Nancy ✨

    • Lynn Mumbing Mejia says

      July 6, 2021 at

      Thank you for stopping by! x

  17. Caroline says

    June 24, 2021 at

    These candles look so cool and seem quite easy too (though I’m sure it will be harder than it looks!). I can’t wait to give these a go x

    • Lynn Mumbing Mejia says

      July 6, 2021 at

      Thank you for commenting, Caroline! x

  18. Headphonesthoughts says

    June 24, 2021 at

    I love candles. It would be so cool to try out these designs. I hope to try this out.

    • Lynn Mumbing Mejia says

      July 6, 2021 at

      Thanks so much for commenting!

  19. Night and day library says

    June 24, 2021 at

    This seems so fun! I’ll definitely be looking out to try this!

    • Lynn Mumbing Mejia says

      July 6, 2021 at

      Thank you for visiting my blog! x

  20. loverosiee says

    June 25, 2021 at

    Ok I LOVE this post! I love these bendy candles and I also love that you can make them yourself with just a few simple steps! I am defo going to give these a go this summer
    Rosie

    • Lynn Mumbing Mejia says

      July 6, 2021 at

      Thank you for reading, Rosie! x

  21. Fadima Mooneira says

    June 25, 2021 at

    This is an interesting DIY. Sounds like a good thing to try. Thank you for sharing.

    • Lynn Mumbing Mejia says

      July 6, 2021 at

      Thank you for reading, Fadima! x

  22. brittshedhappens says

    June 26, 2021 at

    Those look awesome when they are finished and I can’t believe how crazy easy it is to make them. I am definitely going to give these a try. I think they would make the perfect accent to any space – just changing the colour can make a huge difference on how they fit into the room too!

    • Lynn Mumbing Mejia says

      July 9, 2021 at

      Thanks so much for reading this post, Britt! x

Trackbacks

  1. 7 Summer Inspired Crafting Projects To Try | Sincere Mommy says:
    June 26, 2021 at

    […] Overall, this is an extremely easy craft. All you need to get started is a set of long tapered candles and a container full of hot water to put them in. Lynn explains exactly how to make them in this full tutorial! […]

  2. Blogs you really need to read this month - Claire Mac - Lifestyle says:
    June 30, 2021 at

    […] DIY trendy bendy candles. […]

  3. 20+ Awesome Crafts To Sell In 2021 | Lynn Mumbing Mejia says:
    July 12, 2021 at

    […] DIY Trendy Bendy Candles […]

  4. Minimalist Boho Tassel Decor | Lynn Mumbing Mejia says:
    July 25, 2021 at

    […] DIY Trendy Bendy Candles […]

  5. How To Develop Patience When Doing DIY Crafts | GUEST POST | Lynn Mumbing Mejia says:
    January 10, 2022 at

    […] DIY Trendy Bendy Candles […]

Next Post >

Pineapple Coconut Chicken

About Photo
Hey there friend! My name is Lynn and I'm a Canadian Content Creator who's focused on Minimal & Neutral Home Decor Inspo, Simple & Budget Friendly DIY Projects, All Things Holidays and Quick & Easy Recipes. I'm so happy you're here and I hope you'll find something that you love!

Categories

follow lynn

  • Facebook
  • Instagram
  • Pinterest
  • Twitter
  • YouTube

Search

Join Us!

Trending Now

Popular Posts

Links

  • About
  • Contact
  • Disclaimer
  • Privacy Policy
  • Terms & Conditions

Socials

  • Instagram
  • Youtube
  • Facebook
  • Twitter
  • Pinterest

Shop

  • Home Wall Art
  • Recipe Cards
  • Greeting Cards
  • Planner Templates

JOIN THE INNER CIRCLE

Asian Sesame Vermicelli Salad 🥗 This Asian Sesam Asian Sesame Vermicelli Salad 🥗 

This Asian Sesame Vermicelli Salad is light, refreshing, and packed with flavor! Tender vermicelli noodles are tossed with crisp veggies and a savory sesame dressing for an easy, vibrant dish that’s perfect for lunches, meal prep, or summer gatherings.

INGREDIENTS
* 3 Bundles Vermicelli about 150g uncooked
* 1 Cup Purple Cabbage thinly shredded 
* 1 Cup Red Peppers thinly shredded 
* 1 Cup Carrots thinly shredded 
* 1/2 Cup Edamame
* 2 Stalks Green Onion thinly sliced 

Sauce
* 1 Clove Garlic grated
* 2 Tbsp Sesame Oil
* 1 tsp Sesame Oil
* 2 Tbsp Soy Sauce
* 1 Tbsp Brown Sugar
* 1 Tbsp Rice Vinegar

INSTRUCTIONS
* Cook the vermicelli noodles according to package instructions. Drain and rinse under cold water.
* In a large bowl, combine the cooked vermicelli, cabbage, red bell pepper, carrot, edamame, and green onions.
* In a small bowl, whisk together garlic, sesame oil, sesame seeds, soy sauce, brown sugar, and rice vinegar until well combined.
* Pour the sauce over the salad and toss until evenly coated.
* Chill in the fridge before serving for extra flavor for minimally 12 hours! Enjoy!

vietnamese vermicelli salad recipe, vermicelli noodle salad, vermicelli salad recipe, how to make vermicelli noodle salad, vermicelli noodles salad recipe, asian salad, asian salad dressing, how to make vietnamese vermicelli noodle salad recipe, asian noodle salad, asian salad recipe, easy sesame noodle salad, asian cold noodle salad, glass noodle salad with sesame dressing, bean vermicelli, ramen salad, vegan salad, vegetarian salad, sesame sauce, sesame sauce recipe
Poppy Seed Almond Muffins 🤎 Have you ever tried C Poppy Seed Almond Muffins 🤎

Have you ever tried Costco’s almond poppy seed muffins? If you have, this is a copycat version of it! It’s my fav muffin and I knew I had to recreate it at home!

These Poppy Seed Almond Muffins are soft, fluffy, and bursting with sweet almond flavor. With a tender crumb and delicate crunch from the poppy seeds, they’re the perfect cozy bakery-style treat for breakfast, snacking, or coffee breaks.

INGREDIENTS
* 2 1/4 Cups Flour
* 1/2 tsp Salt
* 1/2 tsp Baking Soda
* 1/2 tsp Baking Powder
* 3/4 Cup Oil 
* 1 Cup White Sugar
* 2 Eggs
* 1 tsp Vanilla Extract
* 1 Tbsp Almond Extract 
* 3/4 Cup Sour Cream
* 1/4 Cup Milk
* 2 Tbsp Poppy Seeds
* 1/4 Cup Slivered Almonds sprinkle on top

INSTRUCTIONS
* Preheat oven to 350°F and line a 12-cup muffin tin with liners or lightly grease it.
* In a large bowl, whisk together oil, sugar, eggs, vanilla extract, almond extract, sour cream, and milk until smooth.
* Add flour, salt, baking soda, and baking powder directly into the same bowl. Gently mix until just combined.
* Fold in the poppy seeds.
* Divide the batter evenly between the 12 muffin cups and sprinkle slivered almonds on top.
* Bake for 25 minutes, or until a toothpick inserted into the center comes out clean.
* Let cool slightly before serving.


almond poppy seed muffins, poppy seed muffins, costco copycat, costco copycat recipes, almond muffins, easy muffin recipes, simple muffins, poppy seed almond muffins
Spicy Canned Tuna Sushi Bake 🐟🍣 This Spicy Canned Spicy Canned Tuna Sushi Bake 🐟🍣

This Spicy Canned Tuna Sushi Bake is creamy, savory, and packed with bold flavor! Made with simple pantry ingredients, it’s an easy, budget-friendly twist on sushi! It is perfect for sharing, scooping with seaweed, and satisfying all your sushi cravings at home.

INGREDIENTS
* 1 Can Tuna drained
* 2 Tbsp Sriracha
* 1/4 Cup Mayo
* 1 Tbsp Sesame Oil
* 2 Tbsp Furikake
* 1 Cup White Rice cooked
* 1 tsp Sugar
* 1/2 Tbsp Rice Vinegar
* 1 Packet Seasoned Seaweed

INSTRUCTIONS
* Preheat your oven to 400F and prepare a 6-inch baking pan.
* In a bowl, add in your rice and heat it in the microwave for 1 minute. This is so it’s easier for the sugar and rice vinegar to soak in. Add in your rice vinegar and sugar and mix well.
* Next, add in the rice mixture to your baking pan in an even layer. Sprinkle furikake on top.
* Use the same bowl that you mixed up your rice in and add in your drained canned tuna, sesame oil, sriracha, and mayo and mix well.
* Add the layer of saucy tuna on your rice layer evenly on top. Sprinkle with furikake.
* Bake at 400F for 20-30 minutes or until the top is golden brown.
* Serve with a side of seasoned seaweed and enjoy!


sushi bake canned tuna, spicy tuna sushi bake, tuna sushi bake, spicy tuna sushi, sushi bake tuna, spicy tuna mayo sushi, canned tuna, sushi bake, easy sushi bake, sushi bake dish, sushi bake asmr, baked sushi, easy baked sushi, sushi bake tutorial, spicy tuna, easy sushi bake ideas, sushi bake steps, viral sushi bake, sushi bake how to, sushi bake trend, sushi baked recipe, easy sushi bake recipe, how to make a sushi bake, sushi bake recipe, tiktok sushi bake, sushi bake tiktok
Spicy Canned Tuna Sushi Bake 🐟🍣 This Spicy Canned Spicy Canned Tuna Sushi Bake 🐟🍣

This Spicy Canned Tuna Sushi Bake is creamy, savory, and packed with bold flavor! Made with simple pantry ingredients, it’s an easy, budget-friendly twist on sushi! It is perfect for sharing, scooping with seaweed, and satisfying all your sushi cravings at home.

INGREDIENTS
* 1 Can Tuna drained
* 2 Tbsp Sriracha
* 1/4 Cup Mayo
* 1 Tbsp Sesame Oil
* 2 Tbsp Furikake
* 1 Cup White Rice cooked
* 1 tsp Sugar
* 1/2 Tbsp Rice Vinegar
* 1 Packet Seasoned Seaweed

INSTRUCTIONS
* Preheat your oven to 400F and prepare a 6-inch baking pan.
* In a bowl, add in your rice and heat it in the microwave for 1 minute. This is so it’s easier for the sugar and rice vinegar to soak in. Add in your rice vinegar and sugar and mix well.
* Next, add in the rice mixture to your baking pan in an even layer. Sprinkle furikake on top.
* Use the same bowl that you mixed up your rice in and add in your drained canned tuna, sesame oil, sriracha, and mayo and mix well.
* Add the layer of saucy tuna on your rice layer evenly on top. Sprinkle with furikake.
* Bake at 400F for 20-30 minutes or until the top is golden brown.
* Serve with a side of seasoned seaweed and enjoy!�

sushi bake canned tuna, spicy tuna sushi bake, tuna sushi bake, spicy tuna sushi, sushi bake tuna, spicy tuna mayo sushi, canned tuna, sushi bake, easy sushi bake, sushi bake dish, sushi bake asmr, baked sushi, easy baked sushi, sushi bake tutorial, spicy tuna, easy sushi bake ideas, sushi bake steps, viral sushi bake, sushi bake how to, sushi bake trend, sushi baked recipe, easy sushi bake recipe, how to make a sushi bake, sushi bake recipe, tiktok sushi bake, sushi bake tiktok
Banana Bread Syrup 🍌 This Banana Bread Syrup is Banana Bread Syrup 🍌 

This Banana Bread Syrup is warm, sweet, and full of cozy flavor just like your favorite homemade loaf in liquid form! Perfect for coffee, pancakes, waffles, or desserts, it’s an easy homemade syrup that adds a comforting, bakery-style touch to any treat 💛

INGREDIENTS
* 1/2 Cup White Sugar
* 1/2 Cup Brown Sugar
* 1 Mashed Ripe Banana
* 1 tsp Vanilla Extract
* 1/2 tsp Cinnamon
* 1 Cup Water

INSTRUCTIONS
* In a small saucepan over medium heat, combine water, white sugar, and brown sugar.
* Stir until the sugars fully dissolve and the mixture begins to gently simmer.
* Add the mashed banana and cinnamon. Simmer for 5–8 minutes, stirring occasionally.
* Remove from heat and stir in the vanilla extract.
* Strain the syrup (optional for a smoother texture) and let cool.
* Transfer to a jar or bottle and store in the fridge.

banana bread syrup, banana bread, banana latte, banana bread latte, banana bread matcha latte, copycat starbucks banana bread matcha latte, banana bread breve, banana bread, copycat starbucks iced banana bread matcha latte, copycat starbucks banana bread matcha, copycat starbucks iced banana bread matcha recipe, iced latte, banana milk, banana coffee, banana coffee recipe, fun latte recipes, banana coffee syrup,
Banana Bread Syrup 🍌 This Banana Bread Syrup is Banana Bread Syrup 🍌 

This Banana Bread Syrup is warm, sweet, and full of cozy flavor just like your favorite homemade loaf in liquid form! Perfect for coffee, pancakes, waffles, or desserts, it’s an easy homemade syrup that adds a comforting, bakery-style touch to any treat 💛

INGREDIENTS
* 1/2 Cup White Sugar
* 1/2 Cup Brown Sugar
* 1 Mashed Ripe Banana
* 1 tsp Vanilla Extract
* 1/2 tsp Cinnamon
* 1 Cup Water

INSTRUCTIONS
* In a small saucepan over medium heat, combine water, white sugar, and brown sugar.
* Stir until the sugars fully dissolve and the mixture begins to gently simmer.
* Add the mashed banana and cinnamon. Simmer for 5–8 minutes, stirring occasionally.
* Remove from heat and stir in the vanilla extract.
* Strain the syrup (optional for a smoother texture) and let cool.
* Transfer to a jar or bottle and store in the fridge.�
banana bread syrup, banana bread, banana latte, banana bread latte, banana bread matcha latte, copycat starbucks banana bread matcha latte, banana bread breve, banana bread, copycat starbucks iced banana bread matcha latte, copycat starbucks banana bread matcha, copycat starbucks iced banana bread matcha recipe, iced latte, banana milk, banana coffee, banana coffee recipe, fun latte recipes, banana coffee syrup,

Copyright © 2026 Lynn Mumbing Mejia · Theme by 17th Avenue