
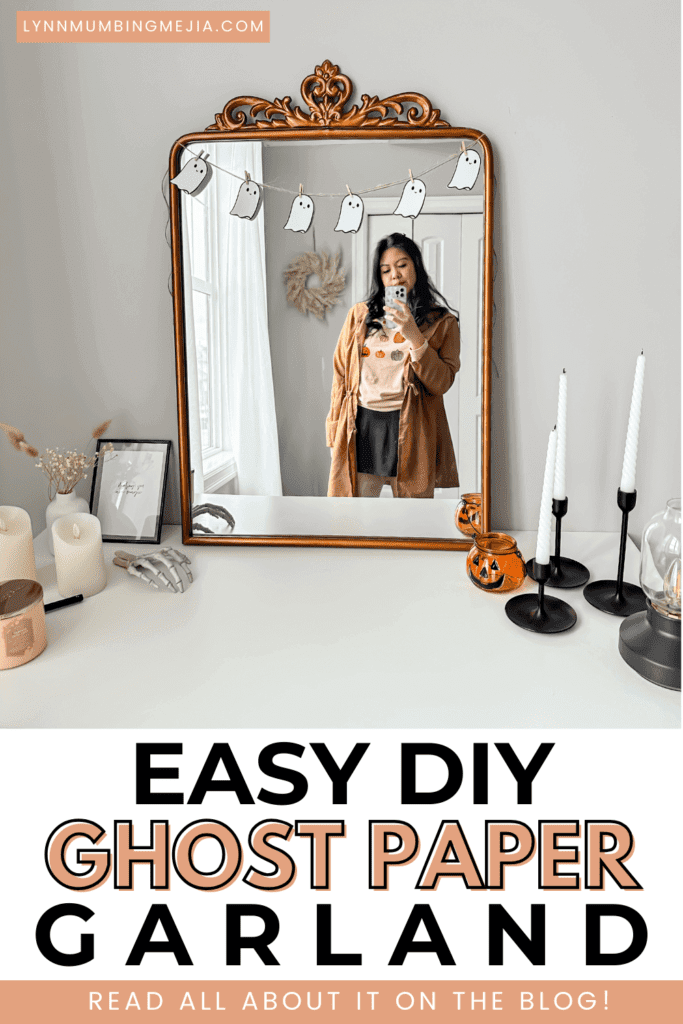
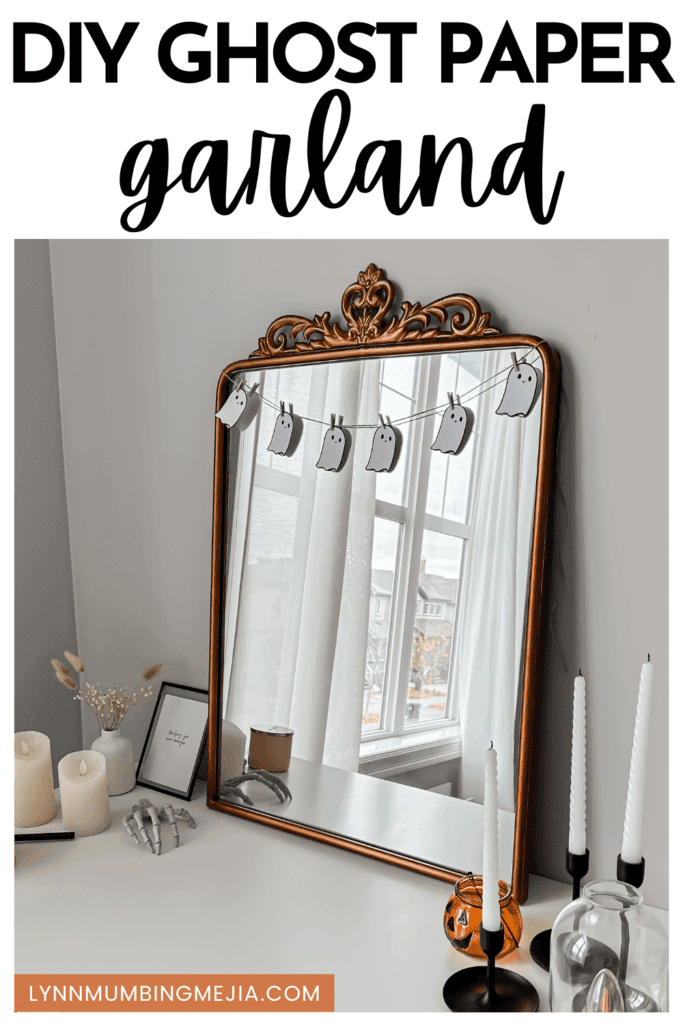
DIY Ghost Paper Garland
Read more for all the details on how to put together a Ghost Paper Garland.
I love me a good paper craft garland and this was by far the cutest and easiest to put together. I have a large mirror in my office so I thought to make it a little bit spooky and hang up a cute garland!
Creating a DIY Ghost Paper Garland is a fun, easy, and affordable way to add a spooky yet charming touch to your Halloween décor. Whether you’re hosting a Halloween party, decorating your home for trick-or-treaters, or just getting into the spooky spirit, this ghost garland will make a great addition. With just a few simple materials—white paper, scissors, and some string—you can craft a delightful, ghostly garland that will be the highlight of your decorations.
This DIY project is perfect for kids and adults alike, making it an excellent activity to do together as a family. Plus, it’s customizable! You can make your ghosts cute, spooky, or funny by adjusting their facial expressions. It’s also a budget-friendly craft, as most of the supplies are likely already in your home. The garland can be hung across windows, mantles, or doorways, creating a hauntingly festive atmosphere.
PIN Ghost Paper Garland FOR LATER:
This DIY Ghost Paper Garland is accompanied by a YouTube Tutorial. If you haven’t subscribed to me on YouTube, don’t forget to!
HERE IS HOW TO MAKE A DIY GHOST PAPER GARLAND:
WHERE CAN YOU FIND THE MATERIALS TO MAKE THIS DIY GHOST PAPER GARLAND?
You can find the materials to make a DIY Ghost Paper Garland at various places:
- Craft Stores: Michaels, Joann Fabrics, and Hobby Lobby have paper, string, markers, and other decorative materials.
- Online: Amazon, Etsy, and other online retailers sell craft supplies, including paper and glue.
- Dollar Stores: Great for budget-friendly supplies like white paper, string, glue, and markers.
- Office Supply Stores: Stores like Staples and Office Depot offer basic materials such as white paper and scissors.
- At Home: You may already have most of the items, like white paper, markers, and scissors, around your home!
WHERE CAN I PRINT THESE GHOSTS?
I have the exact little ghosties I use for this garland up in my freebie library! You can get all my freebies by signing up for my email list here or clicking on the photo! All email list subscribers have access to all the printables I create forever so be sure to check it out.
Once you sign up, you get a welcome email with the password to my freebie library where you can download this cute ghostie template to print at home!
WHAT ARE THE MATERIALS NEEDED FOR THIS DIY GHOST PAPER GARLAND?
The materials you need to create this easy ghost paper garland are:
- White paper
- Black Sharpie (only needed if ghosts are hand drawn, not needed if printing)
- Scissors
- Mini clothespins or clips
- Twine
- Tape/Thumb Tacks/Push Pins
WHAT EQUIPMENT DO I NEED?
You can definitely free hand sketch your ghosts but if you’ve got a printer at home, it is so much easier to print ghosts to cut out! Free hand sketches never turn out great for me. You can also just print the ghost template at your local library or print shop for a small cost.
Aside from that, you’ll just need some twine and mini clothespins which you can pick up from the Dollar store and reuse for many paper garlands to come and a good pair of scissors!
Here are some of the things I have gotten from Amazon:

DOES THIS DIY GHOST PAPER GARLAND LAST TO USE FOR THE FOLLOWING YEARS?
A DIY Ghost Paper Garland can last for several years if stored properly. Keep it in a dry, cool place, away from direct sunlight and moisture, to prevent fading or damage. Proper care will ensure it can be reused for multiple Halloween seasons. I recommend keeping the paper ghosts in a ziplock bag!
HOW LONG DOES IT TAKE TO PUT TOGETHER?
Making an Easy DIY Ghost Paper Garland typically takes about 1-30 minutes, depending on the complexity of the design, how fast you can cut and how many ghosts you want to include. It’s a simple, fun craft project that can be done quickly with basic supplies!
STEPS TO PUT TOGETHER THIS DIY GHOST PAPER GARLAND:
Step 1: Print/Create A Ghost Template & Cut Ghosts
You can signing up for my email list here for the password and access to all my printables including the template for these ghosts! This is the exact size I used to create mine! Alternatively, you can free hand sketch the clovers or use a different template or outline!
Step 2: Cut Twine To The Desired Length
Pick where you’d like to hang your garland and cut your twine to the length of that. You can use tape if you’d like as it’s super light but you can also use a thumb tacks/pushpins! I love hanging my garlands on my mantel!
Step 3: Use Mini Pins To Attach Ghosts To Twine
Attach the paper ghosts to the twine using your mini pins. I love to tilt the ghosts to one side and have them hanging angled but you can do what works for you!
Step 4: Hang Garland And Space Out Ghosts Accordingly
Lastly, hang your garland and space out the ghosts evenly throughout and you’re done! Yay! You’ve got a little bit of Halloween spirit out!
Add a spooky touch to your Halloween décor with this easy DIY Ghost Paper Garland! It’s the perfect budget-friendly craft for the whole family to enjoy. Gather your supplies and get crafting today for a hauntingly festive atmosphere!
Xo,
Lynn
Are you going to try making this DIY Ghost Paper Garland?! Don’t forget to tag me if you do!

This blog post is all the details on DIY Ghost Paper Garland.
P.S: If you haven’t read my most recent post, click here!
PIN DIY Ghost Paper Garland FOR LATER:
If you liked reading DIY Ghost Paper Garland, you might like these are well!
50+ Must-Have Boho Halloween Decor
50+ Ultra Cute Pink Halloween Home Decor!
15 Modern Halloween Home Decor Ideas
This is the end of DIY Ghost Paper Garland.


4 Comments
Comments are closed.