Hello! I'm Lynn.
  • About Me
  • Work With Me
  • Contact Me
  • Subscribe
  • Home
    • About
    • Contact
    • Disclaimer
    • Terms & Conditions
    • Privacy Policy
    • Subscribe
      • Work With Me
        • Media Kit
        • Portfolio and Samples
  • diy
  • lifestyle
    • home decor
  • recipes
  • gifts, parties & holidays
  • health & wellness with lynn

Lynn Mumbing Mejia

Crafting coziness, one recipe, DIY project, and holiday celebration at a time.

diy · April 14, 2025

Easy DIY Ribbon Garland

*This post may contain affiliate or sponsored links, which means I may get paid or receive a commission if you purchase through my link, at no extra cost to you!*

Read more for all the details on Easy DIY Ribbon Garland.

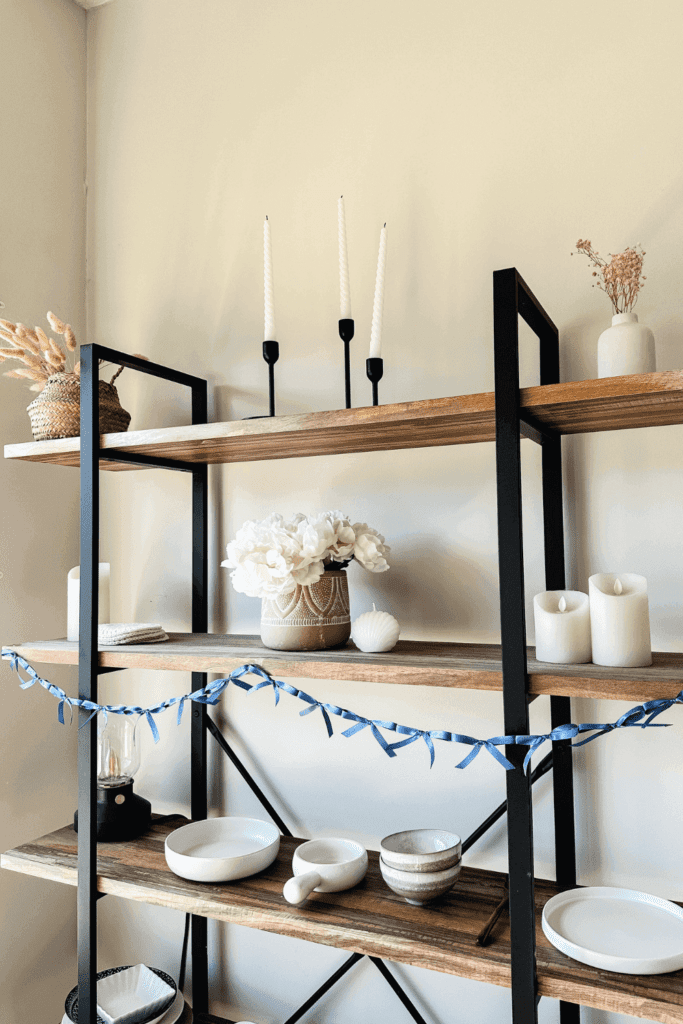
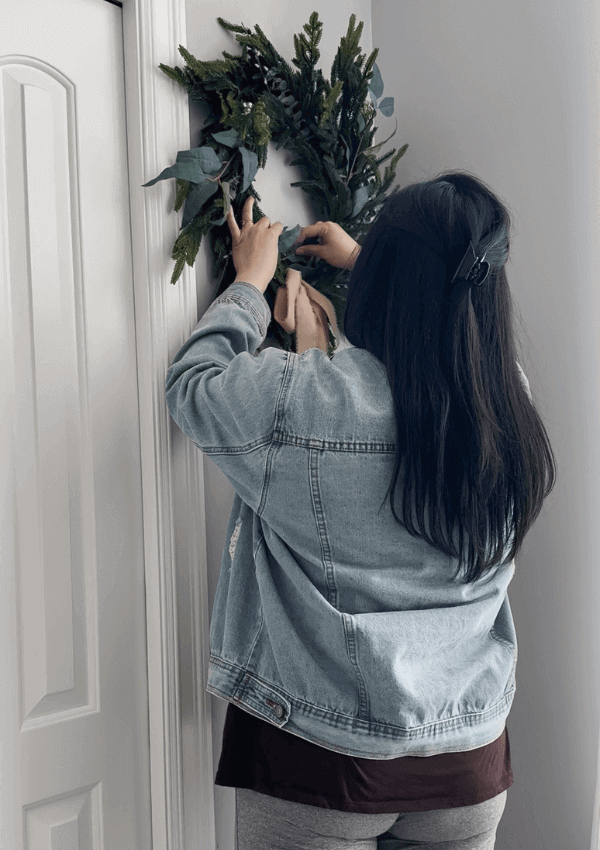
Bows have been the ongoing trend for a while now and I am obsessed! I have always been girly girly and have loved bows for so long. It makes make super excited to see everyone embracing bows as a decor trend! I keep my home decor pretty minimal but will always be a sucker to display bows so I had to make a ribbon garland!

PIN Easy DIY Ribbon Garland FOR LATER:
Easy DIY Ribbon Garland - Lynn Mumbing Mejia - Featured Pin 1

This Easy DIY Ribbon Garland is accompanied by a YouTube Tutorial. If you haven’t subscribed to me on YouTube, don’t forget to!

Table of Contents

Toggle
  • HERE IS HOW TO MAKE AN EASY DIY RIBBON GARLAND:
    • WHERE CAN YOU FIND THE MATERIALS TO MAKE THIS EASY DIY RIBBON GARLAND?
    • WHAT ARE THE MATERIALS NEEDED FOR THIS EASY DIY RIBBON GARLAND?
    • CAN I SUBSTITUTE ANY MATERIALS OUT?
    • DOES THIS DIY LAST FOR THE FOLLOWING YEARS?
    • HOW LONG DOES IT TAKE TO PUT TOGETHER?
    • INSPIRATIONS FOR THIS EASY DIY RIBBON GARLAND?
    • STEPS TO PUT TOGETHER THIS EASY DIY RIBBON GARLAND:
      • Step 1: Cut Strips Of Ribbons To Your Desired Size Of Bow
      • Step 2: Tie Your Ribbons In The Way That’s Easiest For You
      • Step 3: Ensure That Bow Length Are Similar In Size
      • Step 4: Glue Ribbon Together To Desired Length Of Garland
      • Step 5: Hang Up And Enjoy Your Craft!

HERE IS HOW TO MAKE AN EASY DIY RIBBON GARLAND:

WHERE CAN YOU FIND THE MATERIALS TO MAKE THIS EASY DIY RIBBON GARLAND?

All you truly need for this DIY is ribbon and a hot glue gun! I don’t use anything special to make the ribbons and just tie them up then hot glue them together. There are many ways to create little bows so do the way that you enjoy the most. You can find ribbon at your local craft store, dollar store or even Amazon!

WHAT ARE THE MATERIALS NEEDED FOR THIS EASY DIY RIBBON GARLAND?

The materials needed to make this pretty ribbon garland are:

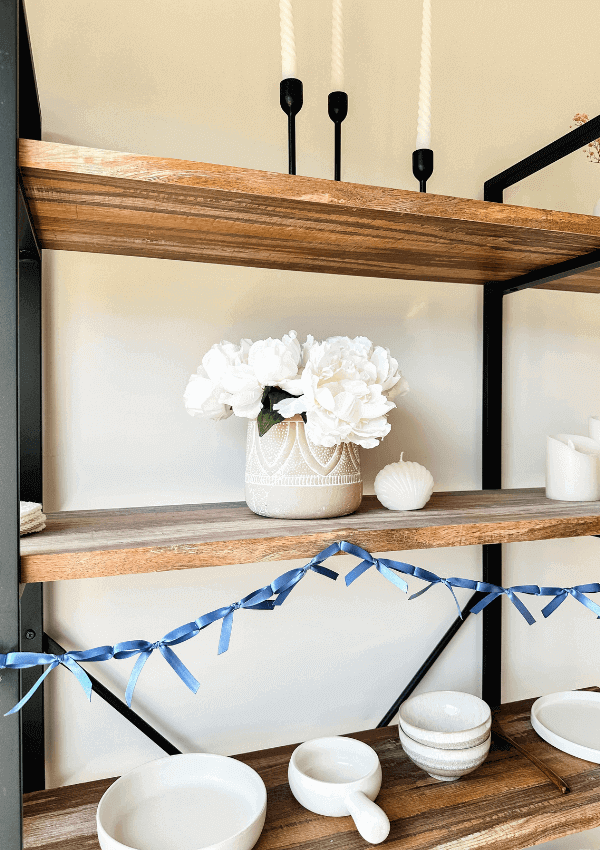
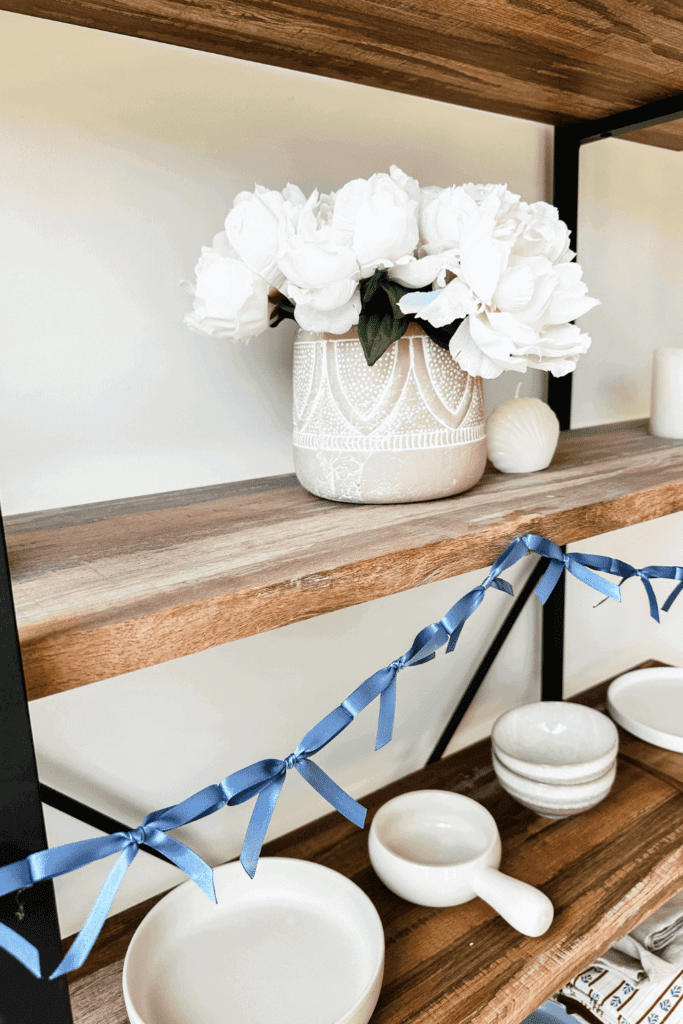
  • Satin Ribbon (any color! I used blue)
  • Hot Glue Gun + Hot Glue Sticks

CAN I SUBSTITUTE ANY MATERIALS OUT?

For this DIY specifically, I used a shiny satin ribbon but you’re welcome to use any ribbon that works for you! I love how soft and shiny this ribbon material is but there are other fabrics that work well! I find that hot glue worked that best for this DIY but you can also use super glue or fabric glue/tape for this as well!

DOES THIS DIY LAST FOR THE FOLLOWING YEARS?

Absolutely! This DIY is very sturdy, especially if you use good glue! Of course, with fabric crafts, sometimes they can be delicate but as long as you are gentle with it and store it nicely, you’ll be able to use this for years to come or even for special occasions like themed parties.

HOW LONG DOES IT TAKE TO PUT TOGETHER?

Not going to lie, this diy ribbon garland did take me a little bit of time. I think with any diy or craft that has smaller pieces like tying lots of bows take time! This craft took me about 1-2 hours to do from start to finish but I love doing this while watching a movie or listening to music! It is truly my form of self care!

INSPIRATIONS FOR THIS EASY DIY RIBBON GARLAND?

I have been loving all things bow related and absolutely love th idea of incorporating it in my home decor! One thing about me is that I love seeing DIYs around peoples houses! I love seeing the home made touches and prefer this over a store bought curated home. It feel so cozy and warm and I’m obsessed! I will be doing DIY’s in my house for years to come!

STEPS TO PUT TOGETHER THIS EASY DIY RIBBON GARLAND:

Step 1: Cut Strips Of Ribbons To Your Desired Size Of Bow

I cut about 25-30cm strips and cut about 20 to 30 of these according to how long my shelf was. You can measure the place you’d like to hang your ribbon garland for more accuracy in sizing.

Step 2: Tie Your Ribbons In The Way That’s Easiest For You

I honestly watched so many ribbon tutorials and I found that this video from Tiktok was the easiest for me to follow! There are so many ways to create little bows so just pick the way that’s the easiest for you!

@hellensboutique

How to make a mini bow! Here’s how we make our cute bows for our bridesmaid proposal boxes💗#howtomakeabow #howtoribbon #smallbusinesstipsforyou #weddingtips #diyribbonbow

♬ Aesthetic – Tollan Kim

Step 3: Ensure That Bow Length Are Similar In Size

I cut the ends of the bows to make sure that the bows are similar in size. It does not need to be perfect, and of course, you can leave it as is but I like to make them slightly similar in size.

Optional: I like to heat seal the edges of the ribbons or they don’t fray!

Step 4: Glue Ribbon Together To Desired Length Of Garland

Glue the sides of the bows together until they form a garland to your desired length.

Step 5: Hang Up And Enjoy Your Craft!

Hang the garland in your desired place in your home and admire a job well done!

Easy DIY Ribbon Garland - Lynn Mumbing Mejia - Blog Image

Thank you for reading to the end of this tutorial! Hope you enjoy and make it as well! 😍

Xo,

Lynn

Are you going to try making this Easy DIY Ribbon Garland?! Don’t forget to tag me if you do!

Easy DIY Ribbon Garland - Lynn Mumbing Mejia - Tag Us

This blog post is all the details on Easy DIY Ribbon Garland.

P.S: If you haven’t read my most recent post, click here!

PIN Easy DIY Ribbon Garland FOR LATER:
Easy DIY Ribbon Garland - Lynn Mumbing Mejia - Featured Pin 2

If you liked reading Easy DIY Ribbon Garland, you might like these as well!

Valentine’s Paper Heart Garland

Easy Snowman Paper Garland

Easy Gingerbread Paper Garland Decor

DIY Ghost Paper Garland

Easy Christmas Tree Garland

St. Patrick’s Day Paper Clover Garland

Cute Paper Easter Bunny Garland – Easy DIY!

Easy Neutral Paper Pumpkin Garland

This is the end of Easy DIY Ribbon Garland.

Shop The Post

Posted In: diy · Tagged: affordable home decor, bow garland, budget friendly home decor, diy bow garland, diy garland, diy home decor, diy ribbon garland, diy ribbon garland no sew, easy fiy ribbon garland, easy garland, ribbon bow garland DIY, ribbon garland, ribbon garland ideas

Get on the List

You’ll Also Love

DIY All-year Round Neutral Wreath
DIY Pretty Spring Wreath
10 Best Home Decor Tips On A Budget

Comments

  1. Molly | Transatlantic Notes says

    April 15, 2025 at

    I love little decor detail like this, especially if they can fit in seasonally or for particular holidays. I can see myself being able to do this, and loving how they turn out!

Next Post >

Crunchy Air Fryer Furikake Chickpeas

About Photo
Hey there friend! My name is Lynn and I'm a Canadian Content Creator who's focused on Minimal & Neutral Home Decor Inspo, Simple & Budget Friendly DIY Projects, All Things Holidays and Quick & Easy Recipes. I'm so happy you're here and I hope you'll find something that you love!

Categories

follow lynn

  • Facebook
  • Instagram
  • Pinterest
  • Twitter
  • YouTube

Search

Join Us!

Trending Now

Popular Posts

Links

  • About
  • Contact
  • Disclaimer
  • Privacy Policy
  • Terms & Conditions

Socials

  • Instagram
  • Youtube
  • Facebook
  • Twitter
  • Pinterest

Shop

  • Home Wall Art
  • Recipe Cards
  • Greeting Cards
  • Planner Templates

JOIN THE INNER CIRCLE

DIY all-year round wreath 🌲 Full video up on YouTu DIY all-year round wreath 🌲 Full video up on YouTube!! #diyhomedecor
Kimchi Avocado Toast 🥑🍞 This Kimchi Avocado Toast Kimchi Avocado Toast 🥑🍞

This Kimchi Avocado Toast is tangy, creamy, and perfect for a gut-friendly breakfast! Buttery avocado meets tangy, spicy kimchi for the perfect balance of richness and heat! All this layered on crispy toast makes for an easy, satisfying breakfast to start your day.

INGREDIENTS
* 1 Slice Sourdough Bread toasted 
* 1/2 Ripe Avocado mashed
* 1/4 Cup Kimchi chopped
* 1 Egg
* 1 Tbsp Butter or Oil to cook the egg
* Salt to taste

INSTRUCTIONS
* Toast the sourdough slice until your preferred toast level!
* Spread the mashed avocado evenly over the toast. Sprinkle lightly with salt.
* Heat butter or oil in a small pan over medium heat. Crack in the egg and cook to your preference (fried, sunny-side up, or over-easy).
* Spoon the chopped kimchi over the avocado layer.
* Top with the cooked egg, serve and enjoy!


avocado kimchi toast, avocado toast, egg avocado toast, kimchi toast, avocado toast ideas, avocado toast recipe, avocadotoast, avocado, kimchi, avocado recipe, avocado recipes, how to eat kimchi, toast, toast ideas, kimchi used cooking, toast recipes, breakfast toast
Kimchi Avocado Toast 🥑🍞 This Kimchi Avocado Toast Kimchi Avocado Toast 🥑🍞

This Kimchi Avocado Toast is tangy, creamy, and perfect for a gut-friendly breakfast! Buttery avocado meets tangy, spicy kimchi for the perfect balance of richness and heat! All this layered on crispy toast makes for an easy, satisfying breakfast to start your day.

INGREDIENTS
* 1 Slice Sourdough Bread toasted 
* 1/2 Ripe Avocado mashed
* 1/4 Cup Kimchi chopped
* 1 Egg
* 1 Tbsp Butter or Oil to cook the egg
* Salt to taste

INSTRUCTIONS
* Toast the sourdough slice until your preferred toast level!
* Spread the mashed avocado evenly over the toast. Sprinkle lightly with salt.
* Heat butter or oil in a small pan over medium heat. Crack in the egg and cook to your preference (fried, sunny-side up, or over-easy).
* Spoon the chopped kimchi over the avocado layer.
* Top with the cooked egg, serve and enjoy!�

avocado kimchi toast, avocado toast, egg avocado toast, kimchi toast, avocado toast ideas, avocado toast recipe, avocadotoast, avocado, kimchi, avocado recipe, avocado recipes, how to eat kimchi, toast, toast ideas, kimchi used cooking, toast recipes, breakfast toast
diy watercolor painted coffee station sign 🤎 full diy watercolor painted coffee station sign 🤎 full video up on youtube now! love you guysssss have a great weekend 😘
Chocolate Chip Cookie Dough Syrup 🍪☕️ This Chocol Chocolate Chip Cookie Dough Syrup 🍪☕️

This Chocolate Chip Cookie Dough Syrup is sweet and packed with cozy cookie flavor! Perfect for stirring into iced coffee, drizzling over desserts, or upgrading your favorite drinks, it’s an easy homemade syrup that tastes just like classic cookie dough in liquid form.

INGREDIENTS
* 1 Cup Water
* 1/2 Cup Brown Sugar
* 1/2 Cup Granulated Sugar
* 1 1/2 tsp Cocoa Powder
* 1/2 Tbsp Vanilla Extract
* 1/8 tsp Almond Extract I just put a drop! <3 
* 1/4 tsp Salt

INSTRUCTIONS
* In a small saucepan over medium heat, combine water, brown sugar, and granulated sugar.
* Whisk until the sugars dissolve completely and the mixture begins to gently simmer.
* Whisk in the cocoa powder until fully incorporated and smooth.
* Remove from heat and stir in vanilla extract, almond extract, and salt.
* Let cool completely before transferring to a sealed jar or bottle.


chocolate chip cookie dough syrup,iced coffee,cold brew,coffee syrup,chocolate syrup,cookie syrup,chocolate chip cookie dough,coffee at home,iced coffee recipe,cold brew recipe,syrup recipe,homemade syrup,cookie dough syrup
Chocolate Chip Cookie Dough Syrup 🍪☕️ This Chocol Chocolate Chip Cookie Dough Syrup 🍪☕️

This Chocolate Chip Cookie Dough Syrup is sweet and packed with cozy cookie flavor! Perfect for stirring into iced coffee, drizzling over desserts, or upgrading your favorite drinks, it’s an easy homemade syrup that tastes just like classic cookie dough in liquid form.

INGREDIENTS
* 1 Cup Water
* 1/2 Cup Brown Sugar
* 1/2 Cup Granulated Sugar
* 1 1/2 tsp Cocoa Powder
* 1/2 Tbsp Vanilla Extract
* 1/8 tsp Almond Extract I just put a drop! <3 
* 1/4 tsp Salt

INSTRUCTIONS
* In a small saucepan over medium heat, combine water, brown sugar, and granulated sugar.
* Whisk until the sugars dissolve completely and the mixture begins to gently simmer.
* Whisk in the cocoa powder until fully incorporated and smooth.
* Remove from heat and stir in vanilla extract, almond extract, and salt.
* Let cool completely before transferring to a sealed jar or bottle.�

chocolate chip cookie dough syrup,iced coffee,cold brew,coffee syrup,chocolate syrup,cookie syrup,chocolate chip cookie dough,coffee at home,iced coffee recipe,cold brew recipe,syrup recipe,homemade syrup,cookie dough syrup
baby steps to the cottagecore/whimsy/floral bedroo baby steps to the cottagecore/whimsy/floral bedroom of my dreams 🤎🌼 since we bought our house, we’ve not done anything to it so i’m excited to start making changes to make our house more ours!! 🧸 full video is up my on channel!! 

#bedroomupdate #bedroomdecor #bedroomdiy

Copyright © 2026 Lynn Mumbing Mejia · Theme by 17th Avenue