Hello! I'm Lynn.
  • About Me
  • Work With Me
  • Contact Me
  • Subscribe
  • Home
    • About
    • Contact
    • Disclaimer
    • Terms & Conditions
    • Privacy Policy
    • Subscribe
      • Work With Me
        • Media Kit
        • Portfolio and Samples
  • diy
  • lifestyle
    • home decor
  • recipes
  • gifts, parties & holidays
  • health & wellness with lynn

Lynn Mumbing Mejia

Crafting coziness, one recipe, DIY project, and holiday celebration at a time.

diy · January 10, 2022

How To Develop Patience When Doing DIY Crafts | GUEST POST

*This post may contain affiliate or sponsored links, which means I may get paid or receive a commission if you purchase through my link, at no extra cost to you!*

*This is a guest post*

Read more for all the details on How To Develop Patience When Doing DIY Crafts.

PIN How To Develop Patience When Doing DIY Crafts FOR LATER:
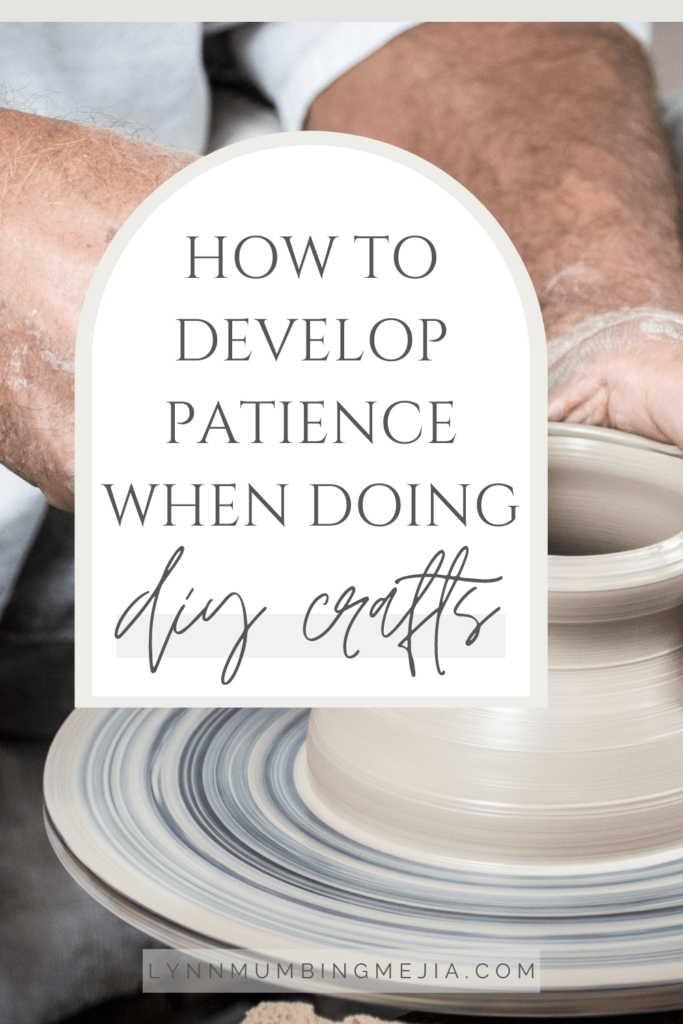
How To Develop Patience When Doing DIY Crafts - Pin 1

Today I would like to talk about something we would need to have when crafting anything. If we don’t have it, things might not last long. Maybe we won’t see the result of our work. This is something that will take time to master, but it will be worth it and make crafting so much fun. This is how to develop patience when doing DIY crafts.

Some people would stop crafting because they run out of patience. And I will explain everything about it and when it would happen. What’s the reason and everything. Keep reading to know more about it. Maybe you can develop it and make crafting more fun for you.

Table of Contents

Toggle
  • HERE IS HOW TO DEVELOP PATIENCE WHEN DOING DIY CRAFTS
    • Doing more crafts
    • Take deep breath and remind yourself
    • Don’t set expectations
    • Work at a normal pace
    • Do long crafts in parts

HERE IS HOW TO DEVELOP PATIENCE WHEN DOING DIY CRAFTS

When we talk about crafting, patience is a big part of it. And it can make crafting fun or an unpleasant experience for us. Therefore, developing and how to develop patience when doing DIY crafts, it is important to enjoy crafting. It’s easy to develop it, but it might take some time.

If you are a crafter, you would know more about how to develop patience when doing DIY crafts. But, we would need to develop patience for moments when something doesn’t work for the first and take a lot of attempts. This is something that would happen more often when crafting. It can get frustrating a bit, but if we develop patience, it wouldn’t be as bad as when we don’t have patience.

A project can take a long time to see the finished results. And that’s fine, but if we are impatient, we will stop before even we get to the last step of crafting. That’s another thing we need patience with when crafting. You can imagine how it would be fun when we develop it. And here on how to develop patience when doing DIY crafts, I will share with you how to do that.

Something I like about crafting is when you don’t have patience. You can start with short and quick crafts to get familiar with crafting. Don’t let yourself miss on the fun when you want only because of not having good patience. I’m going to talk more about this soon.

Developing patience can take time, and that’s normal. As you keep developing it, you will enjoy crafting more. It will be easy for you to finish long or short projects.

This works for crafting, but also if you are doing any other DIY stuff. I think it can be similar and these tips on how to develop patience when doing DIY crafts will help you with that as well. Well, you can share your experience with it after reading this post on how to develop patience when doing DIY crafts.

Doing more crafts

If you want to develop patience and enjoy more crafts. For how to develop patience when doing DIY crafts, you will need to do more crafts. Even if you don’t have good patience. Start with short crafts and slowly work your way to doing long and amazing DIY crafts. This will help you get familiar with the moments you would need to be patient.

Don’t go straight to the complicated crafts. These will need a lot of patience sometimes and can make you think crafting is boring. As you keep doing the easy crafts, things will get better for you when crafting more complicated ideas. And that’s why you need to do the easy first. That’s one important for how to develop patience when doing DIY crafts.

It doesn’t matter what type of crafts. However, if you have a specific type of crafts that you want to keep doing. Then, recommend you focus on it, but with simple ideas at first. And then start with the more complicated ones. This way, you give yourself time to develop it.

This is what I mean when I said it will take some time to master it. But you will still enjoy crafting until you can craft complicated projects, maybe even long ones. You still would need to be patient with them as well. And it will be worth it in the end because it will be so much fun crafting.

Choose simple and quick ideas and keep doing them for a while. Then, when you feel you are ready to make it more complicated and longer. You can do it but keep it as levels and as you level up, it gets more complicated. Don’t rush the process.

Take deep breath and remind yourself

Another good thing to do that will help you develop patience is taking a deep breath. As you keep doing crafts. Some things might not work as you planned, even when crafting simple ideas. Remember, always take a deep breath and remind yourself that it’s ok.

It’s part of the process, but it’s going to be fixed. Remind yourself that you can still do it. This way, you can motivate yourself to keep going. If you quit, you can never develop patience. Therefore, you must keep going, and this will help you with that.

Taking a deep breath will help you calm down. As you keep trying to do something and it doesn’t work as planned. Frustration hits and then you lose patience. So, take a deep breath as much as possible until you feel you are not frustrated anymore. And that’s a way of how to develop patience when doing DIY crafts.

Remember that developing patience for crafting is not so easy, but it’s possible. Because sometimes you will go through moments that you will feel quitting can be easier than keeping going. And that’s true, but in the end, it will be worth it if you continue. This applies to the rest of the tips on how to develop patience when doing DIY crafts.

Don’t set expectations

As I mention about patience. When you set expectations of how something would turn out. And it doesn’t happen, things won’t be good. Because then, disappointment will hit you, and therefore, you won’t continue to do things.

You want nothing that will ruin developing patience. If you don’t know, crafting sometimes can change in a moment just when you do something in a way you didn’t plan. So, expecting is not the best choice to do when crafting or even doing any DIY project.

Just go through the process and enjoy it. When something doesn’t work as you planned. You can change the plan that can help you get the same results. Maybe redo it again to fix the problem. However, if you expect things and it doesn’t happen, it will be difficult unless you have firm determination.

It’s best to work and get things done, expecting no results. This way, whatever the outcome, you still have the mental health to fix it. And keep working on it. Because if you get disappointed with the result, and it wasn’t as you expected. It will be difficult to even finish the project.
How To Develop Patience When Doing DIY Crafts

Work at a normal pace

Some people want to rush to get things done quickly. Especially when crafting quick projects and that’s not great. You need to work at a normal pace. This way, you get used to working slow, and that’s one thing things we need to have patience for.

This would be great when you start. It might be quick projects, but also doing at a normal pace will help to develop patience. Because some people would rush the process and want to get results fast. However, if you want to get perfect results, you need to practice this.

You might think that it’s easy to speed things up. But doing this will help you develop patience. If you can do this, work at a slow pace. Also, when there is an extensive project, you won’t be in a rush to get it done. Because you are used to working at a normal pace.

It brings us to the next which you can then practice working on slow pace projects. This way, you can develop patience and don’t feel you are not getting any results. Results come best when you not rushing. If you have something important, I don’t recommend you do crafting until you get it done.

No matter how short or long the project is, work on it like you have nothing to do after it. Plan everything, draw steps and do all necessary work without thinking you need to get it done quickly. I used to do this before and it didn’t help me when I have complicated and long projects.

Continue reading How To Develop Patience When Doing DIY Crafts…

Do long crafts in parts

When you have long crafts and you want to craft them. Well, before you plan anything. Remember that you can do it in parts. For each part, you can finish some steps until you finish it. Going with this thinking will help you get started. Because sometimes we feel lazy doing them because of how long it is and how much time it will take. So, this is good for how to develop patience when doing DIY crafts.

Waiting for a craft to get done is also a good way to develop patience. I would start one and can’t wait to see the finished results. Don’t rush the process to see the finished results so fast. You can enjoy the process and finish it as perfectly as possible.

Make this a practice every day to do part of the project and learn how to develop patience when doing DIY crafts. Maybe you can find something new that can help you get things done quickly, but remember doing it perfectly is better than quick.

If there is something that will help to develop patience when crafting. This would be one of them. You might get bored and want to stop. But, it’s going to be worth it in the end if it’s an excellent project. And even if it doesn’t work, you will have experience and more patience from trying to finish it. However, it will work most of the time.

About the blogger:

My name is Frank and I go by Fransic verso on the internet. Started blogging when I was a kid in middle school. I wasn’t so serious about blogging when I started for a few years. And I decided to make it my business later when I got more experience. I’m the owner of Querianson and I blog about DIY craft, sharing awesome ideas with everyone. Also, talking about blogging tips. Tips for self-development to help other bloggers and people to make blogging and life better and easier. I’m on Twitter if you want to follow me.

A huge Thank you to Frank for this guest post! Thanks for reading!

Xo,

Lynn

This blog post is all the details on How To Develop Patience When Doing DIY Crafts.

P.S: If you haven’t read my most recent post, click here!

PIN How To Develop Patience When Doing DIY Crafts FOR LATER:
How To Develop Patience When Doing DIY Crafts - Pin 2

If you liked reading How To Develop Patience When Doing DIY Crafts, you might like these are well!

How to plan a DIY Craft Project from Scratch

DIY Trendy Bendy Candles

Minimalist Boho Tassel Decor

Easy Neutral Paper Pumpkin Garland

This is the end of How To Develop Patience When Doing DIY Crafts.

Posted In: diy · Tagged: arts and crafts to do at home, craft projects, craft projects for adults, DIY, DIY craft projects, diy home organization, DIY projects, DIYcreations, Easy DIY, Easy DIY crafts, fun crafts, fun diy projects for adults, planning DIYs, planning projects

Get on the List

You’ll Also Love

DIY Watercolor Home Cafe Sign
DIY Easy Spring Stickers
DIY Pretty Spring Wreath

Comments

  1. Headphonesthoughts says

    January 12, 2022 at

    Good reminder to take your time and plan it out. Its good to take breaks and really plan out the craft.

    • Lynn Mumbing Mejia says

      January 24, 2022 at

      Agreed! Thanks for reading! 🙂

  2. Julia says

    January 13, 2022 at

    This post is brilliant! The read I didn’t know I needed. Not having expectations is a great idea. I always have a picture-perfect result in mind when I start doing crafts and get so frustrated when what I make doesn’t look just like what I imagined… Thank you for this post!

    Julia x

    • Lynn Mumbing Mejia says

      January 24, 2022 at

      Aw, thank you! This is super sweet <3

  3. Lovely says

    January 13, 2022 at

    These are all cool tips! Breaking longer craft projects into smaller parts is a nice idea.
    xoxo
    Lovely
    http://www.mynameislovely.com

    • Lynn Mumbing Mejia says

      January 24, 2022 at

      Thank you so much for reading!

  4. Danielle says

    January 15, 2022 at

    I loved reading this post!

    Danielle

    • Lynn Mumbing Mejia says

      January 24, 2022 at

      Thank you!

Next Post >

Ube Cold Foam

About Photo
Hey there friend! My name is Lynn and I'm a Canadian Content Creator who's focused on Minimal & Neutral Home Decor Inspo, Simple & Budget Friendly DIY Projects, All Things Holidays and Quick & Easy Recipes. I'm so happy you're here and I hope you'll find something that you love!

Categories

follow lynn

  • Facebook
  • Instagram
  • Pinterest
  • Twitter
  • YouTube

Search

Join Us!

Trending Now

Popular Posts

Links

  • About
  • Contact
  • Disclaimer
  • Privacy Policy
  • Terms & Conditions

Socials

  • Instagram
  • Youtube
  • Facebook
  • Twitter
  • Pinterest

Shop

  • Home Wall Art
  • Recipe Cards
  • Greeting Cards
  • Planner Templates

JOIN THE INNER CIRCLE

Poppy Seed Almond Muffins 🤎 Have you ever tried C Poppy Seed Almond Muffins 🤎

Have you ever tried Costco’s almond poppy seed muffins? If you have, this is a copycat version of it! It’s my fav muffin and I knew I had to recreate it at home!

These Poppy Seed Almond Muffins are soft, fluffy, and bursting with sweet almond flavor. With a tender crumb and delicate crunch from the poppy seeds, they’re the perfect cozy bakery-style treat for breakfast, snacking, or coffee breaks.

INGREDIENTS
* 2 1/4 Cups Flour
* 1/2 tsp Salt
* 1/2 tsp Baking Soda
* 1/2 tsp Baking Powder
* 3/4 Cup Oil 
* 1 Cup White Sugar
* 2 Eggs
* 1 tsp Vanilla Extract
* 1 Tbsp Almond Extract 
* 3/4 Cup Sour Cream
* 1/4 Cup Milk
* 2 Tbsp Poppy Seeds
* 1/4 Cup Slivered Almonds sprinkle on top

INSTRUCTIONS
* Preheat oven to 350°F and line a 12-cup muffin tin with liners or lightly grease it.
* In a large bowl, whisk together oil, sugar, eggs, vanilla extract, almond extract, sour cream, and milk until smooth.
* Add flour, salt, baking soda, and baking powder directly into the same bowl. Gently mix until just combined.
* Fold in the poppy seeds.
* Divide the batter evenly between the 12 muffin cups and sprinkle slivered almonds on top.
* Bake for 25 minutes, or until a toothpick inserted into the center comes out clean.
* Let cool slightly before serving.


almond poppy seed muffins, poppy seed muffins, costco copycat, costco copycat recipes, almond muffins, easy muffin recipes, simple muffins, poppy seed almond muffins
Poppy Seed Almond Muffins 🤎 Have you ever tried C Poppy Seed Almond Muffins 🤎

Have you ever tried Costco’s almond poppy seed muffins? If you have, this is a copycat version of it! It’s my fav muffin and I knew I had to recreate it at home!

These Poppy Seed Almond Muffins are soft, fluffy, and bursting with sweet almond flavor. With a tender crumb and delicate crunch from the poppy seeds, they’re the perfect cozy bakery-style treat for breakfast, snacking, or coffee breaks.

INGREDIENTS
* 2 1/4 Cups Flour
* 1/2 tsp Salt
* 1/2 tsp Baking Soda
* 1/2 tsp Baking Powder
* 3/4 Cup Oil 
* 1 Cup White Sugar
* 2 Eggs
* 1 tsp Vanilla Extract
* 1 Tbsp Almond Extract 
* 3/4 Cup Sour Cream
* 1/4 Cup Milk
* 2 Tbsp Poppy Seeds
* 1/4 Cup Slivered Almonds sprinkle on top

INSTRUCTIONS
* Preheat oven to 350°F and line a 12-cup muffin tin with liners or lightly grease it.
* In a large bowl, whisk together oil, sugar, eggs, vanilla extract, almond extract, sour cream, and milk until smooth.
* Add flour, salt, baking soda, and baking powder directly into the same bowl. Gently mix until just combined.
* Fold in the poppy seeds.
* Divide the batter evenly between the 12 muffin cups and sprinkle slivered almonds on top.
* Bake for 25 minutes, or until a toothpick inserted into the center comes out clean.
* Let cool slightly before serving.


almond poppy seed muffins, poppy seed muffins, costco copycat, costco copycat recipes, almond muffins, easy muffin recipes, simple muffins, poppy seed almond muffins
Spicy Canned Tuna Sushi Bake 🐟🍣 This Spicy Canned Spicy Canned Tuna Sushi Bake 🐟🍣

This Spicy Canned Tuna Sushi Bake is creamy, savory, and packed with bold flavor! Made with simple pantry ingredients, it’s an easy, budget-friendly twist on sushi! It is perfect for sharing, scooping with seaweed, and satisfying all your sushi cravings at home.

INGREDIENTS
* 1 Can Tuna drained
* 2 Tbsp Sriracha
* 1/4 Cup Mayo
* 1 Tbsp Sesame Oil
* 2 Tbsp Furikake
* 1 Cup White Rice cooked
* 1 tsp Sugar
* 1/2 Tbsp Rice Vinegar
* 1 Packet Seasoned Seaweed

INSTRUCTIONS
* Preheat your oven to 400F and prepare a 6-inch baking pan.
* In a bowl, add in your rice and heat it in the microwave for 1 minute. This is so it’s easier for the sugar and rice vinegar to soak in. Add in your rice vinegar and sugar and mix well.
* Next, add in the rice mixture to your baking pan in an even layer. Sprinkle furikake on top.
* Use the same bowl that you mixed up your rice in and add in your drained canned tuna, sesame oil, sriracha, and mayo and mix well.
* Add the layer of saucy tuna on your rice layer evenly on top. Sprinkle with furikake.
* Bake at 400F for 20-30 minutes or until the top is golden brown.
* Serve with a side of seasoned seaweed and enjoy!


sushi bake canned tuna, spicy tuna sushi bake, tuna sushi bake, spicy tuna sushi, sushi bake tuna, spicy tuna mayo sushi, canned tuna, sushi bake, easy sushi bake, sushi bake dish, sushi bake asmr, baked sushi, easy baked sushi, sushi bake tutorial, spicy tuna, easy sushi bake ideas, sushi bake steps, viral sushi bake, sushi bake how to, sushi bake trend, sushi baked recipe, easy sushi bake recipe, how to make a sushi bake, sushi bake recipe, tiktok sushi bake, sushi bake tiktok
Spicy Canned Tuna Sushi Bake 🐟🍣 This Spicy Canned Spicy Canned Tuna Sushi Bake 🐟🍣

This Spicy Canned Tuna Sushi Bake is creamy, savory, and packed with bold flavor! Made with simple pantry ingredients, it’s an easy, budget-friendly twist on sushi! It is perfect for sharing, scooping with seaweed, and satisfying all your sushi cravings at home.

INGREDIENTS
* 1 Can Tuna drained
* 2 Tbsp Sriracha
* 1/4 Cup Mayo
* 1 Tbsp Sesame Oil
* 2 Tbsp Furikake
* 1 Cup White Rice cooked
* 1 tsp Sugar
* 1/2 Tbsp Rice Vinegar
* 1 Packet Seasoned Seaweed

INSTRUCTIONS
* Preheat your oven to 400F and prepare a 6-inch baking pan.
* In a bowl, add in your rice and heat it in the microwave for 1 minute. This is so it’s easier for the sugar and rice vinegar to soak in. Add in your rice vinegar and sugar and mix well.
* Next, add in the rice mixture to your baking pan in an even layer. Sprinkle furikake on top.
* Use the same bowl that you mixed up your rice in and add in your drained canned tuna, sesame oil, sriracha, and mayo and mix well.
* Add the layer of saucy tuna on your rice layer evenly on top. Sprinkle with furikake.
* Bake at 400F for 20-30 minutes or until the top is golden brown.
* Serve with a side of seasoned seaweed and enjoy!�

sushi bake canned tuna, spicy tuna sushi bake, tuna sushi bake, spicy tuna sushi, sushi bake tuna, spicy tuna mayo sushi, canned tuna, sushi bake, easy sushi bake, sushi bake dish, sushi bake asmr, baked sushi, easy baked sushi, sushi bake tutorial, spicy tuna, easy sushi bake ideas, sushi bake steps, viral sushi bake, sushi bake how to, sushi bake trend, sushi baked recipe, easy sushi bake recipe, how to make a sushi bake, sushi bake recipe, tiktok sushi bake, sushi bake tiktok
Banana Bread Syrup 🍌 This Banana Bread Syrup is Banana Bread Syrup 🍌 

This Banana Bread Syrup is warm, sweet, and full of cozy flavor just like your favorite homemade loaf in liquid form! Perfect for coffee, pancakes, waffles, or desserts, it’s an easy homemade syrup that adds a comforting, bakery-style touch to any treat 💛

INGREDIENTS
* 1/2 Cup White Sugar
* 1/2 Cup Brown Sugar
* 1 Mashed Ripe Banana
* 1 tsp Vanilla Extract
* 1/2 tsp Cinnamon
* 1 Cup Water

INSTRUCTIONS
* In a small saucepan over medium heat, combine water, white sugar, and brown sugar.
* Stir until the sugars fully dissolve and the mixture begins to gently simmer.
* Add the mashed banana and cinnamon. Simmer for 5–8 minutes, stirring occasionally.
* Remove from heat and stir in the vanilla extract.
* Strain the syrup (optional for a smoother texture) and let cool.
* Transfer to a jar or bottle and store in the fridge.

banana bread syrup, banana bread, banana latte, banana bread latte, banana bread matcha latte, copycat starbucks banana bread matcha latte, banana bread breve, banana bread, copycat starbucks iced banana bread matcha latte, copycat starbucks banana bread matcha, copycat starbucks iced banana bread matcha recipe, iced latte, banana milk, banana coffee, banana coffee recipe, fun latte recipes, banana coffee syrup,
Banana Bread Syrup 🍌 This Banana Bread Syrup is Banana Bread Syrup 🍌 

This Banana Bread Syrup is warm, sweet, and full of cozy flavor just like your favorite homemade loaf in liquid form! Perfect for coffee, pancakes, waffles, or desserts, it’s an easy homemade syrup that adds a comforting, bakery-style touch to any treat 💛

INGREDIENTS
* 1/2 Cup White Sugar
* 1/2 Cup Brown Sugar
* 1 Mashed Ripe Banana
* 1 tsp Vanilla Extract
* 1/2 tsp Cinnamon
* 1 Cup Water

INSTRUCTIONS
* In a small saucepan over medium heat, combine water, white sugar, and brown sugar.
* Stir until the sugars fully dissolve and the mixture begins to gently simmer.
* Add the mashed banana and cinnamon. Simmer for 5–8 minutes, stirring occasionally.
* Remove from heat and stir in the vanilla extract.
* Strain the syrup (optional for a smoother texture) and let cool.
* Transfer to a jar or bottle and store in the fridge.�
banana bread syrup, banana bread, banana latte, banana bread latte, banana bread matcha latte, copycat starbucks banana bread matcha latte, banana bread breve, banana bread, copycat starbucks iced banana bread matcha latte, copycat starbucks banana bread matcha, copycat starbucks iced banana bread matcha recipe, iced latte, banana milk, banana coffee, banana coffee recipe, fun latte recipes, banana coffee syrup,
made my DIY pink cute phone charm a couple weeks a made my DIY pink cute phone charm a couple weeks ago and i’m still obsessed!! how cute is this 🌸 #diyphonecharm #phonecharm
Mediterranean Chicken Quinoa Salad 🥗 This Mediter Mediterranean Chicken Quinoa Salad 🥗

This Mediterranean Chicken Quinoa Salad is fresh, hearty, and full of vibrant flavor! Packed with juicy chicken, fluffy quinoa, and salty feta and crunchy veggies, it’s tossed in a balsamic vinegar dressing for a healthy, satisfying meal that’s perfect for meal prep or easy lunches.

INGREDIENTS
* 2 1/2 Cups Cooked Quinoa
* 2 1/2 Cups Cooked Chicken Breast 
* 2 Cucumbers diced
* 3 Tomatoes diced
* 1 1/2 Cups Feta crumbled
* 1/4 Cup Olive Oil
* 1/2 Cup Balsamic Vinegar
* 1 tsp Black Pepper
* Salt to taste

INSTRUCTIONS
* In a large bowl, combine the cooked quinoa and cooked chicken breast.
* Add the diced cucumbers, tomatoes, and crumbled feta.
* In a small bowl, whisk together olive oil, balsamic vinegar, black pepper, and salt.
* Pour the dressing over the salad and toss until everything is well coated.
* Taste and adjust seasoning if needed.
* Serve immediately or chill in the fridge for 2 hours for best flavor.

mediterranean quinoa salad, medittareanean quinoa salad, mediterranean salad, mediterranean salad recipe, quinoa salad, quinoa salad meal prep, chicken quinoa recipe, easy quinoa salad, how to make a quinoa salad, healthy quinoa salad, quinoa chicken recipe, cucumber quinoa salad, best quinoa salad, how to make quinoa salad, quinoa salad with feta cheese, greek quinoa salad, quinoa salad recipe, easy meal prep, easy lunches,

Copyright © 2026 Lynn Mumbing Mejia · Theme by 17th Avenue