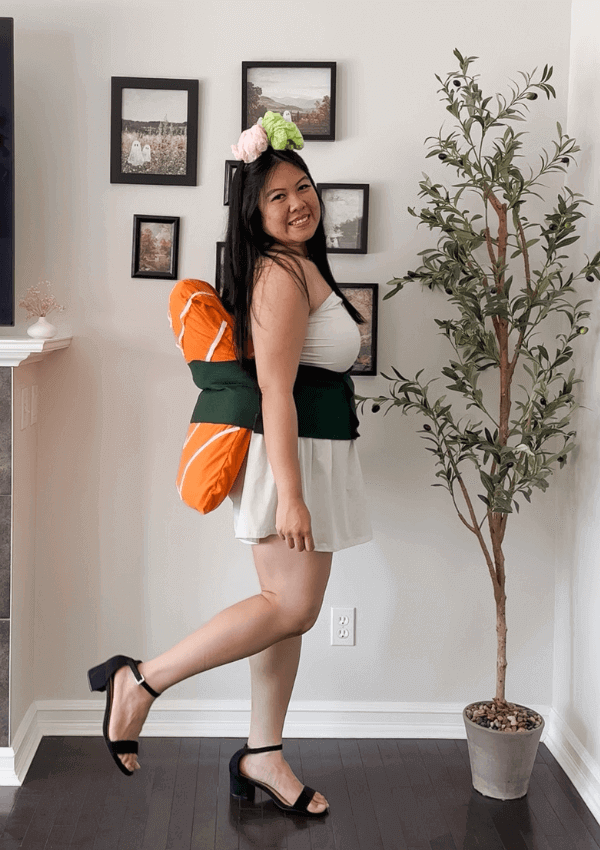
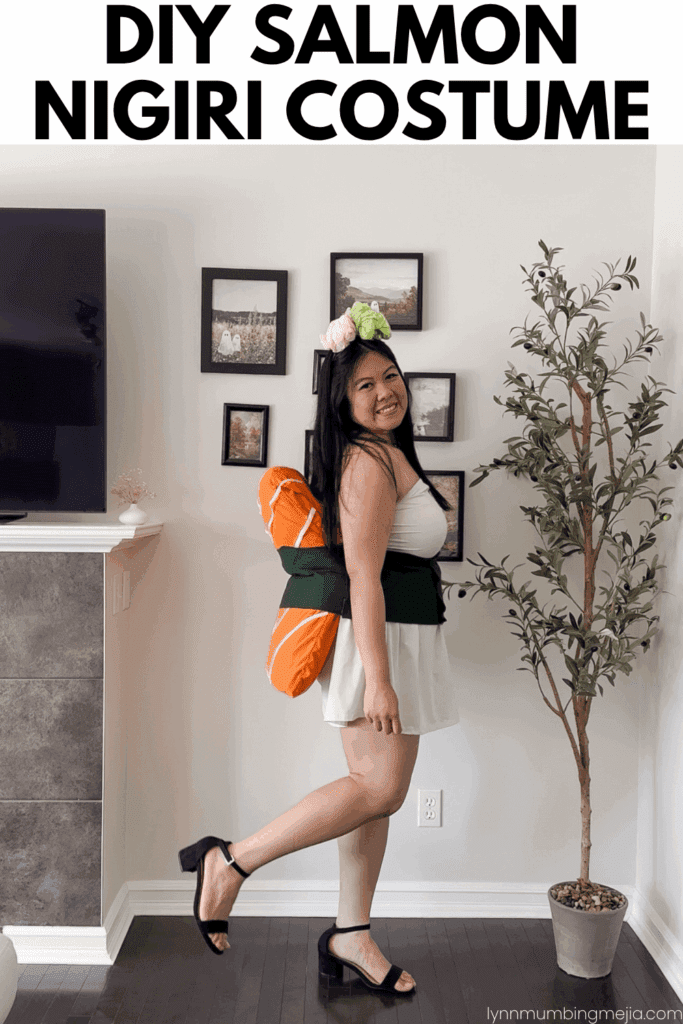
DIY Salmon Nigiri Costume
Read more for all the details on how to put together a DIY Salmon Nigiri Costume.
I’m a sushi girl through and through! I always say to my family that if you’re going to make me pick a restaurant, it’s going to be sushi or pho! Those are my two favourite foods! I’ve seen super cute sushi costumes all over Pinterest and knew that I wanted to recreate them too! 🍣
PIN DIY Salmon Nigiri Costume FOR LATER:
This DIY Salmon Nigiri Costume is accompanied by a YouTube Tutorial. If you haven’t subscribed to me on YouTube, don’t forget to!
HERE IS HOW TO MAKE A DIY SALMON NIGIRI COSTUME:
WHERE CAN YOU FIND THE MATERIALS TO MAKE THIS DIY SALMON NIGIRI COSTUME?
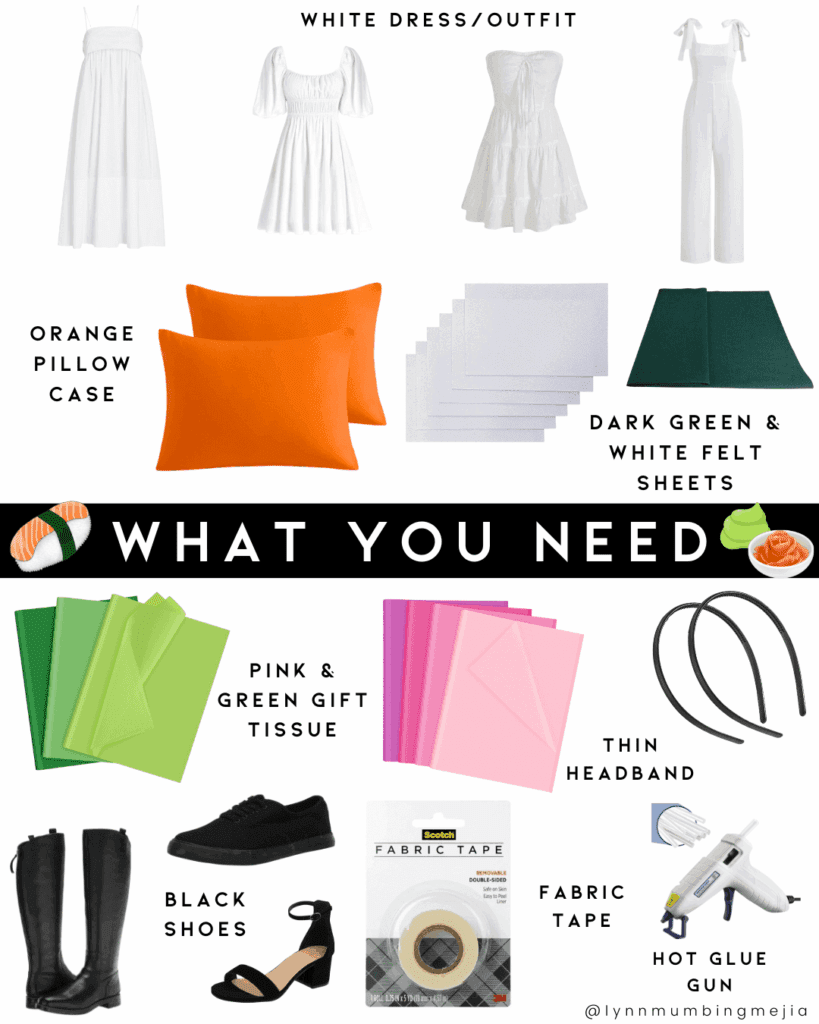
Everything you need to make this DIY costume is super easy to find! I either already had some stuff at home or bought some stuff off of Amazon or my local dollar store. The whole costume all together cost me about $30 but that’s because I purchased fresh orange pillow cases! You can thrift some items too but I thought it would be okay to keep spare new pillow cases at home as well for when we have guests!
WHAT ARE THE MATERIALS/EQUIPMENT NEEDED FOR THIS DIY SALMON NIGIRI COSTUME?
CAN I SUBSTITUTE ANY MATERIALS OUT?
You sure can! Every time I have a new idea or get inspo from something I see online, I like to think about the process and the materials myself so get creative with this! With whatever you already have to save money and you can substitute whatever you need for this. You can also change up the fish!
For this one, I used an orange pillow case for salmon but you can also do tuna or ebi or tamago too! Get super creative with this! I also found that some people use loofahs for their wasabi and ginger! I just bought some gift tissue from the dollar store but loofahs are great too if you can find these exact colors for cheap!
DOES THE COSTUME LAST TO USE FOR THE FOLLOWING YEARS?
Absolutely! I always use fabric tape because I like reusing pieces of my costumes again for other things or regular wear. Fabric tape is awesome because it doesn’t damage fabric! If you want it to stick way better for years to come, you can also just use extra strength fabric glue to glue everything together! I took a part the costume after so I can reuse my black head and white dress but this can be easily put together again!
HOW LONG DOES IT TAKE TO PUT TOGETHER?
This costume took me a bit longer as cutting and glueing the thin white strips for the salmon was a bit tedious but it took me all together about 3 hours! I also got my husband to help me strap the salmon pillow onto my back and used rope to hold it in place! I definitely recommend giving yourself time to do this through a couple of days though and not when you’re in a rush as it can be stressful!
INSPIRATIONS FOR THIS COSTUME?
I LOVE all food costumes! I am a foodie myself, so it’s always so fun and easy to put together food-inspired costume DIYs! I’ve been wanting to make this sushi costume for a while now, and finally got the time to do so! I absolutely loved how it turned out and in the future, I’m looking forward to make more of my favourite foods into costumes!
Here are some of the costume elements you can buy online!

STEPS TO PUT TOGETHER THIS DIY SALMON NIGIRI COSTUME:
Step 1: Grab 1 piece of pink and 1 piece of green gift tissue and crumple it into balls.
Once you have 2 same-sized balls, hot glue it onto your headband! I placed mine on right in the middle! The balls do not have to be perfect but roughly as rounded as you possibly can.
Step 2: Cut about 10 thin long white strips and place them onto the orange pillow case.
You may have a different pillow case and size as me so definitely measure to what you have! Cut enough long white strips so that you can have about 10 “V”‘s to go down the pillow case. Once you’ve cut all the white strips, use some fabric tape or glue gun to place them on the pillow!
Step 3: Cut a piece of “nori” from the dark green fabric tape to wrap yourself around.
Measure this against your abdomen size with the salmon pillow on! I measured about 11″ thick, then just cut enough so that it wraps around me!
Step 4: Put the costume together!
Wear your wasabi and ginger headband, salmon pillow and wrap your nori sheet and secure it tightly with some rope or anything you have on hand! I used my robe tie, then tape the nori sheet around you as well. Accessorize and enjoy!
Thank you so much for following this blog post on how to create a DIY Salmon Nigiri Costume!
Xo,
Lynn
Are you going to try making this DIY Salmon Nigiri Costume?! Don’t forget to tag me if you do!

This blog post is all the details on DIY Salmon Nigiri Costume.
P.S: If you haven’t read my most recent post, click here!
PIN DIY Salmon Nigiri Costume FOR LATER:

If you liked reading DIY Salmon Nigiri Costume, you might like these are well!
This is the end of DIY Salmon Nigiri Costume.