Hello! I'm Lynn.
  • About Me
  • Work With Me
  • Contact Me
  • Subscribe
  • Home
    • About
    • Contact
    • Disclaimer
    • Terms & Conditions
    • Privacy Policy
    • Subscribe
      • Work With Me
        • Media Kit
        • Portfolio and Samples
  • diy
  • lifestyle
    • home decor
  • recipes
  • gifts, parties & holidays
  • health & wellness with lynn

Lynn Mumbing Mejia

Crafting coziness, one recipe, DIY project, and holiday celebration at a time.

recipes · July 9, 2026

Easy S’mores Bark

*This post may contain affiliate or sponsored links, which means I may get paid or receive a commission if you purchase through my link, at no extra cost to you!*
Jump to Recipe Print Recipe

Read more for all the details on Easy S’mores Bark.

I’m not going to lie, I’m really not a summer girl! As much as I love the longer and brighter days, I honestly am over summer after a couple of years and yearn for Fall HOWEVER, I am a s’mores girl through and through and wanted to find my own easy at home solution! 🤭

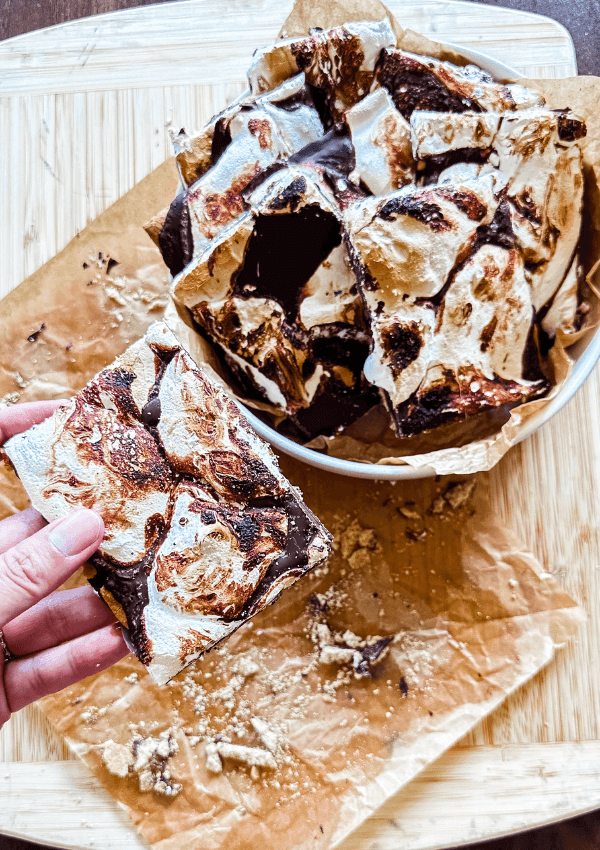
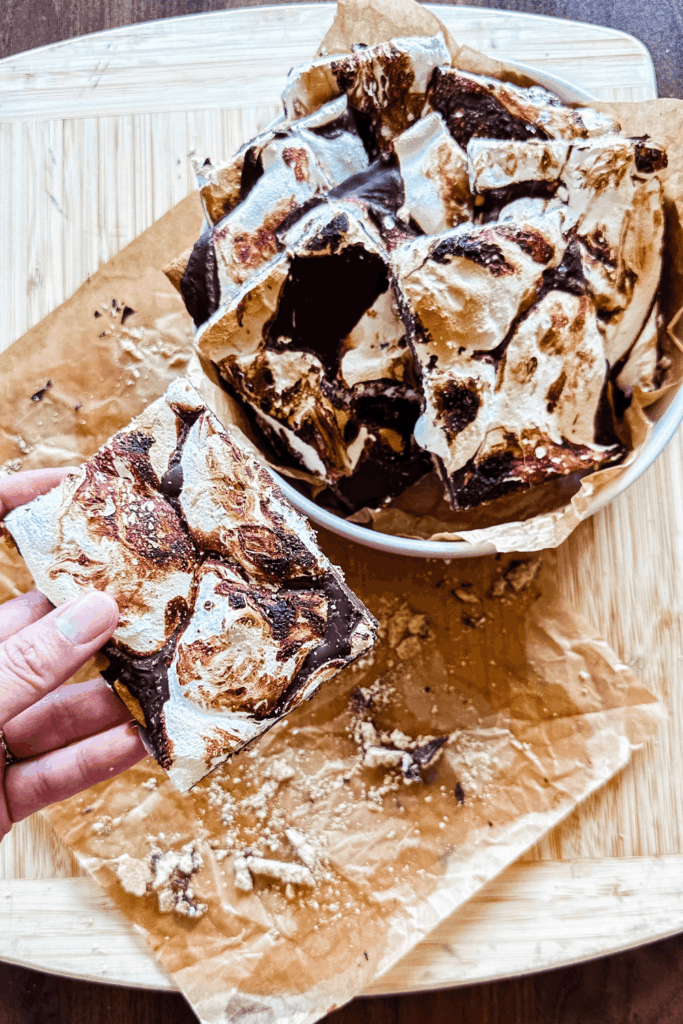
This Easy S’mores Bark is a no-bake treat that combines creamy chocolate, fluffy marshmallow fluff, and crunchy graham crackers into one irresistible dessert. With all the classic flavours of a campfire s’more but without the fire! It’s the perfect quick and easy sweet treat for parties, holidays, or whenever you’re craving a little nostalgia.

PIN Easy S’mores Bark FOR LATER:
This Easy S’mores Bark recipe is accompanied by a YouTube Tutorial. If you haven’t subscribed to me on YouTube, don’t forget to!

Table of Contents

Toggle
  • HERE IS HOW TO MAKE EASY S’MORES BARK:
    • WHERE CAN I FIND THESE INGREDIENTS?
    • WHAT ARE THE INGREDIENTS?
    • WHAT EQUIPMENT DO I NEED?
    • CAN I SUBSTITUTE/ADD ANYTHING OUT?
    • WHAT DOES EASY S’MORES BARK TASTE LIKE?
    • HOW LONG DOES IT KEEP FOR?
    • INSPIRATIONS FOR THIS RECIPE?
    • ANY OTHER NOTES?
    • Easy S’mores Bark
      • Ingredients  
      • Instructions 

HERE IS HOW TO MAKE EASY S’MORES BARK:

WHERE CAN I FIND THESE INGREDIENTS?

You only need 3 ingredients for this dessert bark and if you’re doing this in the summer like me, you’ll find lots of options in the grocery stores. Whenever summer rolls around, ingredients for BBQ’s, camping and cookout parties are all right in front of your face!

Luckily all of these items are located in the aisles too so they are non-perishable and will last a long time.

WHAT ARE THE INGREDIENTS?

The ingredients to make this yummy S’mores Bark are:

  • Marshmallow Fluff
  • Chocolate Bars – of your choice! I always love dark chocolate over any other chocolate!
  • Graham Crackers

WHAT EQUIPMENT DO I NEED?

I made this as easy as I possibly could, but I did want the chocolate to be melted so I could spread it more easily, so you’ll need a bowl to melt the chocolate in the microwave for a couple of minutes (30-second intervals). Then you’ll just need a sheet pan lined with parchment paper and a spoon to place the marshmallow fluff on!

Here are some of my Amazon kitchen items I use!

CAN I SUBSTITUTE/ADD ANYTHING OUT?

This recipe is the very basic s’mores recipe, so of course you can substitute or add anything out. Here are some ideas you can take to spruce up this recipe!

  • Berries! You can add berries on top while the chocolate and marshmallow fluff are still warm
  • Cherry jam or any other jam for more fruity vibes!
  • Butterscotch or caramel sauce – this is for the people with the ULTIMATE sweet tooth!
  • Peanut butter – as a certified peanut butter lover, honestly, why didn’t I think of this sooner!

WHAT DOES EASY S’MORES BARK TASTE LIKE?

S’mores bark tastes just like your favourite campfire treat in a crunchy, chocolatey bite. 🍫🔥✨

The smooth chocolate is rich and creamy, while the marshmallow fluff adds a soft, sweet, melt-in-your-mouth layer that mimics perfectly toasted marshmallows. The graham crackers provide a buttery crunch that ties everything together, creating the classic sweet, chocolatey, and marshmallow-filled flavour everyone loves.

Every bite is a delicious mix of creamy, crunchy, and gooey textures that feels nostalgic and indulgent like enjoying a s’more without needing a campfire. The great thing about this is that you still get the burnt marshmallow flavour, but it’s super easy to grab and go!

HOW LONG DOES IT KEEP FOR?

S’mores Bark is easy to store and stays fresh for days!

  • At room temperature: 5–7 days in an airtight container in a cool, dry place.
  • In the fridge: up to 2 weeks in an airtight container if you prefer a firmer texture.
  • In the freezer: up to 3 months when wrapped tightly and stored in a freezer-safe container or bag.

For the best taste and texture, let refrigerated or frozen bark sit at room temperature for 10–15 minutes before serving. This allows the chocolate to soften slightly while keeping the bark crisp and delicious. You can also just warm it up a little bit before eating if you prefer the warmth of an ooey-gooey s’mores!

INSPIRATIONS FOR THIS RECIPE?

When I was a little girl, I used to go camping all the time, but I’m not going to lie, as I got older, I was not having it with bugs and being outdoors, haha so I haven’t done a lot of camping since, but that doesn’t mean I don’t like camping food so I had to take matters into my own hands!

I made this s’mores bark to satisfy the craving but still have a burnt marshmallow taste! Honestly, this bark is so good, I could not stop eating it!

ANY OTHER NOTES?
Easy S’mores Bark

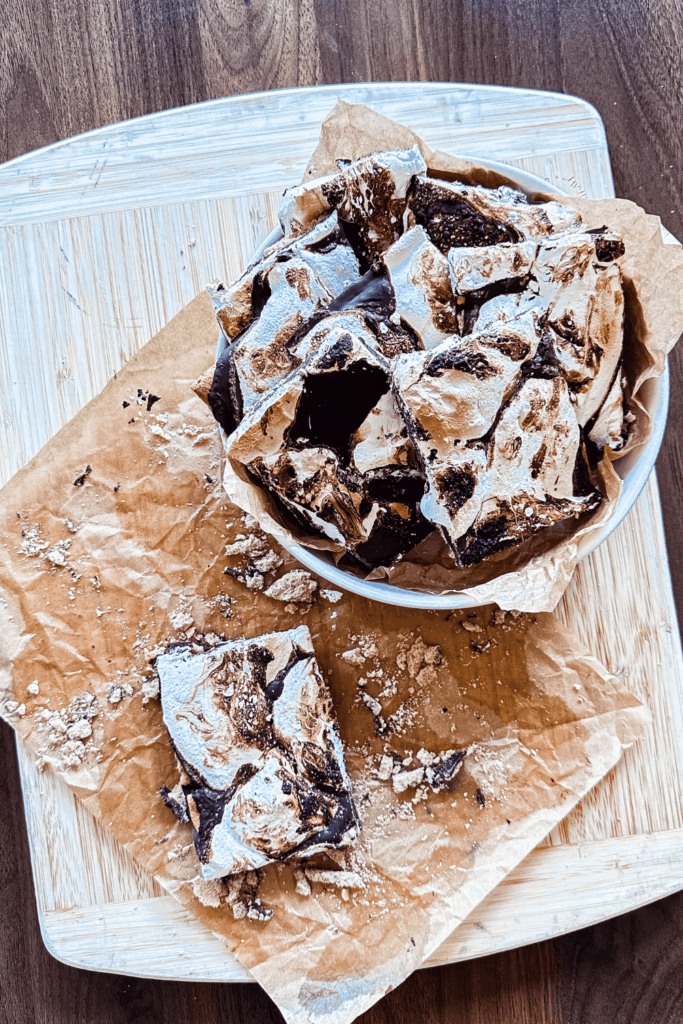
This Easy S'mores Bark is a no-bake treat that combines creamy chocolate, fluffy marshmallow fluff, and crunchy graham crackers into one irresistible dessert. With all the classic flavours of a campfire s'more but without the fire! It's the perfect quick and easy sweet treat for parties, holidays, or whenever you're craving a little nostalgia.
Print Recipe Pin Recipe
Prep Time 10 minutes mins
Cook Time 5 minutes mins
Chill 2 hours hrs
Course Dessert
Servings 12 Pieces

Ingredients
  

  • 1 1/2 Cup Marshmallow Fluff
  • 2 Chocolate Bars
  • 4 Sheets Graham Sheets or enough to fill a 10×8 inch sheet pan

Instructions
 

  • Line a 10×8-inch baking dish or sheet pan with parchment paper.
  • Arrange the graham cracker sheets in a single layer to cover the bottom of the pan, breaking them as needed to fit.
  • Melt the chocolate bars in the microwave in 20-second intervals, stirring between each interval until smooth.
  • Pour the melted chocolate over the graham crackers and gently spread it into an even layer.
  • Add marshmallow fluff and spread gently over the melted chocolate and graham crackers.
  • Broil s'mores bark in oven for 5 minutes or until marshmallows are charred to your desire! Watch out this happens really fast!
  • Refrigerate for 1–2 hours, or until the chocolate is completely set.
  • Lift the bark out of the pan using the parchment paper, then cut or break into pieces and serve.
Keyword Easy S’mores Bark

Thank you so much for reading to the end of this recipe! I hope you enjoy it as much as I do! <3

Xo,

Lynn

Are you going to try making this Easy S’mores Bark recipe?! Don’t forget to tag me if you do!

Tag Us - Easy S'mores Bark - Lynn Mumbing Mejia

This blog post is all the details on Easy S’mores Bark.

P.S: If you haven’t read my most recent post, click here!

PIN Easy S’mores Bark FOR LATER:
If you liked reading Easy S’mores Bark, you might like these as well!

Easy Smores Brownies

Pumpkin Smores Cookies

Pumpkin Spice Fall Chocolate Bark

This is the end of Easy S’mores Bark.
Shop The Post

Posted In: recipes · Tagged: easy smores, easy smores bark, marshmallow fluff, s'mores bark with marshmallow fluff, smores at home, smores bark, smores bark recipe, smores bars, smores dessert, smores with marshmallow fluff

Get on the List

You’ll Also Love

Mushroom Spinach Stuffed Chicken
Filipino Adobo-Inspired Soy Marinated Eggs
Easy Unsweetened Oat Milk
Next Post >

Dill Pickle Pasta Salad

About Photo
Hey there friend! My name is Lynn and I'm a Canadian Content Creator who's focused on Minimal & Neutral Home Decor Inspo, Simple & Budget Friendly DIY Projects, All Things Holidays and Quick & Easy Recipes. I'm so happy you're here and I hope you'll find something that you love!

Categories

follow lynn

  • Facebook
  • Instagram
  • Pinterest
  • Twitter
  • YouTube

Search

Join Us!

Trending Now

Popular Posts

Links

  • About
  • Contact
  • Disclaimer
  • Privacy Policy
  • Terms & Conditions

Socials

  • Instagram
  • Youtube
  • Facebook
  • Twitter
  • Pinterest

Shop

  • Home Wall Art
  • Recipe Cards
  • Greeting Cards
  • Planner Templates

JOIN THE INNER CIRCLE

This Dill Pickle Pasta Salad is creamy, tangy, and This Dill Pickle Pasta Salad is creamy, tangy, and packed with crunchy pickle goodness in every bite! Tossed with tender pasta and a flavorful, zesty dressing, it’s the perfect side dish for barbecues, potlucks, picnics, or easy weekday lunches. 🥗🥒

INGREDIENTS
3 Cups Cooked Pasta
1 Cup Dill Pickles diced
1 Cup Cheddar Cheese diced
1 Cup Crispy Bacon crumbled
1 Tbsp Fresh Dill
1/2 Cup Sour Cream
1/4 Cup Pickle Juice
1 Packet Ranch Dressing Seasoning Packet
2 Tbsp Mayo

INSTRUCTIONS
1. In a large bowl, whisk together the sour cream, pickle juice, ranch seasoning packet, and mayonnaise until smooth.
2. Next, combine the cooked pasta, chopped pickles, cheddar cheese, crispy bacon, and fresh dill.
3. Toss the pasta mixture with sauce and toss until everything is evenly coated.
4. Cover and refrigerate for at least 4 hours to allow the flavors to come together. (Though, you can eat it immediately if you’d like!)
5. Give the salad a final stir before serving and garnish with extra dill or chopped pickles if desired.
6. Serve and enjoy!

dill pickle pasta salad, dill pickle pasta salad recipe, dill pickle ranch pasta salad, dill pickle pasta salad spaceships, dill pickle pasta salad with cheese, pickle pasta salad, dill pickle pasta, pasta salad with pickles, dillpicklepastasalad, quick pasta salad, pasta salad, dill pickle, pickle salad, pasta salad meal prep, pasta salad ideas, dill pickles, pasta salad recipes tasty, pickle pasta recipe, easy pasta salad, cold pasta salad, best pasta salad, dill pickle food, homemade pasta salad, ranch pasta salad
This Dill Pickle Pasta Salad is creamy, tangy, and This Dill Pickle Pasta Salad is creamy, tangy, and packed with crunchy pickle goodness in every bite! Tossed with tender pasta and a flavorful, zesty dressing, it’s the perfect side dish for barbecues, potlucks, picnics, or easy weekday lunches. 🥗🥒

INGREDIENTS
3 Cups Cooked Pasta
1 Cup Dill Pickles diced
1 Cup Cheddar Cheese diced
1 Cup Crispy Bacon crumbled
1 Tbsp Fresh Dill
1/2 Cup Sour Cream
1/4 Cup Pickle Juice
1 Packet Ranch Dressing Seasoning Packet
2 Tbsp Mayo

INSTRUCTIONS
1. In a large bowl, whisk together the sour cream, pickle juice, ranch seasoning packet, and mayonnaise until smooth.
2. Next, combine the cooked pasta, chopped pickles, cheddar cheese, crispy bacon, and fresh dill.
3. Toss the pasta mixture with sauce and toss until everything is evenly coated.
4. Cover and refrigerate for at least 4 hours to allow the flavors to come together. (Though, you can eat it immediately if you’d like!)
5. Give the salad a final stir before serving and garnish with extra dill or chopped pickles if desired.
6. Serve and enjoy!

dill pickle pasta salad, dill pickle pasta salad recipe, dill pickle ranch pasta salad, dill pickle pasta salad spaceships, dill pickle pasta salad with cheese, pickle pasta salad, dill pickle pasta, pasta salad with pickles, dillpicklepastasalad, quick pasta salad, pasta salad, dill pickle, pickle salad, pasta salad meal prep, pasta salad ideas, dill pickles, pasta salad recipes tasty, pickle pasta recipe, easy pasta salad, cold pasta salad, best pasta salad, dill pickle food, homemade pasta salad, ranch pasta salad
Ube Rice Krispies Treats 💜 These Ube Rice Krispie Ube Rice Krispies Treats 💜

These Ube Rice Krispies Treats are chewy, buttery, and bursting with sweet ube flavor! With their vibrant purple color and soft marshmallow texture, this fun twist on a classic childhood treat is perfect for parties, holidays, or whenever you’re craving something unique and delicious.

INGREDIENTS
* 1/4 Cup Unsalted Butter
* 400 g Mini Marshmallows + extra for topping (optional)
* 2 tsp Ube Extract
* 4 Cups Rice Krispies Cereal

INSTRUCTIONS
* Line a 9×9-inch baking pan with parchment paper.
* In a large pot over low heat, melt the butter.
* Add the mini marshmallows and stir until completely melted and smooth.
* Stir in the ube extract until evenly incorporated and the mixture is a vibrant purple color.
* Remove from heat and gently fold in the Rice Krispies until fully coated.
* Transfer the mixture to the prepared pan and press it evenly into the corners using a spatula.
* If desired, sprinkle extra mini marshmallows on top and gently press them into the surface.
* Let cool at room temperature before slicing into 9 squares. Enjoy!


rice krispies treats, cereal rice krispies treats, homemade rice krispies treats, rice krispies treats recipe, how to make rice krispies treats, rice krispies treats homemade, best rice krispie treats, rice krispies treat, rice krispie treats, cereal rice krispie treats, rice krispies treats, rice krispie treats hack, easy rice krispie treats, baked rice krispie treats, rice krispie treats recipe, ube rice krispi, ube desserts, ube baked goods,
Ube Rice Krispies Treats 💜 These Ube Rice Krispie Ube Rice Krispies Treats 💜

These Ube Rice Krispies Treats are chewy, buttery, and bursting with sweet ube flavor! With their vibrant purple color and soft marshmallow texture, this fun twist on a classic childhood treat is perfect for parties, holidays, or whenever you’re craving something unique and delicious.

INGREDIENTS
* 1/4 Cup Unsalted Butter
* 400 g Mini Marshmallows + extra for topping (optional)
* 2 tsp Ube Extract
* 4 Cups Rice Krispies Cereal

INSTRUCTIONS
* Line a 9×9-inch baking pan with parchment paper.
* In a large pot over low heat, melt the butter.
* Add the mini marshmallows and stir until completely melted and smooth.
* Stir in the ube extract until evenly incorporated and the mixture is a vibrant purple color.
* Remove from heat and gently fold in the Rice Krispies until fully coated.
* Transfer the mixture to the prepared pan and press it evenly into the corners using a spatula.
* If desired, sprinkle extra mini marshmallows on top and gently press them into the surface.
* Let cool at room temperature before slicing into 9 squares. Enjoy!


rice krispies treats, cereal rice krispies treats, homemade rice krispies treats, rice krispies treats recipe, how to make rice krispies treats, rice krispies treats homemade, best rice krispie treats, rice krispies treat, rice krispie treats, cereal rice krispie treats, rice krispies treats, rice krispie treats hack, easy rice krispie treats, baked rice krispie treats, rice krispie treats recipe, ube rice krispi, ube desserts, ube baked goods,
Asian Sesame Vermicelli Salad 🥗 This Asian Sesam Asian Sesame Vermicelli Salad 🥗 

This Asian Sesame Vermicelli Salad is light, refreshing, and packed with flavor! Tender vermicelli noodles are tossed with crisp veggies and a savory sesame dressing for an easy, vibrant dish that’s perfect for lunches, meal prep, or summer gatherings.

INGREDIENTS
* 3 Bundles Vermicelli about 150g uncooked
* 1 Cup Purple Cabbage thinly shredded 
* 1 Cup Red Peppers thinly shredded 
* 1 Cup Carrots thinly shredded 
* 1/2 Cup Edamame
* 2 Stalks Green Onion thinly sliced 

Sauce
* 1 Clove Garlic grated
* 2 Tbsp Sesame Oil
* 1 tsp Sesame Oil
* 2 Tbsp Soy Sauce
* 1 Tbsp Brown Sugar
* 1 Tbsp Rice Vinegar

INSTRUCTIONS
* Cook the vermicelli noodles according to package instructions. Drain and rinse under cold water.
* In a large bowl, combine the cooked vermicelli, cabbage, red bell pepper, carrot, edamame, and green onions.
* In a small bowl, whisk together garlic, sesame oil, sesame seeds, soy sauce, brown sugar, and rice vinegar until well combined.
* Pour the sauce over the salad and toss until evenly coated.
* Chill in the fridge before serving for extra flavor for minimally 12 hours! Enjoy!

vietnamese vermicelli salad recipe, vermicelli noodle salad, vermicelli salad recipe, how to make vermicelli noodle salad, vermicelli noodles salad recipe, asian salad, asian salad dressing, how to make vietnamese vermicelli noodle salad recipe, asian noodle salad, asian salad recipe, easy sesame noodle salad, asian cold noodle salad, glass noodle salad with sesame dressing, bean vermicelli, ramen salad, vegan salad, vegetarian salad, sesame sauce, sesame sauce recipe
Asian Sesame Vermicelli Salad 🥗 This Asian Sesam Asian Sesame Vermicelli Salad 🥗 

This Asian Sesame Vermicelli Salad is light, refreshing, and packed with flavor! Tender vermicelli noodles are tossed with crisp veggies and a savory sesame dressing for an easy, vibrant dish that’s perfect for lunches, meal prep, or summer gatherings.

INGREDIENTS
* 3 Bundles Vermicelli about 150g uncooked
* 1 Cup Purple Cabbage thinly shredded 
* 1 Cup Red Peppers thinly shredded 
* 1 Cup Carrots thinly shredded 
* 1/2 Cup Edamame
* 2 Stalks Green Onion thinly sliced 

Sauce
* 1 Clove Garlic grated
* 2 Tbsp Sesame Oil
* 1 tsp Sesame Oil
* 2 Tbsp Soy Sauce
* 1 Tbsp Brown Sugar
* 1 Tbsp Rice Vinegar

INSTRUCTIONS
* Cook the vermicelli noodles according to package instructions. Drain and rinse under cold water.
* In a large bowl, combine the cooked vermicelli, cabbage, red bell pepper, carrot, edamame, and green onions.
* In a small bowl, whisk together garlic, sesame oil, sesame seeds, soy sauce, brown sugar, and rice vinegar until well combined.
* Pour the sauce over the salad and toss until evenly coated.
* Chill in the fridge before serving for extra flavor for minimally 12 hours! Enjoy!

vietnamese vermicelli salad recipe, vermicelli noodle salad, vermicelli salad recipe, how to make vermicelli noodle salad, vermicelli noodles salad recipe, asian salad, asian salad dressing, how to make vietnamese vermicelli noodle salad recipe, asian noodle salad, asian salad recipe, easy sesame noodle salad, asian cold noodle salad, glass noodle salad with sesame dressing, bean vermicelli, ramen salad, vegan salad, vegetarian salad, sesame sauce, sesame sauce recipe
Poppy Seed Almond Muffins 🤎 Have you ever tried C Poppy Seed Almond Muffins 🤎

Have you ever tried Costco’s almond poppy seed muffins? If you have, this is a copycat version of it! It’s my fav muffin and I knew I had to recreate it at home!

These Poppy Seed Almond Muffins are soft, fluffy, and bursting with sweet almond flavor. With a tender crumb and delicate crunch from the poppy seeds, they’re the perfect cozy bakery-style treat for breakfast, snacking, or coffee breaks.

INGREDIENTS
* 2 1/4 Cups Flour
* 1/2 tsp Salt
* 1/2 tsp Baking Soda
* 1/2 tsp Baking Powder
* 3/4 Cup Oil 
* 1 Cup White Sugar
* 2 Eggs
* 1 tsp Vanilla Extract
* 1 Tbsp Almond Extract 
* 3/4 Cup Sour Cream
* 1/4 Cup Milk
* 2 Tbsp Poppy Seeds
* 1/4 Cup Slivered Almonds sprinkle on top

INSTRUCTIONS
* Preheat oven to 350°F and line a 12-cup muffin tin with liners or lightly grease it.
* In a large bowl, whisk together oil, sugar, eggs, vanilla extract, almond extract, sour cream, and milk until smooth.
* Add flour, salt, baking soda, and baking powder directly into the same bowl. Gently mix until just combined.
* Fold in the poppy seeds.
* Divide the batter evenly between the 12 muffin cups and sprinkle slivered almonds on top.
* Bake for 25 minutes, or until a toothpick inserted into the center comes out clean.
* Let cool slightly before serving.


almond poppy seed muffins, poppy seed muffins, costco copycat, costco copycat recipes, almond muffins, easy muffin recipes, simple muffins, poppy seed almond muffins
Poppy Seed Almond Muffins 🤎 Have you ever tried C Poppy Seed Almond Muffins 🤎

Have you ever tried Costco’s almond poppy seed muffins? If you have, this is a copycat version of it! It’s my fav muffin and I knew I had to recreate it at home!

These Poppy Seed Almond Muffins are soft, fluffy, and bursting with sweet almond flavor. With a tender crumb and delicate crunch from the poppy seeds, they’re the perfect cozy bakery-style treat for breakfast, snacking, or coffee breaks.

INGREDIENTS
* 2 1/4 Cups Flour
* 1/2 tsp Salt
* 1/2 tsp Baking Soda
* 1/2 tsp Baking Powder
* 3/4 Cup Oil 
* 1 Cup White Sugar
* 2 Eggs
* 1 tsp Vanilla Extract
* 1 Tbsp Almond Extract 
* 3/4 Cup Sour Cream
* 1/4 Cup Milk
* 2 Tbsp Poppy Seeds
* 1/4 Cup Slivered Almonds sprinkle on top

INSTRUCTIONS
* Preheat oven to 350°F and line a 12-cup muffin tin with liners or lightly grease it.
* In a large bowl, whisk together oil, sugar, eggs, vanilla extract, almond extract, sour cream, and milk until smooth.
* Add flour, salt, baking soda, and baking powder directly into the same bowl. Gently mix until just combined.
* Fold in the poppy seeds.
* Divide the batter evenly between the 12 muffin cups and sprinkle slivered almonds on top.
* Bake for 25 minutes, or until a toothpick inserted into the center comes out clean.
* Let cool slightly before serving.


almond poppy seed muffins, poppy seed muffins, costco copycat, costco copycat recipes, almond muffins, easy muffin recipes, simple muffins, poppy seed almond muffins

Copyright © 2026 Lynn Mumbing Mejia · Theme by 17th Avenue