Read more for all the details on Dill Pickle Pasta Salad.
Confession… Before I even bothered to take some pictures, I had 3 bowls of this pickle pasta salad 😂 I could not resist!
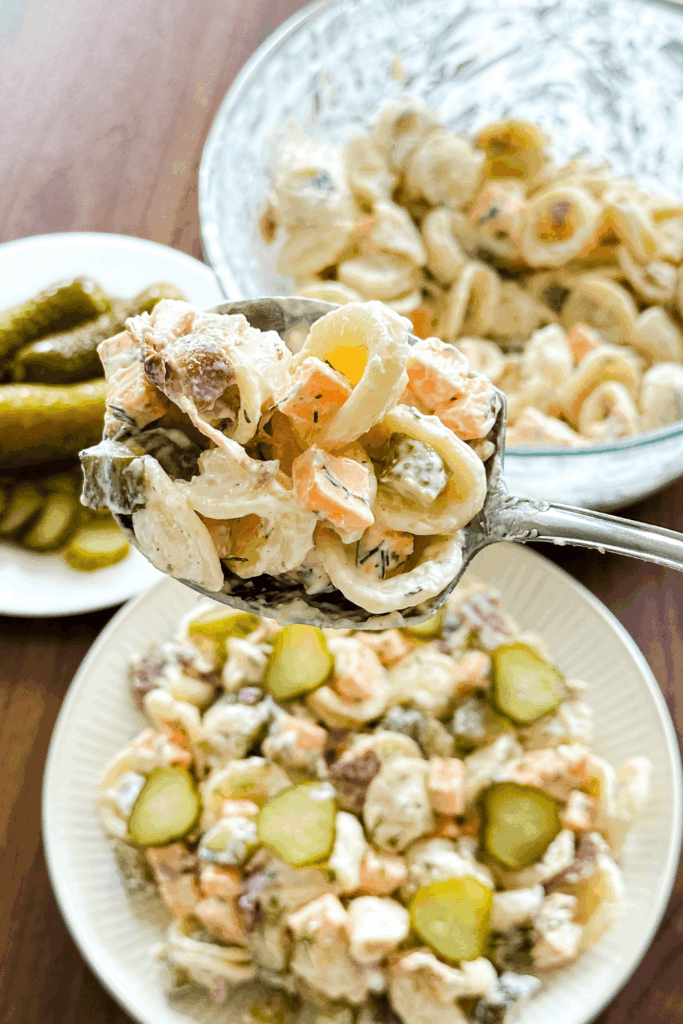
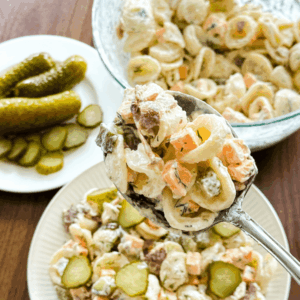
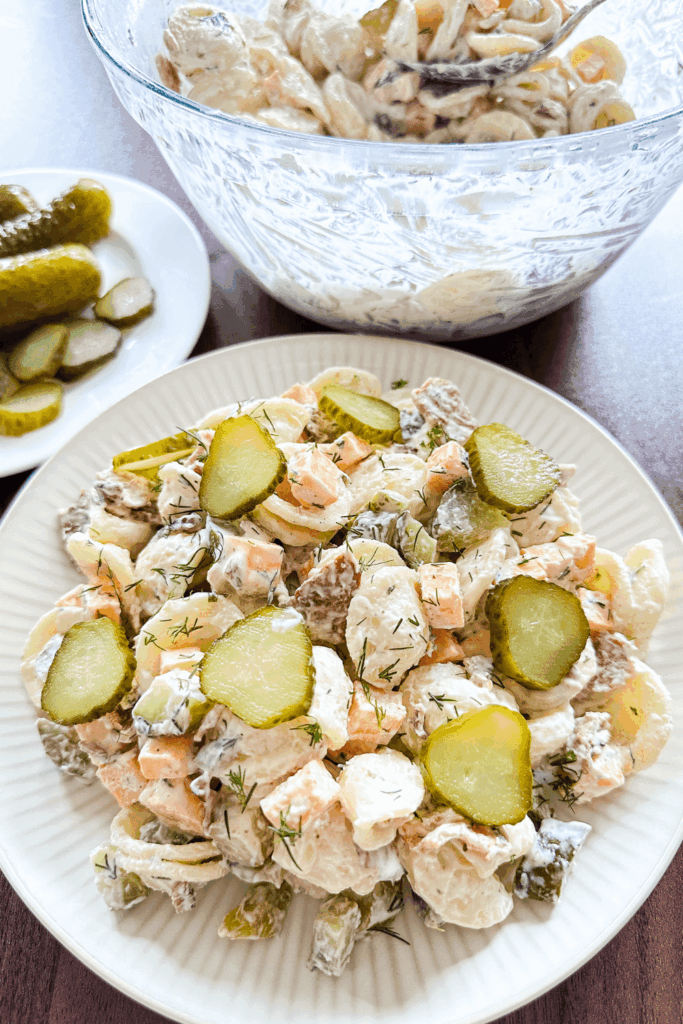
This Dill Pickle Pasta Salad is creamy, tangy, and packed with crunchy pickle goodness in every bite! Tossed with tender pasta and a flavorful, zesty dressing, it’s the perfect side dish for barbecues, potlucks, picnics, or easy weekday lunches.
PIN Dill Pickle Pasta Salad FOR LATER:
This Dill Pickle Pasta Salad recipe is accompanied by a YouTube Tutorial. If you haven’t subscribed to me on YouTube, don’t forget to!
HERE IS HOW TO MAKE DILL PICKLE PASTA SALAD:
WHERE CAN I FIND THESE INGREDIENTS?
The ingredients to make this delicious pickle pasta salad are in two parts! You’ll want to mix the sauce together, which is sour cream, pickle juice, ranch dressing seasoning and mayo. The second part is the components of the pasta salad which is some cooked pasta of your choice, chopped pickles, chopped cheddar cheese, chopped cripsy bacon, and fresh dill!
Most of the ingredients in this recipe can be found in most grocery stores, so hopefully this is quite easy for you to find and put together!
WHAT ARE THE INGREDIENTS?
Here are the ingredients to make this delicious dill pickle pasta salad:
- Cooked Pasta – preferably small and bite-sized like macaroni, small shells, bow ties,or rotini
- Chopped Dill Pickles
- Chopped Crispy Bacon
- Chopped Cheddar Cheese
- Fresh Dill
- Sour Cream
- Pickle Juice
- Ranch Dressing Pack
- Mayo
WHAT EQUIPMENT DO I NEED?
You don’t need anything special for this recipe! You should have everything you need at home. A large bowl with a cover is perfect. I used measuring cups and spoons but you can also measure with your heart and of course, a cutting board and knife. I do recommend having a whisk! It mixes the sauce really well together so that everything is ranch and dill pickly goodness! 🥒
Here are some of my fav Amazon kitchen finds:

CAN I SUBSTITUTE/ADD ANYTHING OUT?
You can of course substitute or add anything out! The star of the show is of course, pickles, and in my opinion, the ranch seasoning, but add or remove whatever you like! Here are some ideas to spruce this up!
- Adding red onions for a kick
- Adding chopped chicken for more protein
- Adding some fresh cucumbers, bell peppers or crunchy tomatoes
- Adding corn for sweetness
- Adding chopped kale or spinach for greens!
WHAT DOES DILL PICKLE PASTA SALAD TASTE LIKE?
Dill Pickle Pasta Salad is creamy, tangy, and packed with bold pickle flavor. 🥒✨
Every bite is a delicious mix of tender pasta, crunchy dill pickles, sharp cheddar cheese, and crispy bacon. The creamy ranch dressing is brightened with pickle juice, giving it a zesty, tangy kick that perfectly balances the richness of the cheese and bacon. Fresh dill adds a burst of herbaceous flavor, making the salad taste fresh, savory, and incredibly satisfying.
It’s the perfect combination of creamy, crunchy, salty, and tangy like your favorite dill pickle chips transformed into a hearty, crowd-pleasing pasta salad.
HOW LONG DOES IT KEEP FOR?
Dill Pickle Pasta Salad is a great make-ahead dish and stores well:
- In the fridge: 3–4 days in an airtight container.
- Not recommended for freezing, as the creamy dressing can separate and the pasta, cheese, and pickles may lose their texture after thawing.
For the best flavor, let the pasta salad chill for at least 4 hours before serving. If it thickens after refrigeration, stir in a splash of pickle juice or a spoonful of sour cream to freshen up the dressing but if you like the dressing thick like I do, leave as is!
💡 Tip: If you’re making it for a party or meal prep, you can prepare it a day ahead—the flavors become even more delicious as they meld together overnight.
INSPIRATIONS FOR THIS RECIPE?
A couple years ago, I made this delicious Pickle Alfredo Pasta which was so yummy and I thought this year, I wanted to make a pasta salad that was tangy and refreshing for summer and thought ooh, I need to make a pickly flavoured one! It’s so perfect! I’m obsessed!
ANY OTHER NOTES?
Honestly, I would recommend letting it sit overnight if you can! I think the longer it sits, the more pickly it gets! If you loooooove pickles, give it 24 hours before enjoying but it’s good to eat immediately or after a couple of hours in the fridge!
Dill Pickle Pasta Salad
Ingredients
- 3 Cups Cooked Pasta
- 1 Cup Dill Pickles diced
- 1 Cup Cheddar Cheese diced
- 1 Cup Crispy Bacon crumbled
- 1 Tbsp Fresh Dill
- 1/2 Cup Sour Cream
- 1/4 Cup Pickle Juice
- 1 Packet Ranch Dressing Seasoning Packet
- 2 Tbsp Mayo
Instructions
- In a large bowl, whisk together the sour cream, pickle juice, ranch seasoning packet, and mayonnaise until smooth.
- Next, combine the cooked pasta, chopped pickles, cheddar cheese, crispy bacon, and fresh dill.
- Toss the pasta mixture with sauce and toss until everything is evenly coated.
- Cover and refrigerate for at least 4 hours to allow the flavors to come together. (Though, you can eat it immediately if you'd like!)
- Give the salad a final stir before serving and garnish with extra dill or chopped pickles if desired.
- Serve and enjoy!
Thank you so much for reading this recipe post! I hope you enjoy it as much as I do! 🥒
Xo,
Lynn
Are you going to try making this Dill Pickle Pasta Salad recipe?! Don’t forget to tag me if you do!

This blog post is all the details on Dill Pickle Pasta Salad.
P.S: If you haven’t read my most recent post, click here!
PIN Dill Pickle Pasta Salad FOR LATER:
If you liked reading Dill Pickle Pasta Salad, you might like these as well!
This is the end of Dill Pickle Pasta Salad.