Hello! I'm Lynn.
  • About Me
  • Work With Me
  • Contact Me
  • Subscribe
  • Home
    • About
    • Contact
    • Disclaimer
    • Terms & Conditions
    • Privacy Policy
    • Subscribe
      • Work With Me
        • Media Kit
        • Portfolio and Samples
  • diy
  • lifestyle
    • home decor
  • recipes
  • gifts, parties & holidays
  • health & wellness with lynn

Lynn Mumbing Mejia

Crafting coziness, one recipe, DIY project, and holiday celebration at a time.

gifts/parties/holidays, diy · September 2, 2025

Fall Thanksgiving Pie Paper Garland

*This post may contain affiliate or sponsored links, which means I may get paid or receive a commission if you purchase through my link, at no extra cost to you!*

Read more for all the details on how to put together a Fall Thanksgiving Pie Paper Garland.

Thanksgiving has got to be my favourite holiday! How nice is it to gather with loved ones for some quality time, dressed in a cute fall outfit and eat a bunch of comfort food?! That is why I love Thanksgiving! No obligation for presents or forced activities, but just cozy quality time with loved ones surrounded by delicious food.

If you’re a crafty person wanting to put a little handmade DIY touch to your Fall and Thanksgiving decor, this pie paper garland is a must! I absolutely loved how this turned out!! I did 3 different pies, which I think are the main pies for Thanksgiving – Apple, Pecan and Pumpkin pie, but you can try to create any pies you’d like!

PIN Fall Thanksgiving Pie Paper Garland FOR LATER:
Fall Thanksgiving Pie Paper Garland - Lynn Mumbing Mejia - Featured Blog Pin 1

This Fall Thanksgiving Pie Paper Garland is accompanied by a YouTube Tutorial. If you haven’t subscribed to me on YouTube, don’t forget to!

Table of Contents

Toggle
  • HERE IS HOW TO MAKE A FALL THANKSGIVING PIE PAPER GARLAND:
    • WHERE CAN YOU FIND THE MATERIALS TO MAKE THIS FALL THANKSGIVING PIE PAPER GARLAND?
    • WHAT ARE THE MATERIALS/EQUIPMENT NEEDED FOR THIS FALL THANKSGIVING PIE PAPER GARLAND?
    • CAN I SUBSTITUTE ANY MATERIALS OUT?
    • DOES THE DIY LAST TO USE FOR THE FOLLOWING YEARS?
    • HOW LONG DOES IT TAKE TO PUT TOGETHER?
    • INSPIRATIONS FOR THIS DIY?
    • STEPS TO PUT TOGETHER FALL THANKSGIVING PIE PAPER GARLAND:
      • Step 1: Cut and measure out all your pie pieces.
      • Step 2: Cut out all your pie parts.
      • Step 3: Glue all your pie parts together.
      • Step 4: Hang your pie garland with wood clips.

HERE IS HOW TO MAKE A FALL THANKSGIVING PIE PAPER GARLAND:

WHERE CAN YOU FIND THE MATERIALS TO MAKE THIS FALL THANKSGIVING PIE PAPER GARLAND?

All the materials I purchased for this DIY I found at Michaels or Amazon! You’ll need any string or ribbon that you’d like. I use thin twine. You’ll need some construction paper of the pie colors of your choosing. I purchased a pack from Michaels that had different shades of brown, then had some white and orange at home but all can be purchased at Michael’s too! I bought my mini wood clips from Amazon years ago and have been reusing them ever since!

WHAT ARE THE MATERIALS/EQUIPMENT NEEDED FOR THIS FALL THANKSGIVING PIE PAPER GARLAND?

Here are the things you’ll need to create this:

  • Different shades of Brown cardstock paper
  • Orange cardstock paper
  • White cardstock paper
  • Mini wood pins
  • Twine
  • Scissors
  • Hot Glue Gun

Here are the exact things I used and recommend for this DIY paper garland!

CAN I SUBSTITUTE ANY MATERIALS OUT?

You sure can! These are the exact materials I used to make my paper garland but of course, I encourage everyone to take inspiration from what I create and create anything that suits their style! I really enjoyed making 3 different pies but do admit it took a lot more work than I had planned so if you want to just stick with one like pumpkin pie, that is totally okay and will end up being super cute still!

DOES THE DIY LAST TO USE FOR THE FOLLOWING YEARS?

Oh absolutely! As long as you carefully store these pie pieces nicely, you will be able to use this pie garland for years to come! Please note that they are paper so of course, they bend easily and may get wet so just be careful of that. The lovely thing is that you can recreate these very easily if you need to! It only takes paper, scissors and glue to recreate these pies if you damage any!

HOW LONG DOES IT TAKE TO PUT TOGETHER?

In total, this took me about 3 hours! I cut every piece by hand and kept cutting until I made pieces that worked for me that duplicated it to make multiple pies that were the same shape. Since the pieces were small and delicate, I took my time cutting and glueing. I always recommend crafting while listening to music or watching a show while doing DIY’s it’s peaceful and time goes by so quick! It took me 3 hours but DIY projects are of course different for everyone so it can take more or less time for you! Have some fun with it and relax! Crafting will always be my go to activity when lessening screentime.

INSPIRATIONS FOR THIS DIY?

I love all things DIY crafts! I have been really into paper crafts and specifically paper garlands because it always makes your home extra cozy! It’s so nice seeing a cute DIY you made with your own hands hanging proudly in your house! I also love being able to swap out your decor for very little money. We get so obsessed with overconsumption and getting the latest viral product that we end up spending so much money! Spending money decorating your home does not have to break the bank. I reuse and make whatever I can for every holiday!

STEPS TO PUT TOGETHER FALL THANKSGIVING PIE PAPER GARLAND:

Step 1: Cut and measure out all your pie pieces.

I literally winged this one and tested a bunch of triangle pieces until I figured out what worked for me! Figure out where in your home you want to hang your pie garland and test out what size works best!

Step 2: Cut out all your pie parts.

Depending on what pies you make, cut out your pie parts! For a pumpkin pie, I added a small dollop of whipped cream, for apple pie, I did criss-cross lines on top, and for pecan pie, I cut little pecans and folded them to create some dimension. For each pie crust, I did different designs! For the pumpkin pie, I did zip-zag folds, for apple pie, I just did a wavy bottom, and for the pecan pie, I did a long, cloud-like shape! You can do exactly what I did, or you can use your imagination to create beautiful designs!

Step 3: Glue all your pie parts together.

Once you’ve decided on what pies you are making and have cut everything out, glue everything together! You can use any glue or tape, but I just used a hot glue gun!

Step 4: Hang your pie garland with wood clips.

Now that your pies are all put together, you can hang them up! I measured a piece of twine to my mantel in my living room, then use wood clips to hang the pie pieces and evenly spaced them out! Enjoy! 😊

Thank you so much for following this blog post on how to create a Fall Thanksgiving Pie Paper Garland!

Xo,

Lynn

Are you going to try making this Fall Thanksgiving Pie Paper Garland?! Don’t forget to tag me if you do!

 Fall Thanksgiving Pie Paper Garland! - Lynn Mumbing Mejia - Tag Us

This blog post is all the details on how to make a Fall Thanksgiving Pie Paper Garland.

P.S: If you haven’t read my most recent post, click here!

PIN Fall Thanksgiving Pie Paper Garland FOR LATER:
Fall Thanksgiving Pie Paper Garland - Lynn Mumbing Mejia - Featured Blog Pin 2

If you liked reading Fall Thanksgiving Pie Paper Garland, you might like these are well!

25+ Super Cute Boho Fall Wreath Ideas

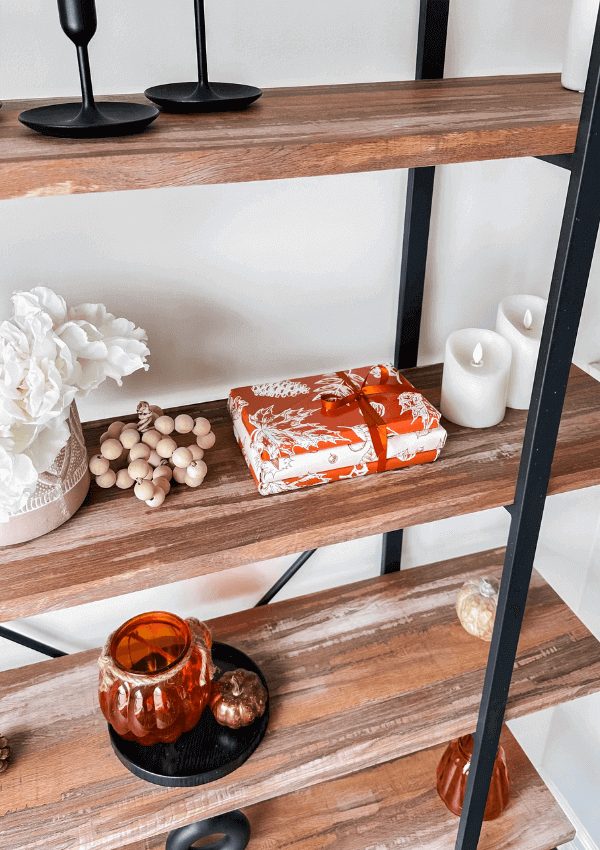
7 Fall Mantel Decor Must-Haves

DIY Ghost Paper Garland

Easy Gingerbread Paper Garland Decor

Easy Snowman Paper Garland

Easy Christmas Tree Garland

This is the end of Fall Thanksgiving Pie Paper Garland.

Shop The Post

Posted In: gifts/parties/holidays, diy · Tagged: affordable fall decor, apple pie, cheap fall decor, diy autumn decor, diy fall decor, DIY paper garland, fall crafts, fall decor, holiday decor, paper garland, pie banner, pie crust, pie garland, pie slice, pie slice garland, pie slices, pumpkin pie, thanksgiving decor, thanksgiving decorations, thanksgiving pie

Get on the List

You’ll Also Love

DIY Fall Wrapped Book Decor
Valentine’s Paper Heart Garland
Easy Christmas Tree Garland

Trackbacks

  1. Halloween Painted Candles | Lynn Mumbing Mejia says:
    September 4, 2025 at

    […] Fall Thanksgiving Pie Paper Garland […]

Next Post >

White Chocolate Pumpkin Spice Cookies

About Photo
Hey there friend! My name is Lynn and I'm a Canadian Content Creator who's focused on Minimal & Neutral Home Decor Inspo, Simple & Budget Friendly DIY Projects, All Things Holidays and Quick & Easy Recipes. I'm so happy you're here and I hope you'll find something that you love!

Categories

follow lynn

  • Facebook
  • Instagram
  • Pinterest
  • Twitter
  • YouTube

Search

Join Us!

Trending Now

Popular Posts

Links

  • About
  • Contact
  • Disclaimer
  • Privacy Policy
  • Terms & Conditions

Socials

  • Instagram
  • Youtube
  • Facebook
  • Twitter
  • Pinterest

Shop

  • Home Wall Art
  • Recipe Cards
  • Greeting Cards
  • Planner Templates

JOIN THE INNER CIRCLE

DIY all-year round wreath 🌲 Full video up on YouTu DIY all-year round wreath 🌲 Full video up on YouTube!! #diyhomedecor
Kimchi Avocado Toast 🥑🍞 This Kimchi Avocado Toast Kimchi Avocado Toast 🥑🍞

This Kimchi Avocado Toast is tangy, creamy, and perfect for a gut-friendly breakfast! Buttery avocado meets tangy, spicy kimchi for the perfect balance of richness and heat! All this layered on crispy toast makes for an easy, satisfying breakfast to start your day.

INGREDIENTS
* 1 Slice Sourdough Bread toasted 
* 1/2 Ripe Avocado mashed
* 1/4 Cup Kimchi chopped
* 1 Egg
* 1 Tbsp Butter or Oil to cook the egg
* Salt to taste

INSTRUCTIONS
* Toast the sourdough slice until your preferred toast level!
* Spread the mashed avocado evenly over the toast. Sprinkle lightly with salt.
* Heat butter or oil in a small pan over medium heat. Crack in the egg and cook to your preference (fried, sunny-side up, or over-easy).
* Spoon the chopped kimchi over the avocado layer.
* Top with the cooked egg, serve and enjoy!


avocado kimchi toast, avocado toast, egg avocado toast, kimchi toast, avocado toast ideas, avocado toast recipe, avocadotoast, avocado, kimchi, avocado recipe, avocado recipes, how to eat kimchi, toast, toast ideas, kimchi used cooking, toast recipes, breakfast toast
Kimchi Avocado Toast 🥑🍞 This Kimchi Avocado Toast Kimchi Avocado Toast 🥑🍞

This Kimchi Avocado Toast is tangy, creamy, and perfect for a gut-friendly breakfast! Buttery avocado meets tangy, spicy kimchi for the perfect balance of richness and heat! All this layered on crispy toast makes for an easy, satisfying breakfast to start your day.

INGREDIENTS
* 1 Slice Sourdough Bread toasted 
* 1/2 Ripe Avocado mashed
* 1/4 Cup Kimchi chopped
* 1 Egg
* 1 Tbsp Butter or Oil to cook the egg
* Salt to taste

INSTRUCTIONS
* Toast the sourdough slice until your preferred toast level!
* Spread the mashed avocado evenly over the toast. Sprinkle lightly with salt.
* Heat butter or oil in a small pan over medium heat. Crack in the egg and cook to your preference (fried, sunny-side up, or over-easy).
* Spoon the chopped kimchi over the avocado layer.
* Top with the cooked egg, serve and enjoy!�

avocado kimchi toast, avocado toast, egg avocado toast, kimchi toast, avocado toast ideas, avocado toast recipe, avocadotoast, avocado, kimchi, avocado recipe, avocado recipes, how to eat kimchi, toast, toast ideas, kimchi used cooking, toast recipes, breakfast toast
diy watercolor painted coffee station sign 🤎 full diy watercolor painted coffee station sign 🤎 full video up on youtube now! love you guysssss have a great weekend 😘
Chocolate Chip Cookie Dough Syrup 🍪☕️ This Chocol Chocolate Chip Cookie Dough Syrup 🍪☕️

This Chocolate Chip Cookie Dough Syrup is sweet and packed with cozy cookie flavor! Perfect for stirring into iced coffee, drizzling over desserts, or upgrading your favorite drinks, it’s an easy homemade syrup that tastes just like classic cookie dough in liquid form.

INGREDIENTS
* 1 Cup Water
* 1/2 Cup Brown Sugar
* 1/2 Cup Granulated Sugar
* 1 1/2 tsp Cocoa Powder
* 1/2 Tbsp Vanilla Extract
* 1/8 tsp Almond Extract I just put a drop! <3 
* 1/4 tsp Salt

INSTRUCTIONS
* In a small saucepan over medium heat, combine water, brown sugar, and granulated sugar.
* Whisk until the sugars dissolve completely and the mixture begins to gently simmer.
* Whisk in the cocoa powder until fully incorporated and smooth.
* Remove from heat and stir in vanilla extract, almond extract, and salt.
* Let cool completely before transferring to a sealed jar or bottle.


chocolate chip cookie dough syrup,iced coffee,cold brew,coffee syrup,chocolate syrup,cookie syrup,chocolate chip cookie dough,coffee at home,iced coffee recipe,cold brew recipe,syrup recipe,homemade syrup,cookie dough syrup
Chocolate Chip Cookie Dough Syrup 🍪☕️ This Chocol Chocolate Chip Cookie Dough Syrup 🍪☕️

This Chocolate Chip Cookie Dough Syrup is sweet and packed with cozy cookie flavor! Perfect for stirring into iced coffee, drizzling over desserts, or upgrading your favorite drinks, it’s an easy homemade syrup that tastes just like classic cookie dough in liquid form.

INGREDIENTS
* 1 Cup Water
* 1/2 Cup Brown Sugar
* 1/2 Cup Granulated Sugar
* 1 1/2 tsp Cocoa Powder
* 1/2 Tbsp Vanilla Extract
* 1/8 tsp Almond Extract I just put a drop! <3 
* 1/4 tsp Salt

INSTRUCTIONS
* In a small saucepan over medium heat, combine water, brown sugar, and granulated sugar.
* Whisk until the sugars dissolve completely and the mixture begins to gently simmer.
* Whisk in the cocoa powder until fully incorporated and smooth.
* Remove from heat and stir in vanilla extract, almond extract, and salt.
* Let cool completely before transferring to a sealed jar or bottle.�

chocolate chip cookie dough syrup,iced coffee,cold brew,coffee syrup,chocolate syrup,cookie syrup,chocolate chip cookie dough,coffee at home,iced coffee recipe,cold brew recipe,syrup recipe,homemade syrup,cookie dough syrup
baby steps to the cottagecore/whimsy/floral bedroo baby steps to the cottagecore/whimsy/floral bedroom of my dreams 🤎🌼 since we bought our house, we’ve not done anything to it so i’m excited to start making changes to make our house more ours!! 🧸 full video is up my on channel!! 

#bedroomupdate #bedroomdecor #bedroomdiy

Copyright © 2026 Lynn Mumbing Mejia · Theme by 17th Avenue