DIY Fall Wrapped Book Decor
Read more for all the details on how to put together a DIY Fall Wrapped Book Decor.
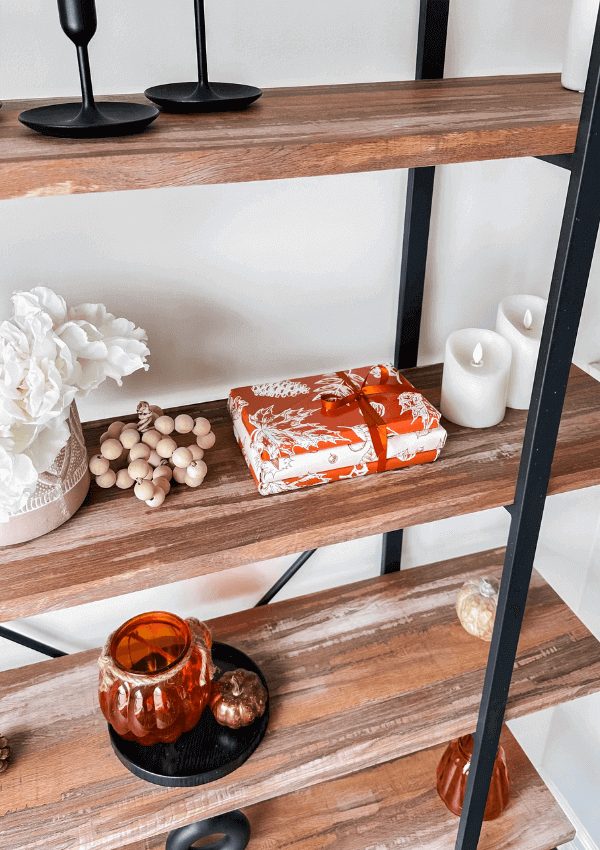
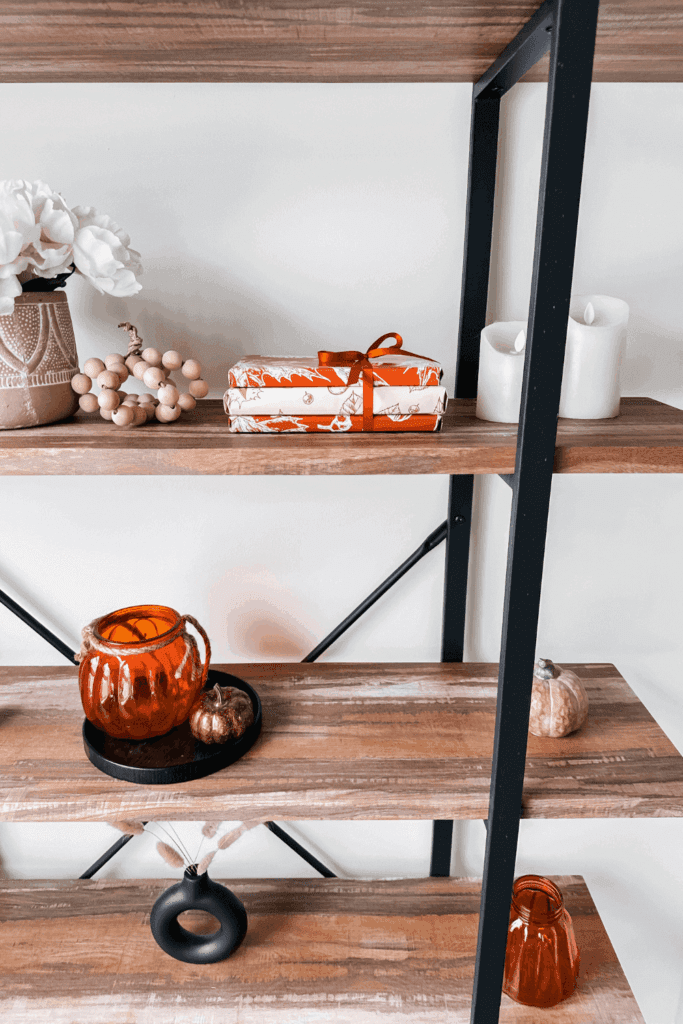
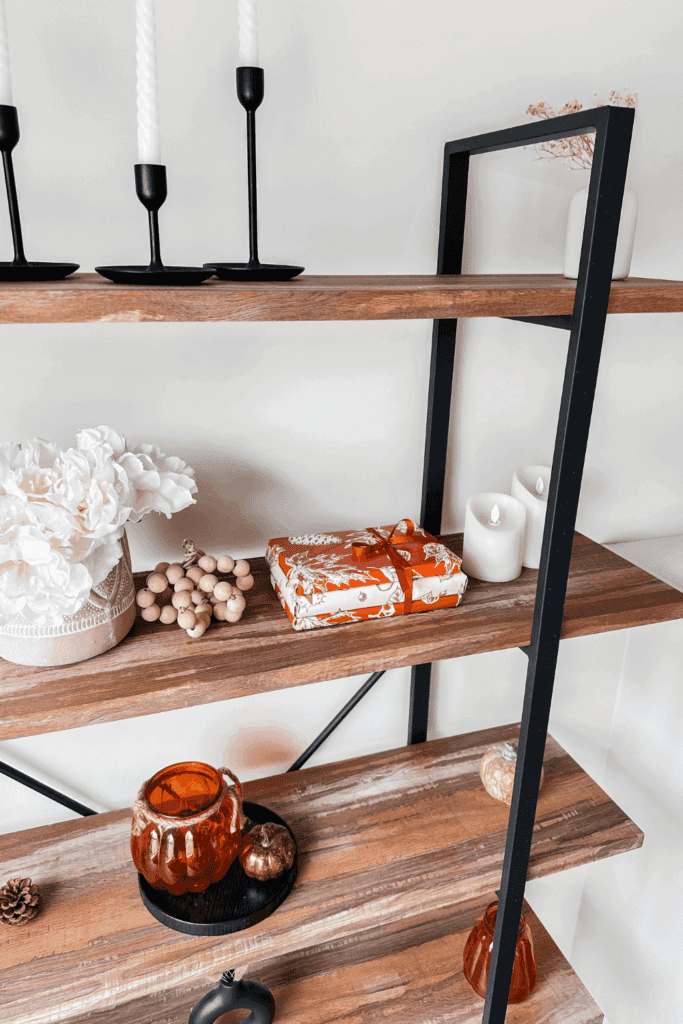
Looking for an easy and affordable Fall DIY home decor to make? I got you! I love all things Fall and all the beautiful patterns and colours that come with Autumn! I remember wrapping textbooks in high school to protect them, and I would pick the cutest wrapping paper designs from the dollar store, and it gave me an idea to do a cute Fall book stack! I loved how it turned out, and you can do this for any holiday or theme!
PIN DIY Fall Wrapped Book Decor FOR LATER:
This DIY Fall Wrapped Book Decor is accompanied by a YouTube Tutorial. If you haven’t subscribed to me on YouTube, don’t forget to!
HERE IS HOW TO MAKE THIS DIY FALL WRAPPED BOOK DECOR:
WHERE CAN YOU FIND THE MATERIALS TO MAKE THIS DIY FALL WRAPPED BOOK DECOR?
I bought everything I needed on Amazon! I did make this pretty early so Fall decor hasn’t rolled in yet, but you can definitely purchase everything at Michaels. I chose some fall wrapping paper on Amazon, and there are so many to choose from! I chose orange and white! I felt like it went nicely on my shelf, but choose whatever you like! Aside from this, you’ll just need some fall-patterned ribbon or even a solid colour one like orange, yellow, brown, black or white and of course, some tape!
Can’t forget the most important thing, which is the books! I just used some books from my library that were roughly the same size and wrapped them! You can alternatively get some from the dollar store or thrift shop!
WHAT ARE THE MATERIALS/EQUIPMENT NEEDED FOR THIS DIY FALL WRAPPED BOOK DECOR?
Here are the things you’ll need to create this:
- Fall-patterned wrapping paper
- Fall colored satin ribbon
- Old Books
- Tape
- Scissors
Here are the exact things I used and recommend for this DIY fall book stack decor!

CAN I SUBSTITUTE ANY MATERIALS OUT?
Of course you can! I always encourage you to use what you have and not spend a lot of money, so if you already have some materials at home, please use them! I’m a huge fan of the dollar store, so if you can find things that you like there, like the wrapping paper and ribbon, please use them! I don’t believe that home decor should be so expensive, and it’s so nice to have a cozy, homemade vibe!
DOES THIS DIY LAST TO USE FOR THE FOLLOWING YEARS?
It sure does! If you take care of this book stack, you can definitely use it as decor for years to come! Please note that they are paper so of course, they may tear easily and may get wet so just be careful of that. The lovely thing is that you can recreate these very easily if you need to! It only takes paper, scissors and tape to recreate this piece if you damage any!
HOW LONG DOES IT TAKE TO PUT TOGETHER?
This took me less than an hour to complete! Of course, I was filming a tutorial at the same time, so it took me longer, but if you have ever wrapped a gift before, it’s basically wrapping 3 gifts! My husband came home after I did this and was like Ooh, are those presents?! Haha. This is a super quick DIY and honestly will probably take you 15-30 minutes to put together! It’s a very, very simple and easy DIY home decor piece to create!
INSPIRATIONS FOR THIS DIY?
I love the look of book stacks and thought, Why not do a fun Fall-themed one! I have seen book stacks sell in home decor stores for so much money, and I just could not justify it! I had old books at home and some ribbon I bought at the Michaels clearance sale last year, so I thought, Why not make a stack myself for a couple of bucks! I loved the way it turned out, and it is a super cute and affordable DIY!
STEPS TO PUT TOGETHER THIS DIY FALL WRAPPED BOOK DECOR:
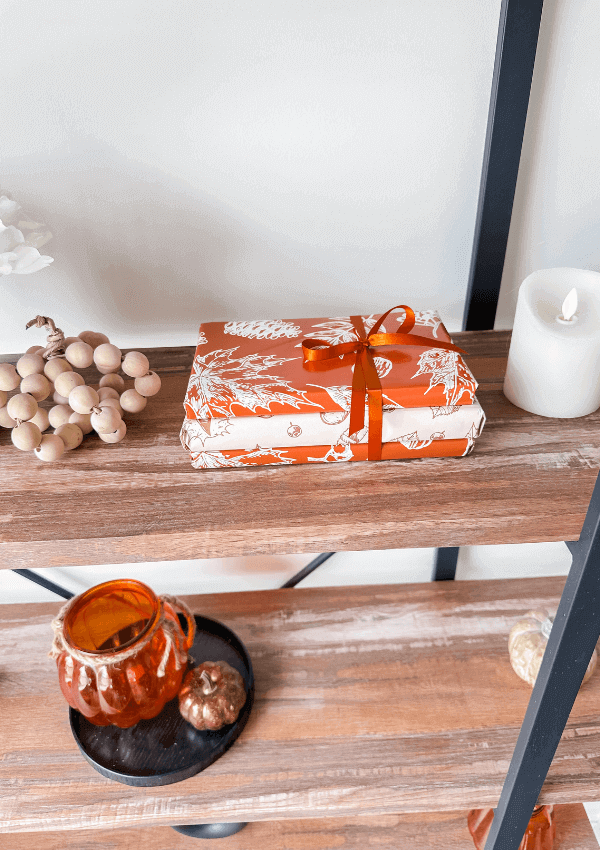
Step 1: Measure your wrapping paper to be able to wrap your books.
Measure your wrapping paper to be able to fully wrap around the books. You can either just wrap the covers or just do the whole thing! I just wrap the whole book like a gift for ease.
Step 2: Wrap your books like a gift!
Wrap your books like you would wrap a Christmas gift. I’m definitely not the best wrapper around haha, so if you need assistance with this, there are so many talented wrapping tutorial videos out there!
Step 3: Stack the books on top of each other and tie a ribbon on the top.
Next, stack the books on top of each other and measure the length of your ribbon to your choice! If you want some ribbon drag, you’ll definitely want to allow more length to tie up the books. I didn’t some just a little bit of extra ribbon, so that’s what I did!
Step 4: Place on a shelf of your choosing.
Lastly, place your book stack on a shelf of your choosing and enjoy this super cute Fall home decor piece!
Thank you so much for following this blog post on how to create a DIY Fall Wrapped Book Decor!
Xo,
Lynn
Are you going to try making this DIY Fall Wrapped Book Decor?! Don’t forget to tag me if you do!

This blog post is all the details on how to make this DIY Fall Wrapped Book Decor.
P.S: If you haven’t read my most recent post, click here!
PIN DIY Fall Wrapped Book Decor FOR LATER:
If you liked reading DIY Fall Wrapped Book Decor, you might like these are well!
Fall Thanksgiving Pie Paper Garland
25+ Super Cute Boho Fall Wreath Ideas
7 Fall Mantel Decor Must-Haves
This is the end of DIY Fall Wrapped Book Decor.


One Comment
Comments are closed.