Hello! I'm Lynn.
  • About Me
  • Work With Me
  • Contact Me
  • Subscribe
  • Home
    • About
    • Contact
    • Disclaimer
    • Terms & Conditions
    • Privacy Policy
    • Subscribe
      • Work With Me
        • Media Kit
        • Portfolio and Samples
  • diy
  • lifestyle
    • home decor
  • recipes
  • gifts, parties & holidays
  • health & wellness with lynn

Lynn Mumbing Mejia

Crafting coziness, one recipe, DIY project, and holiday celebration at a time.

gifts/parties/holidays, recipes · November 11, 2024

Not So Sweet Eggnog Loaf

*This post may contain affiliate or sponsored links, which means I may get paid or receive a commission if you purchase through my link, at no extra cost to you!*
Jump to Recipe Print Recipe

Read more for all the details on Eggnog Loaf.

Eggnog truly is one of the most popular if not, the MOST popular holiday/Christmas drink out there! I know that I’m not the only one to jump for joy whenever I see eggnog hit the shelves again! I love putting a little eggnog in my coffee from September to the end of the year because it makes me a little festive everyday.

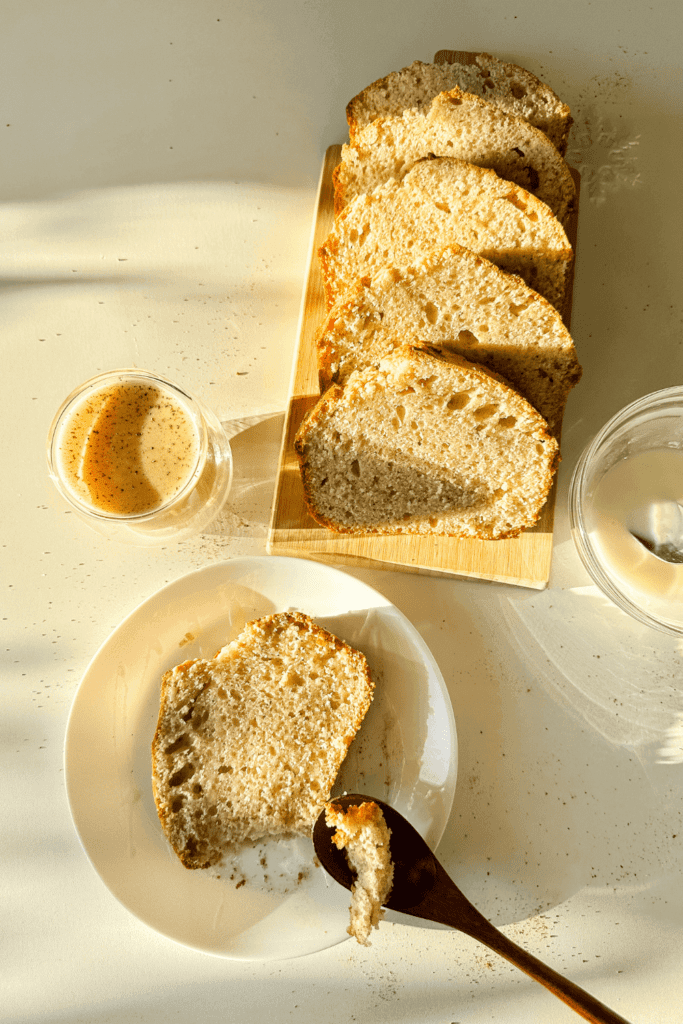
I am so guilty of needing a little pick me up treat around 2-3pm and these eggnog loaf really hits the spot! Iike to have a slice of this eggnog loaf alongside a steaming coffee with eggnog or a piping hot green tea! I adore treats that aren’t too sweet which is exactly why this recipe hits the spot!

PIN Eggnog Loaf FOR LATER:

This Not So Sweet Eggnog Loaf recipe is accompanied by a YouTube Tutorial. If you haven’t subscribed to me on YouTube, don’t forget to!

Table of Contents

Toggle
  • HERE IS HOW TO MAKE AN EGGNOG LOAF:
    • WHERE CAN I FIND THESE INGREDIENTS?
    • WHAT ARE THE INGREDIENTS?
    • WHAT EQUIPMENT DO I NEED?
    • CAN I SUBSTITUTE/ADD ANYTHING OUT?
    • WHAT DOES AN EGGNOG LOAF TASTE LIKE?
    • HOW LONG DOES IT KEEP FOR?
    • INSPIRATIONS FOR THIS RECIPE?
    • ANY OTHER NOTES?
    • Eggnog Loaf
      • Ingredients  
      • Instructions 

HERE IS HOW TO MAKE AN EGGNOG LOAF:

WHERE CAN I FIND THESE INGREDIENTS?

The ingredients to make this delicious eggnog loaf can be found at most grocery stores! Eggnog can be a tricky ingredient to find as it may not be a popular holiday drink in a lot of countries but eggnog generally is on the shelves by September!

Aside from eggnog, you’ll need regular baking ingredients like butter, sugar, eggs, vanilla extract, flour, baking powder and nutmeg! All of these should be available within your baking aisle and dairy section!

WHAT ARE THE INGREDIENTS?

The ingredients to make the delicious eggnog loaf are:

  • Eggnog
  • Eggs
  • White Sugar
  • Unsalted Butter
  • Vanilla
  • Flour
  • Baking Powder
  • Nutmeg

WHAT EQUIPMENT DO I NEED?

You don’t need a lot of equipment for this recipe! if you already love baking treats, you should have everything you need already in your home! You’ll want to have a loaf pan or dish, measuring cups and spoons, mixing bowls and a mixing utensil like a spatula!

Here are some of my Amazon kitchen and baking favs!

CAN I SUBSTITUTE/ADD ANYTHING OUT?

I love baking but I haven’t tried any substitutes with this recipe! If you have any dietary restrictions or use specific ingredients, you can try to substitute it out! Here are a few ideas of additions and substations that you can try out!

  • Adding some chocolate chips/chunks, tried fruits or nuts
  • Glazing the top of the loaf with eggnog glaze (1/4 icing sugar & 1 Tbsp of eggnog)
  • Making a cream cheese frosting to go on top
  • Making an oat crumble to go on top

WHAT DOES AN EGGNOG LOAF TASTE LIKE?

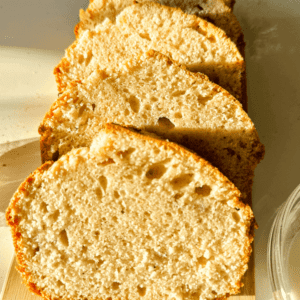
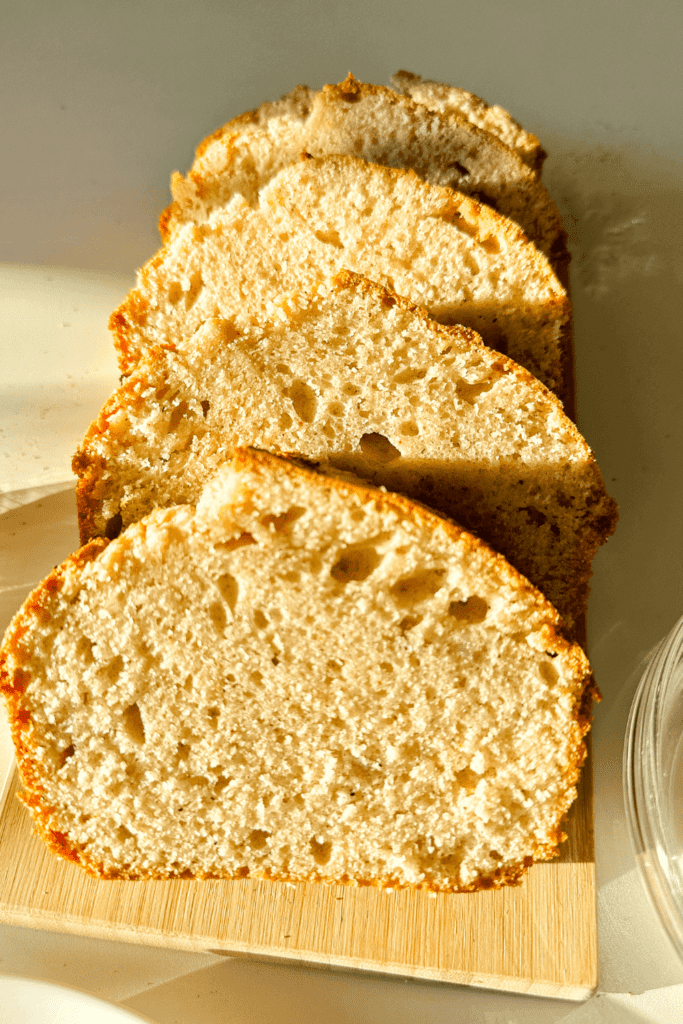
This eggnog loaf is a dessert that isn’t too sweet but has that rich eggnog flavour in it! The cake itself is very moist and is perfect paired with a hot drink of your choice! Nutmeg is a very prominent spice in eggnog and the additional couple teaspoons added to the batter really takes this to the next level!

HOW LONG DOES IT KEEP FOR?

In an airtight container, this eggnog bread keeps for up to 7 days in the fridge. I highly recommend warming it up for 30 seconds before enjoying! You can even spread a little bit of butter or peanut butter on it! This loaf also freezes so well so you’re able to freeze the bread for up to a month and a half! To enjoy, let thaw or warm up in the microwave or toaster for a few seconds/minutes until warm!

INSPIRATIONS FOR THIS RECIPE?

I LOVE making loaves! Cake is my favourite dessert hands down and I love that loaves like these don’t feel too heavy like a cake with frosting and you’re able to enjoy a little slice everyday with a cup of coffee or drink of choice!

I put eggnog in my coffee pretty much everyday once November hits and enjoying my eggnog coffee with my eggnog loaf is the perfect way to be a little bit festive in my everyday routine!

ANY OTHER NOTES?

No other notes for this one! Enjoy!

Eggnog Loaf

Eggnog is a perfect holiday drink! This eggnog loaf adds the rich flavour of eggnog into a beautiful moist loaf treat for the holidays!
Print Recipe Pin Recipe
Prep Time 15 minutes mins
Cook Time 1 hour hr 10 minutes mins
Course Dessert
Servings 1 Loaf

Ingredients
  

  • 1 Cup Eggnog
  • 2 Eggs
  • 3/4 Cup White Sugar
  • 1/2 Cup Unsalted Butter melted, cooled
  • 1 tsp Vanilla Extract
  • 2 Cups Flour
  • 2 tsp Baking Powder
  • 2 tsp Nutmeg

Instructions
 

  • Preheat oven at 350F and generously grease your loaf pan including all the corners and edges.
  • In a mixing bowl, add in all your wet ingredients and sugar then mix well together. This would be your eggs, eggnog, white sugar, butter, and vanilla.
  • Once all your sugar and wet ingredients have been combined, add in your nutmeg, baking powder, and flour. Be sure to add in your flour 1/2 cup at a time to avoid clumps!
  • When your batter is all well combined and there are no lumps, pour into your greased loaf pan. Optional: Sprinkle a little more nutmeg on top.
  • Bake in the oven at 350F for about 60-80 minutes or until you can poke the middle of the loaf with a toothpick and the toothpick comes out clean.
  • Slice, serve and enjoy!
Keyword Eggnog Loaf

Xo,

Lynn

Are you going to try making this Eggnog Loaf recipe?! Don’t forget to tag me if you do!

tag us

This blog post is all the details on Eggnog Loaf.

P.S: If you haven’t read my most recent post, click here!

PIN Eggnog Loaf FOR LATER:

If you liked reading Eggnog Loaf, you might like these are well!

Easy Orange Cranberry Shortbread Cookies With Eggnog Icing

Vegan Eggnog Overnight Oats

Candy Cane Chocolate Chip Cookies

Easy Rudolph Brownies

Pistachio Pudding Bread

Butterscotch Pudding Bread

This is the end of Eggnog Loaf.

Shop The Post

Posted In: gifts/parties/holidays, recipes · Tagged: Christmas Baking, Christmas Desserts, classic christmas desserts, eggnog bread, eggnog desserts, eggnog glaze, eggnog loaf, eggnog quick bread, Holiday Baking, holiday recipes, loaf recipe, loaf recipes, not so sweet desserts, quick bread

Get on the List

You’ll Also Love

Gingerbread Chocolate Chip Cookies
Gingerbread Spice Mix
Candy Cane Chocolate Almonds

Trackbacks

  1. Easy Gingerbread Paper Garland Decor | Lynn Mumbing Mejia says:
    November 20, 2024 at

    […] P.S: If you haven’t read my most recent post, click here! […]

Next Post >

Holiday Spiced Candied Nuts

About Photo
Hey there friend! My name is Lynn and I'm a Canadian Content Creator who's focused on Minimal & Neutral Home Decor Inspo, Simple & Budget Friendly DIY Projects, All Things Holidays and Quick & Easy Recipes. I'm so happy you're here and I hope you'll find something that you love!

Categories

follow lynn

  • Facebook
  • Instagram
  • Pinterest
  • Twitter
  • YouTube

Search

Join Us!

Trending Now

Popular Posts

Links

  • About
  • Contact
  • Disclaimer
  • Privacy Policy
  • Terms & Conditions

Socials

  • Instagram
  • Youtube
  • Facebook
  • Twitter
  • Pinterest

Shop

  • Home Wall Art
  • Recipe Cards
  • Greeting Cards
  • Planner Templates

JOIN THE INNER CIRCLE

Asian Sesame Vermicelli Salad 🥗 This Asian Sesam Asian Sesame Vermicelli Salad 🥗 

This Asian Sesame Vermicelli Salad is light, refreshing, and packed with flavor! Tender vermicelli noodles are tossed with crisp veggies and a savory sesame dressing for an easy, vibrant dish that’s perfect for lunches, meal prep, or summer gatherings.

INGREDIENTS
* 3 Bundles Vermicelli about 150g uncooked
* 1 Cup Purple Cabbage thinly shredded 
* 1 Cup Red Peppers thinly shredded 
* 1 Cup Carrots thinly shredded 
* 1/2 Cup Edamame
* 2 Stalks Green Onion thinly sliced 

Sauce
* 1 Clove Garlic grated
* 2 Tbsp Sesame Oil
* 1 tsp Sesame Oil
* 2 Tbsp Soy Sauce
* 1 Tbsp Brown Sugar
* 1 Tbsp Rice Vinegar

INSTRUCTIONS
* Cook the vermicelli noodles according to package instructions. Drain and rinse under cold water.
* In a large bowl, combine the cooked vermicelli, cabbage, red bell pepper, carrot, edamame, and green onions.
* In a small bowl, whisk together garlic, sesame oil, sesame seeds, soy sauce, brown sugar, and rice vinegar until well combined.
* Pour the sauce over the salad and toss until evenly coated.
* Chill in the fridge before serving for extra flavor for minimally 12 hours! Enjoy!

vietnamese vermicelli salad recipe, vermicelli noodle salad, vermicelli salad recipe, how to make vermicelli noodle salad, vermicelli noodles salad recipe, asian salad, asian salad dressing, how to make vietnamese vermicelli noodle salad recipe, asian noodle salad, asian salad recipe, easy sesame noodle salad, asian cold noodle salad, glass noodle salad with sesame dressing, bean vermicelli, ramen salad, vegan salad, vegetarian salad, sesame sauce, sesame sauce recipe
Poppy Seed Almond Muffins 🤎 Have you ever tried C Poppy Seed Almond Muffins 🤎

Have you ever tried Costco’s almond poppy seed muffins? If you have, this is a copycat version of it! It’s my fav muffin and I knew I had to recreate it at home!

These Poppy Seed Almond Muffins are soft, fluffy, and bursting with sweet almond flavor. With a tender crumb and delicate crunch from the poppy seeds, they’re the perfect cozy bakery-style treat for breakfast, snacking, or coffee breaks.

INGREDIENTS
* 2 1/4 Cups Flour
* 1/2 tsp Salt
* 1/2 tsp Baking Soda
* 1/2 tsp Baking Powder
* 3/4 Cup Oil 
* 1 Cup White Sugar
* 2 Eggs
* 1 tsp Vanilla Extract
* 1 Tbsp Almond Extract 
* 3/4 Cup Sour Cream
* 1/4 Cup Milk
* 2 Tbsp Poppy Seeds
* 1/4 Cup Slivered Almonds sprinkle on top

INSTRUCTIONS
* Preheat oven to 350°F and line a 12-cup muffin tin with liners or lightly grease it.
* In a large bowl, whisk together oil, sugar, eggs, vanilla extract, almond extract, sour cream, and milk until smooth.
* Add flour, salt, baking soda, and baking powder directly into the same bowl. Gently mix until just combined.
* Fold in the poppy seeds.
* Divide the batter evenly between the 12 muffin cups and sprinkle slivered almonds on top.
* Bake for 25 minutes, or until a toothpick inserted into the center comes out clean.
* Let cool slightly before serving.


almond poppy seed muffins, poppy seed muffins, costco copycat, costco copycat recipes, almond muffins, easy muffin recipes, simple muffins, poppy seed almond muffins
Spicy Canned Tuna Sushi Bake 🐟🍣 This Spicy Canned Spicy Canned Tuna Sushi Bake 🐟🍣

This Spicy Canned Tuna Sushi Bake is creamy, savory, and packed with bold flavor! Made with simple pantry ingredients, it’s an easy, budget-friendly twist on sushi! It is perfect for sharing, scooping with seaweed, and satisfying all your sushi cravings at home.

INGREDIENTS
* 1 Can Tuna drained
* 2 Tbsp Sriracha
* 1/4 Cup Mayo
* 1 Tbsp Sesame Oil
* 2 Tbsp Furikake
* 1 Cup White Rice cooked
* 1 tsp Sugar
* 1/2 Tbsp Rice Vinegar
* 1 Packet Seasoned Seaweed

INSTRUCTIONS
* Preheat your oven to 400F and prepare a 6-inch baking pan.
* In a bowl, add in your rice and heat it in the microwave for 1 minute. This is so it’s easier for the sugar and rice vinegar to soak in. Add in your rice vinegar and sugar and mix well.
* Next, add in the rice mixture to your baking pan in an even layer. Sprinkle furikake on top.
* Use the same bowl that you mixed up your rice in and add in your drained canned tuna, sesame oil, sriracha, and mayo and mix well.
* Add the layer of saucy tuna on your rice layer evenly on top. Sprinkle with furikake.
* Bake at 400F for 20-30 minutes or until the top is golden brown.
* Serve with a side of seasoned seaweed and enjoy!


sushi bake canned tuna, spicy tuna sushi bake, tuna sushi bake, spicy tuna sushi, sushi bake tuna, spicy tuna mayo sushi, canned tuna, sushi bake, easy sushi bake, sushi bake dish, sushi bake asmr, baked sushi, easy baked sushi, sushi bake tutorial, spicy tuna, easy sushi bake ideas, sushi bake steps, viral sushi bake, sushi bake how to, sushi bake trend, sushi baked recipe, easy sushi bake recipe, how to make a sushi bake, sushi bake recipe, tiktok sushi bake, sushi bake tiktok
Spicy Canned Tuna Sushi Bake 🐟🍣 This Spicy Canned Spicy Canned Tuna Sushi Bake 🐟🍣

This Spicy Canned Tuna Sushi Bake is creamy, savory, and packed with bold flavor! Made with simple pantry ingredients, it’s an easy, budget-friendly twist on sushi! It is perfect for sharing, scooping with seaweed, and satisfying all your sushi cravings at home.

INGREDIENTS
* 1 Can Tuna drained
* 2 Tbsp Sriracha
* 1/4 Cup Mayo
* 1 Tbsp Sesame Oil
* 2 Tbsp Furikake
* 1 Cup White Rice cooked
* 1 tsp Sugar
* 1/2 Tbsp Rice Vinegar
* 1 Packet Seasoned Seaweed

INSTRUCTIONS
* Preheat your oven to 400F and prepare a 6-inch baking pan.
* In a bowl, add in your rice and heat it in the microwave for 1 minute. This is so it’s easier for the sugar and rice vinegar to soak in. Add in your rice vinegar and sugar and mix well.
* Next, add in the rice mixture to your baking pan in an even layer. Sprinkle furikake on top.
* Use the same bowl that you mixed up your rice in and add in your drained canned tuna, sesame oil, sriracha, and mayo and mix well.
* Add the layer of saucy tuna on your rice layer evenly on top. Sprinkle with furikake.
* Bake at 400F for 20-30 minutes or until the top is golden brown.
* Serve with a side of seasoned seaweed and enjoy!�

sushi bake canned tuna, spicy tuna sushi bake, tuna sushi bake, spicy tuna sushi, sushi bake tuna, spicy tuna mayo sushi, canned tuna, sushi bake, easy sushi bake, sushi bake dish, sushi bake asmr, baked sushi, easy baked sushi, sushi bake tutorial, spicy tuna, easy sushi bake ideas, sushi bake steps, viral sushi bake, sushi bake how to, sushi bake trend, sushi baked recipe, easy sushi bake recipe, how to make a sushi bake, sushi bake recipe, tiktok sushi bake, sushi bake tiktok
Banana Bread Syrup 🍌 This Banana Bread Syrup is Banana Bread Syrup 🍌 

This Banana Bread Syrup is warm, sweet, and full of cozy flavor just like your favorite homemade loaf in liquid form! Perfect for coffee, pancakes, waffles, or desserts, it’s an easy homemade syrup that adds a comforting, bakery-style touch to any treat 💛

INGREDIENTS
* 1/2 Cup White Sugar
* 1/2 Cup Brown Sugar
* 1 Mashed Ripe Banana
* 1 tsp Vanilla Extract
* 1/2 tsp Cinnamon
* 1 Cup Water

INSTRUCTIONS
* In a small saucepan over medium heat, combine water, white sugar, and brown sugar.
* Stir until the sugars fully dissolve and the mixture begins to gently simmer.
* Add the mashed banana and cinnamon. Simmer for 5–8 minutes, stirring occasionally.
* Remove from heat and stir in the vanilla extract.
* Strain the syrup (optional for a smoother texture) and let cool.
* Transfer to a jar or bottle and store in the fridge.

banana bread syrup, banana bread, banana latte, banana bread latte, banana bread matcha latte, copycat starbucks banana bread matcha latte, banana bread breve, banana bread, copycat starbucks iced banana bread matcha latte, copycat starbucks banana bread matcha, copycat starbucks iced banana bread matcha recipe, iced latte, banana milk, banana coffee, banana coffee recipe, fun latte recipes, banana coffee syrup,
Banana Bread Syrup 🍌 This Banana Bread Syrup is Banana Bread Syrup 🍌 

This Banana Bread Syrup is warm, sweet, and full of cozy flavor just like your favorite homemade loaf in liquid form! Perfect for coffee, pancakes, waffles, or desserts, it’s an easy homemade syrup that adds a comforting, bakery-style touch to any treat 💛

INGREDIENTS
* 1/2 Cup White Sugar
* 1/2 Cup Brown Sugar
* 1 Mashed Ripe Banana
* 1 tsp Vanilla Extract
* 1/2 tsp Cinnamon
* 1 Cup Water

INSTRUCTIONS
* In a small saucepan over medium heat, combine water, white sugar, and brown sugar.
* Stir until the sugars fully dissolve and the mixture begins to gently simmer.
* Add the mashed banana and cinnamon. Simmer for 5–8 minutes, stirring occasionally.
* Remove from heat and stir in the vanilla extract.
* Strain the syrup (optional for a smoother texture) and let cool.
* Transfer to a jar or bottle and store in the fridge.�
banana bread syrup, banana bread, banana latte, banana bread latte, banana bread matcha latte, copycat starbucks banana bread matcha latte, banana bread breve, banana bread, copycat starbucks iced banana bread matcha latte, copycat starbucks banana bread matcha, copycat starbucks iced banana bread matcha recipe, iced latte, banana milk, banana coffee, banana coffee recipe, fun latte recipes, banana coffee syrup,

Copyright © 2026 Lynn Mumbing Mejia · Theme by 17th Avenue