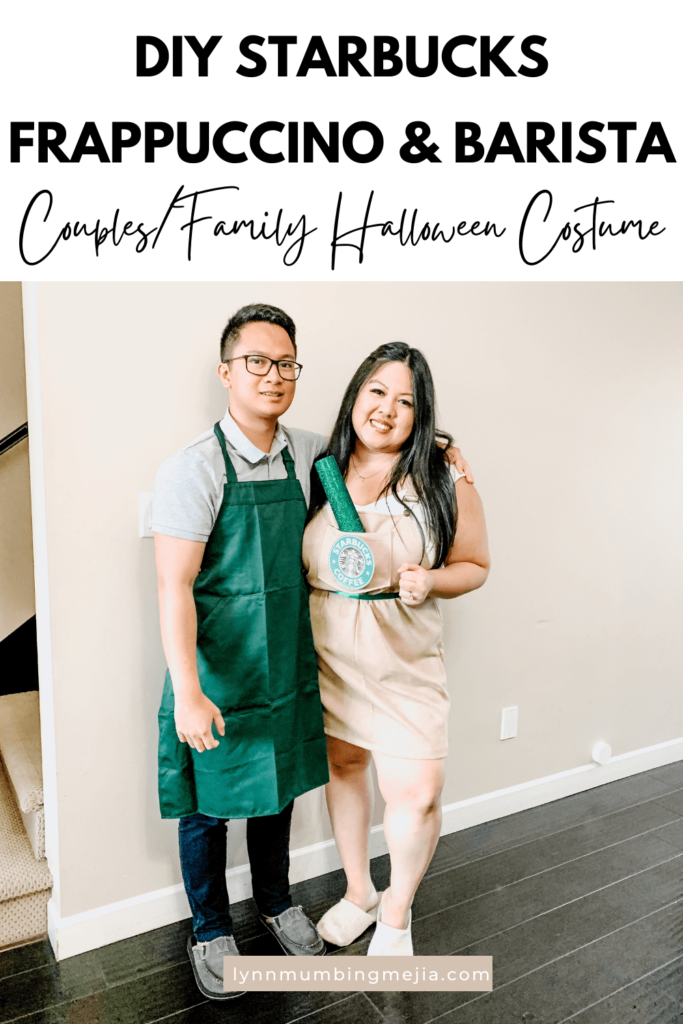
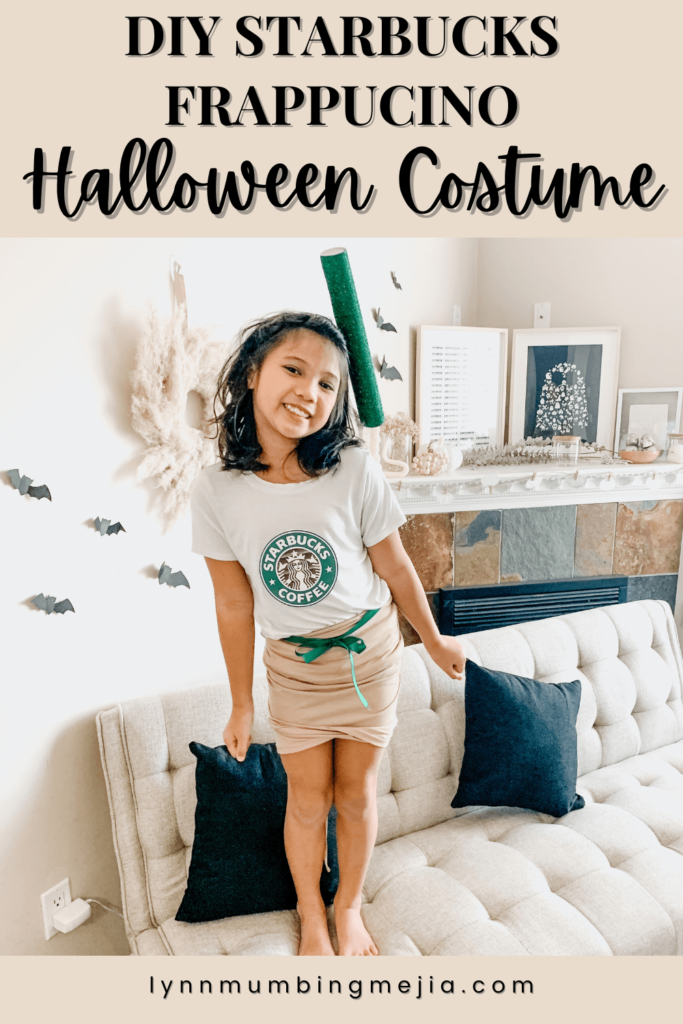
DIY Starbucks Frappuccino and Barista Costume
Read more for all the details on DIY Starbucks Frappuccino and Barista Costume.
The past weekend, we celebrated Canadian Thanksgiving and while the last week of September/October is a busy month for me with my husband and I’s anniversary and birthdays, we wanted to do a costume party!
Okay, if you have been a reader of the blog or just my social media platforms in general, you’ll know that I love these two things in no particular order 1) Starbucks drinks 2) DIY projects and crafts!
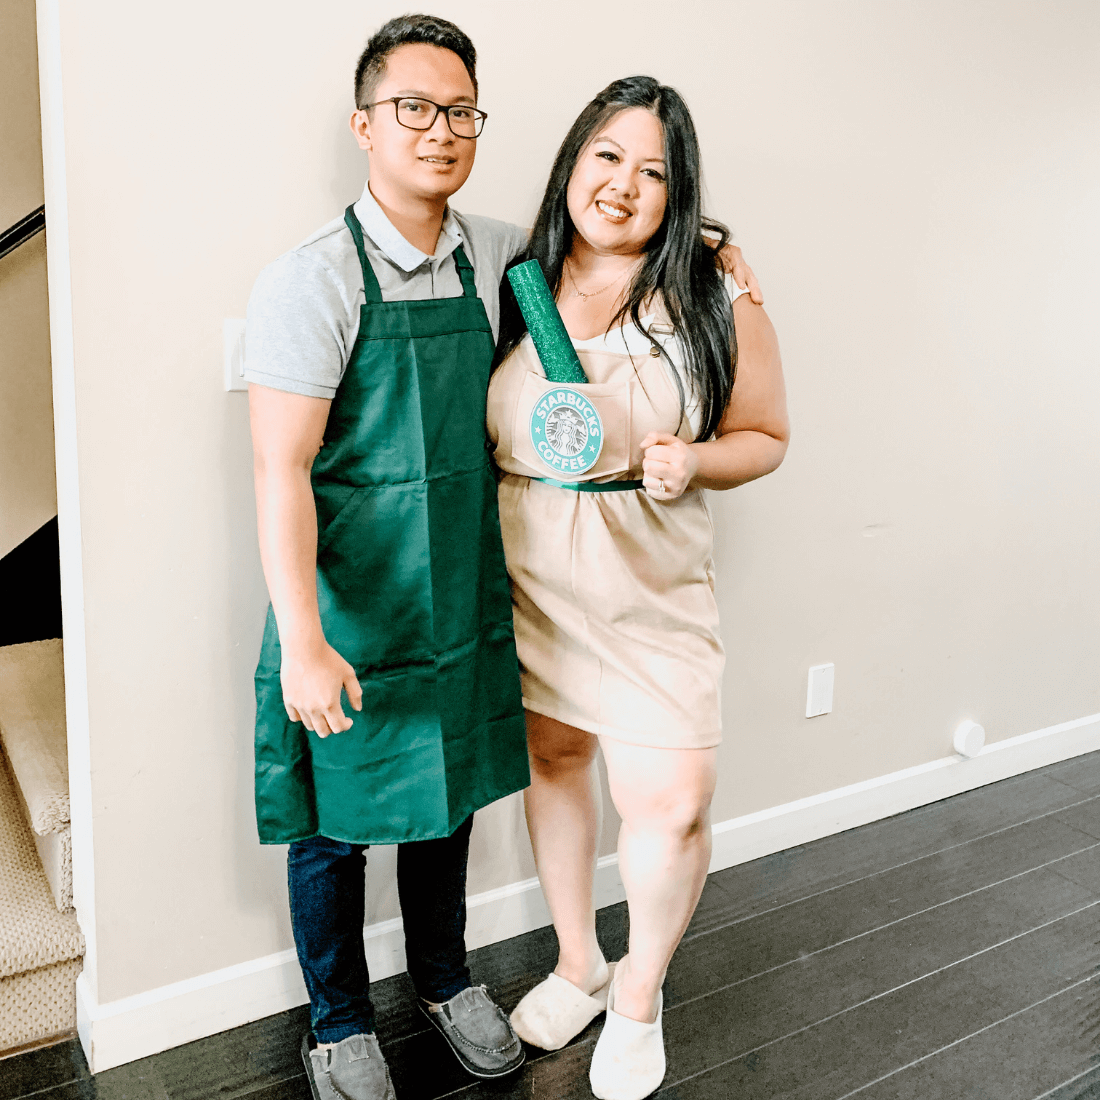
I knew that I wanted to do a super cute costume while at the same time not breaking the break and that’s what I did! I used what I had at home and just added a few things. My husband and I’s DIY Starbucks Frappuccino and Barista Costume costs under $20 and we were the hit of the party!
I highly recommend this DIY Starbucks Frappuccino and Barista Costume for anyone who wants to do a duo or couple costume or even just a solo costume works as well!
Are you dressing up for Halloween? If you are, what are you dressing up as!? I’d love to know in the comments below!
PIN DIY Starbucks Frappuccino and Barista Costume FOR LATER:
Continue reading how to make a DIY Starbucks Frappuccino and Barista Costume…
So my husband is not extra like I am so I wanted to make a costume that would be the least amount of effort for him but would be super cute for me to try and create! I was able to make this costume that he and I could both enjoy. It was seriously so funny when I first told him what we were going to be and he was dreading it until the day when he just saw his regular clothes and an apron!
I definitely made it seem like he was going to have to wear dark green tights and a bunch of accessories hanging all over him. This is perfect for any duo, siblings, partners, besties where one half loves going all out and being cute and the other just wants to be unbothered and have a relaxing time.
My husband took off his apron often throughout the night and just put it back on for photos or whatever! I’ll be forever planning out costumes for him and I and future kids!
Are you the extra half in your duo like me? or are you the chill unbothered half like my husband? Tell me in the comments!!
HERE IS HOW TO MAKE A DIY STARBUCKS FRAPPUCCINO AND BARISTA COSTUME:
WHAT ARE THE MATERIALS NEEDED FOR THIS DIY STARBUCKS FRAPPUCCINO AND BARISTA COSTUME?
The materials needed to make this DIY Starbucks Frappuccino and Barista Costume are quite simple and are most likely in your home already! Here is what you need:
Starbucks Frappuccino
- White Shirt/Top
- Anything Coloured Bottoms, I was a Coffee Frappuccino so I used Beige overalls
- Glittery Green Cardstock Paper
- Printed Cardstock Starbucks Logo
- Satin Green Ribbon
- Optional: Green Eye Makeup
Starbucks Barista
- Neutral Polo Shirt with a Collar (Black, White, Brown, Grey etc)
- Any Dark Coloured Bottoms
- Green Apron
- Optional: Printed Cardstock Starbucks Logo
WHERE CAN I FIND THESE MATERIALS?
Honestly, you can find these materials anywhere! You may already have most of these materials at home already but we used our normal clothing and I printed out a Starbucks logo on my printer. I always use white cardstock paper 8.5″x11 to print things out in my printer! Alternatively, you can head into your local print shop or even staples to get this printed.
For the Starbucks Frappuccino costume, I got glittery cardstock paper from my local dollar store and got 2 pieces for $1! I also got my green ribbon from the dollar store for $1 a roll and last but not least, picked up the cheapest one pot of green eye makeup from the drugstore!
For the Starbucks Barista costume, all I did was buy a dark green apron from Amazon for $14.99 which I can use for everyday cooking too!
WHAT EQUIPMENT DO I NEED?
You really don’t need much to make this DIY Starbucks Frappuccino and Barista Costume. All you’ll really need is some sticky tape to tape on the Starbucks logo or even a hot glue gun if you’re willing to ruin the top you’re wearing! When you roll up the green cardstock to make the straw, you’ll need hot glue or anything that’s strong to hold together so it doesn’t unroll in the middle of the night.
I didn’t do anything special with the green ribbon for the Starbucks Frappuccino costume, I just measure my waist and used scissors to cut a piece then tied the back of it into a bow!
Continue reading how to make a DIY Starbucks Frappuccino and Barista Costume…
WHAT ARE THE STEPS TO CREATE?
I literally threw this costume together about an hour before guests came but basically the steps needed to create this DIY Starbucks Frappuccino and Barista Costume are:
- Print – the Starbucks logo and measure it to be big enough for your outfits
- Roll – the green glitter paper to make a straw
- Tie – a ribbon either around your waist or as a bracelet
- Put the costume on altogether!
CAN I SUB ANYTHING OUT?
There isn’t a lot to sub out to make this DIY Starbucks Frappuccino and Barista Costume but I have to say, the glitter gets EVERYWHERE so you can opt-out the glitter cardstock and just use solid dark green paper!
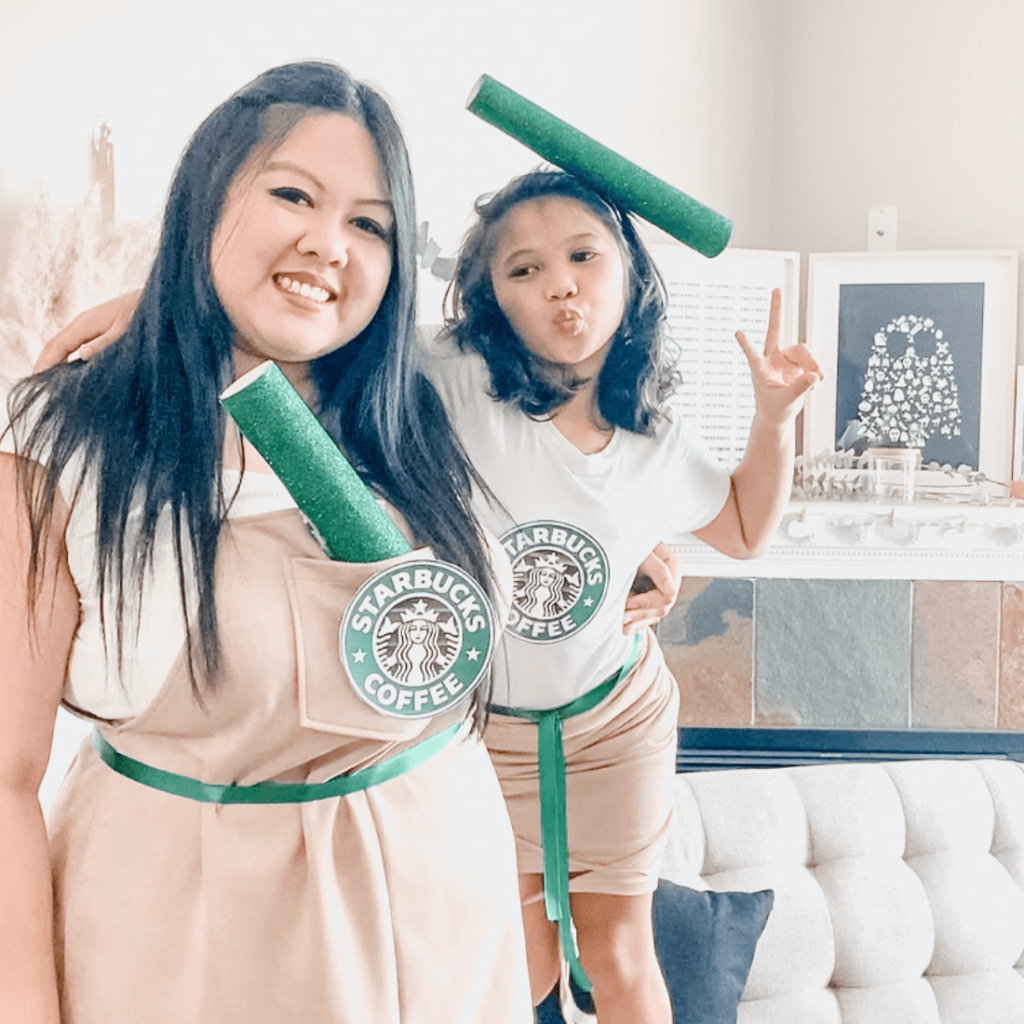
If you don’t want to be a coffee frappuccino, you can also be a strawberry one or any flavour you’d like! Just use different bottoms and keep the same white top. The white top symbolizes whipped cream!
You can put or tape the straw anywhere you’d like. I put my straw in my overalls front pocket but you can put it on your head in a headband or hot glue some hair clips or even just tape it onto the top of your shirt!
As for the barista part, the green apron is pretty much the distinctive factor of a Starbucks barista although some Starbucks don’t make employees wear this anymore, if you didn’t have this, it wouldn’t look like a barista haha!
DOES THIS COSTUME LAST TO USE FOR THE FOLLOWING YEARS?
So, this is a great question, I’ve been answering since I posted photos! The answer is no. This DIY Starbucks Frappuccino and Barista Costume are not meant to be used for the following years. This costume is seriously one of the easiest costumes I’ve ever made so you could remake this whenever you want for Halloween!
BUT, you can try and make this last really well. I suggest storing the green straw somewhere that won’t get folded and laminating or create the Starbucks logo to be laminated or as a Cricut vinyl sign! By doing these things, you’ll be able to slip into this costume anytime for years to come!
Continue reading how to make a DIY Starbucks Frappuccino and Barista Costume…
HOW LONG DOES IT TAKE TO MAKE?
As I said earlier, I literally did this within the hour of our guests coming to our house! I’d say, it takes a total of 30 minutes to put together. A little bit longer for me as I also put on some makeup and green eyeshadow and did my hair but the only thing you really need to do is 1) Roll the cardstock into a straw 2) Print out a Starbucks logo 3) Put some kind of green ribbon on you as an added pop of green accessory!
INSPIRATIONS FOR THIS COSTUME?
Of course, everyone and their moms know that I LOVE Pinterest and am constantly on there looking at anything and everything! I did a post on DIY Halloween Costumes for Couples and DIY Halloween Costumes for Kids so I did lots and lots of research in the summer to see what I wanted to include! I saw this one and thought it was super cute!!
I looked into it more and knew I wanted to do something similar! I couldn’t find an affordable white boa and didn’t want to spend a bunch of money on my costume so I decided to just see what I had at home and from the dollar store. I ended up purchasing the apron from Amazon but it wasn’t too bad as I could use the apron again and not just waste it or leave it in the closet for years haha!
ANY OTHER NOTES?
Yes! A few notes for this DIY Starbucks Frappuccino and Barista Costume:
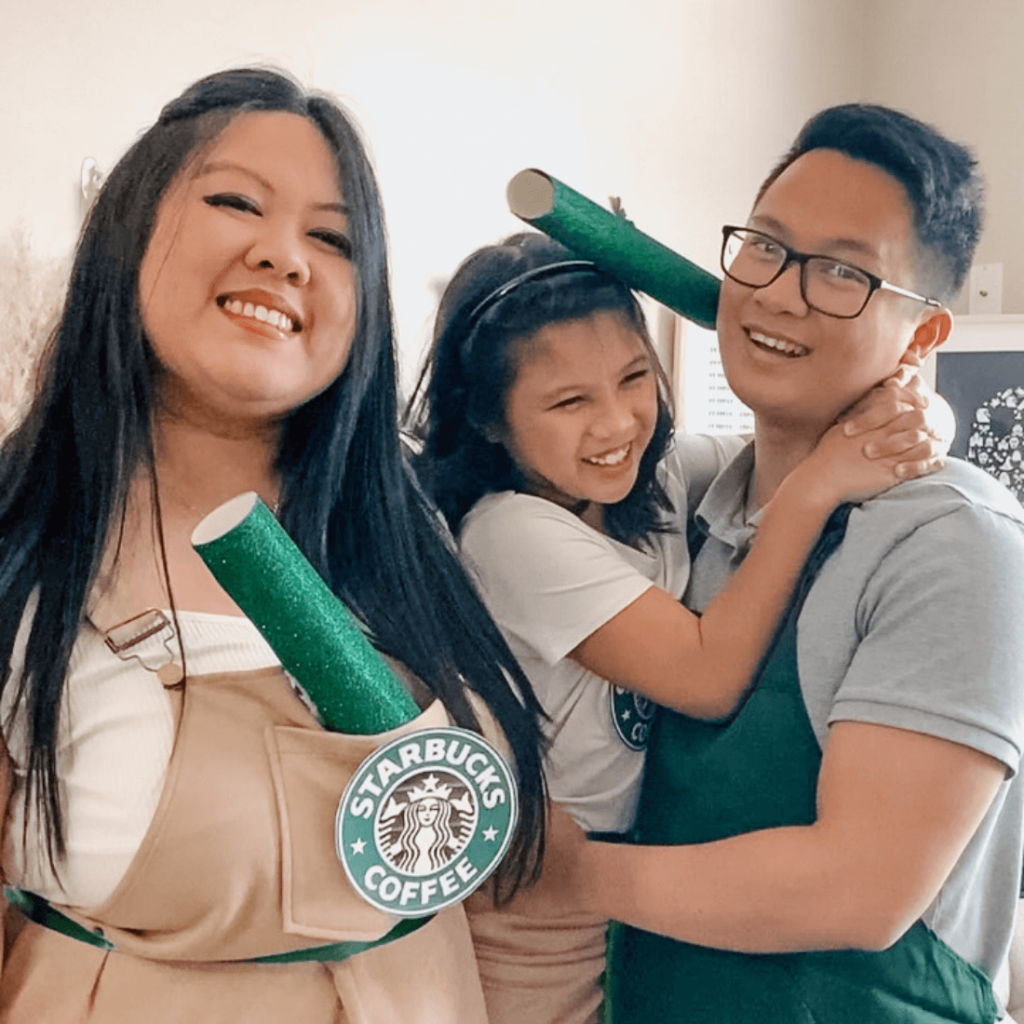
- You can put the straw anywhere you’d like. I made my niece who was staying with me for the weekend a frappuccino costume with me and I glued her straw as a headband. I put my straw in my overalls pocket but you can tape it to your chest or even to your back or on hairclips.
- Printing the Starbucks logo on a regular piece of paper WILL NOT work! You absolutely need thicker paper or your logo will not last more than half an hour!
- The green ribbon is awesome and can be put anywhere on your body as well. It’s a nice pop of green to add to your white and beige outfit. We put ours on our waist and it tied the whole costume together!
- For shoes, you can use whatever but white canvas shoes would be the cutest especialy if you’re not going to be taking your shoes off at wherever you’re going to!
- Make sure to keep the top white as it symbolizes whipped cream! It definitely wouldn’t look the same if you didn’t wear a white top but if you really didn’t have one, I’m sure you could try and make it work anyways!
Continue reading how to make a DIY Starbucks Frappuccino and Barista Costume…
STEPS TO DO THIS DIY STARBUCKS FRAPPUCCINO AND BARISTA COSTUME:
So, I’ve pretty much described the entire process on how to make this DIY Starbucks Frappuccino and Barista Costume but here is exactly what I did in order:
Step 1: Go on your computer and open a Microsoft word doc and Google Search Starbucks Logo. Add the logo onto your Microsoft Word doc and make it a decent size to put on yourself. Print it out and cut!
Step 2: Grab your glittery dark green cardstock paper and roll it into a long straw. Use glue, tape or hot glue to make sure the shape stays in place.
Step 3: Measure out your satin green bow to wherever you want to place it for the night and cut the ribbon. Set aside.
Step 4: Change into your Frappuccino and Barista Clothing. Frappuccino = white top, whatever flavour colour you want bottoms. Barista = whatever coloured top and dark bottoms.
Step 5: For the barista, put on your apron. For the frappuccino, tape your straw and logo onto you and tie the ribbon in a nice bow!
Show off your costume and enjoy your night!
I hope you enjoyed reading how I made this DIY Starbucks Frappuccino and Barista Costume! It was so easy and so cheap! I can’t believe I spent less than $20 for my husband’s, my niece’s and my own Starbucks-inspired costumes!
We love Starbucks in this household and are not afraid to admit it. I’m hoping to do one more costume before the end of the month, time permitting and would love to show you guys what I do!
Would you dress up as a Starbucks Frappuccino and Barista costume? Share with your bestie or partner if this is the costume for you guys this year!
Xo,
Lynn
Are you making this DIY Starbucks Frappuccino and Barista Costume?! Don’t forget to tag me if you do!

This blog post is all the details on DIY Starbucks Frappuccino and Barista Costume.
P.S: If you haven’t read my most recent post, click here!
PIN DIY Starbucks Frappuccino and Barista Costume FOR LATER:
If you liked reading DIY Starbucks Frappuccino and Barista Costume, you might like these are well!
Candy Corn Rice Krispies Treats
The Ultimate List of Halloween Family Friendly Movies
Coffee Filter Ghosts Halloween Craft
13+ Spooky Halloween Themed Date Night Activities
This is the end of DIY Starbucks Frappuccino and Barista Costume.
This costume is so cute! You are so creative!
Antonia || Sweet Passions
This looked like so much fun.
This is so cute!!!! Looks really easy to to make. I wish we had Halloween here in SA….
Awesome Lynn! This one looks so easy to make! We don’t have Halloween here but I’d love to try this for fun 😀 Thanks for sharing the idea x
This is such a fun Halloween costume! I love it 😍🎃
Omg this is SO cute; I love it!!
This is such a cute costume idea, I love it! Something completely different to what you’d normally see people dressed up as! x
Lucy | http://www.lucymary.co.uk
I saw this on your IG and thought you guys looked so adorable! I love the idea of this costume as it isn’t too complex/expensive. What a great idea!
Such an adorable couples costume!
You guys are too adorable!!! What a great couple’s costume, especially as your hubby didn’t want to dress up too much (you totally stole the show!). I love where you put the straw too 😉
Oh and happy anniversary to you both!
This is creative and adorable and I love it! Such a fun costume idea for any age. And it seems really simple too, which is nice. I’ll have to consider it for next year (this year I’m going to be David Rose from Schitt’s Creek haha)
This is cool idea! You guys look brilliant in this costume.
xoxo
Lovely
http://www.mynameislovely.com
Oh wow!!!!!! This is sooooo awesome! A Starbucks theme party. I like your outfit. Thank you for sharing.
This looks so so cute and love how it can be used not only for couples but as a family costume idea too! You all looked amazing and are totally a couple goals! I love how easy it looks and done with things you already have x
Great costume ideas and the pictures are so cute. Hope you had a lovely time.
Ahhh this is such a cute costume! #StarbucksAllTheWay haha! I love how simple it is to make this outfit and it doesn’t cost a lot either!
Lynn, creativity knows no bounds