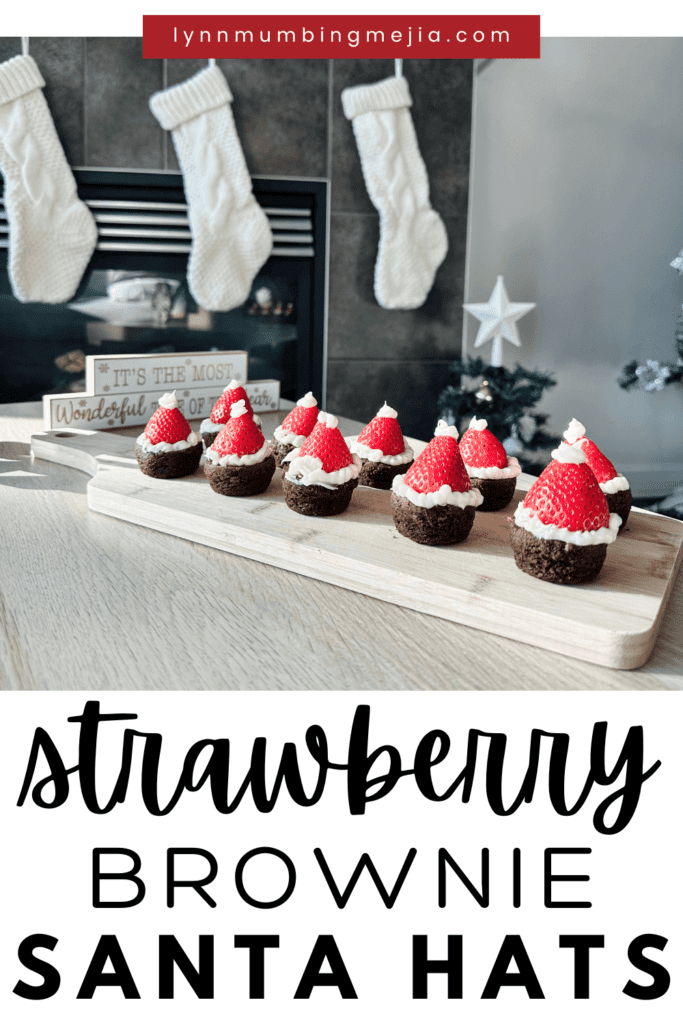
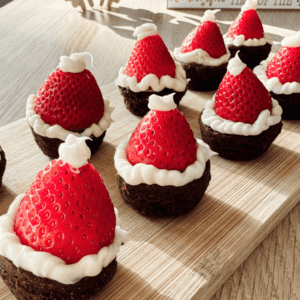
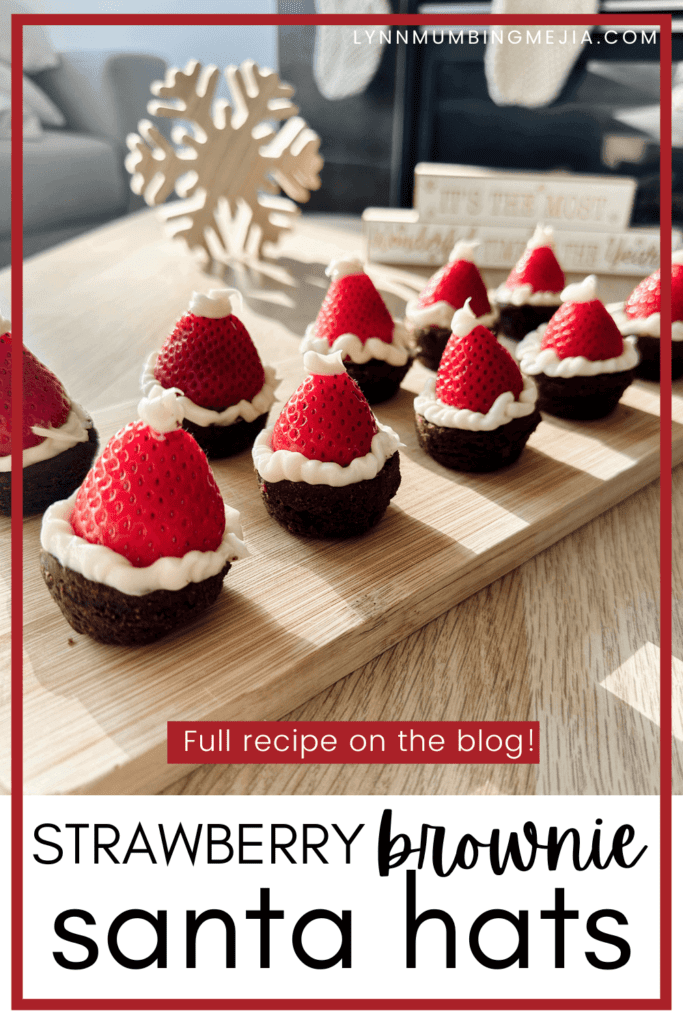
Strawberry Brownie Santa Hats
Read more for all the details on Strawberry Brownie Santa Hats.
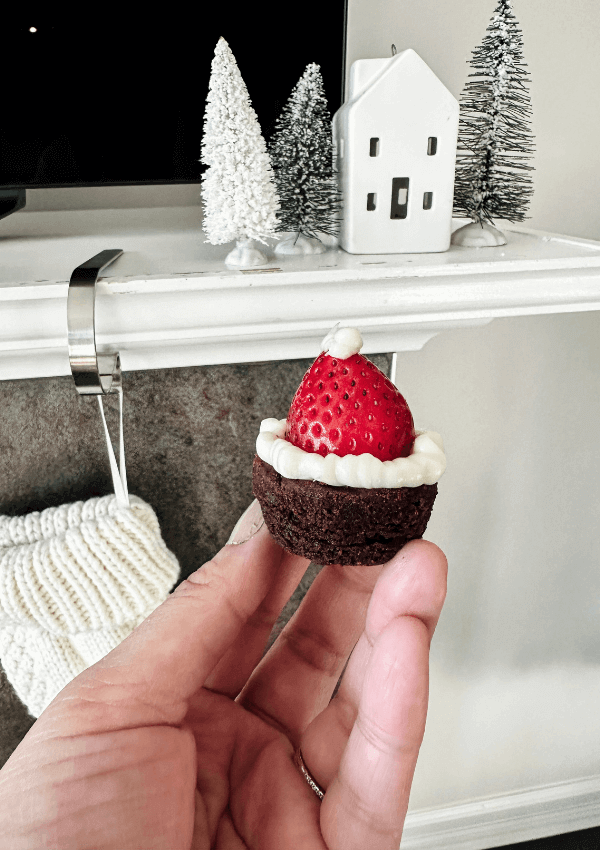
‘Tis the season for sweet indulgences and creative confections! This holiday, we’re adding a touch of whimsy to your dessert table with Strawberry Brownie Santa Hats. Picture this: adorable Santa hats made of rich, fudgy brownies crowned with plump strawberries and decadent vanilla frosting.
These are such a cute and easy sweet treat to make! Perfect for last-minute gatherings or when you’re in a pinch for time but still want to prepare something that’s Christmas-themed! You’ll love creating these Strawberry Brownie Santa Hats that will be the star of your holiday dessert spread.
PIN Strawberry Brownie Santa Hats FOR LATER:
This Strawberry Brownie Santa Hats recipe is accompanied by a YouTube Tutorial. If you haven’t subscribed to me on YouTube, don’t forget to!
HERE IS HOW TO MAKE STRAWBERRY BROWNIE SANTA HATS:
WHERE CAN I FIND THESE INGREDIENTS?
To make Strawberry Brownie Santa Hats, you can find the ingredients at various places, including:
- Grocery Stores: Your local grocery store is a convenient option. Look for two-bite brownies, fresh strawberries, vanilla/white frosting, and any optional ingredients like chocolate chips or sprinkles.
- Baking Supply Stores: Specialty baking supply stores carry a wide range of baking mixes if you want to make your brownies from scratch, decorations, and tools. You might find unique toppings or holiday-themed sprinkles to enhance your Santa Hats.
- Farmers’ Markets: Fresh strawberries are often available at farmers’ markets, providing a chance to source high-quality, seasonal produce.
- Online Retailers: If you prefer shopping online, many retailers offer baking mixes, fresh produce, and specialty toppings. This can be especially helpful if you’re looking for specific decorations.
- Local Bakeries: Some local bakeries sell brownie mixes or may have pre-made brownies that you can use as a base for your Santa Hats.
Remember to check for any holiday-themed decorations or toppings to make your Strawberry Brownie Santa Hats extra festive. With these options, you’ll be well-prepared to create a delightful and visually appealing holiday treat.
WHAT ARE THE INGREDIENTS?
The ingredients to make these super cute Strawberry Brownie Santa Hats are:
- Two-bite brownies
- Strawberries
- Vanilla/White Frosting
WHAT EQUIPMENT DO I NEED?
You definitely do not need much for this one! If you want to make them look very well put together, you can use piping bags and tips! I generally love it when my dishes have that homemade look on them and are not completely perfect. I just add some frosting to a ziplock bag and cut the tip to pipe out some frosting.
Aside from a piping bag or ziplock, you’ll need a cutting board and knife to chop off the tops of the strawberries!

CAN I SUBSTITUTE/ADD ANYTHING OUT?
I almost always recommend some substitutions/additions however, for this super easy 3 ingredient recipe, there is truly nothing you’d want to add! For dietary substitutions, if you want to make your own gluten-free brownies or vegan vanilla frosting or something like that, you totally can!
If you want to make even smaller Santa brownie hats, you can always try raspberries instead but I must say that the strawberries and brownies are just PERFECT together!
WHAT DOES STRAWBERRY BROWNIE SANTA HATS TASTE LIKE?
Strawberry Brownie Santa Hats offer a delightful combination of rich, fudgy chocolate brownies, juicy and slightly tart strawberries, and the sweetness of fluffy vanilla frosting! Here’s what you can expect:
- Chocolate Brownies: The brownie base provides a decadent and deeply chocolatey flavor. The fudgy texture complements the juiciness of the strawberries, creating a harmonious blend of sweetness and richness.
- Strawberries: Fresh strawberries bring a burst of natural sweetness and a hint of tartness. Their juiciness contrasts with the dense texture of the brownie, adding a refreshing element to each bite.
- Vanilla Frosting: The vanilla frosting adds extra sweetness that enhances the richness of the brownie and complements the fruity flavor of the strawberries. It also mimics the appearance of Santa’s snowy hat.
- Optional Toppings: If you choose to add optional toppings like chocolate chips or sprinkles, they can contribute additional textures and flavors, enhancing the overall taste experience.
Strawberry Brownie Santa Hats are a festive and visually appealing treat that not only delights the eyes but also tantalizes the taste buds with a perfect balance of chocolatey, fruity, and creamy flavors. It’s a joyful and indulgent experience, making it a wonderful addition to holiday celebrations.
HOW LONG DOES IT KEEP FOR?
Strawberry Brownie Santa Hats are best enjoyed shortly after assembly for optimal freshness. Strawberries carry a lot of juice in them so they will start to be soggy after a day. If preparing in advance, store components separately and assemble just before serving. In ideal conditions:
- Brownies: When stored in an airtight container at room temperature, brownies can maintain freshness for about 2-3 days.
- Strawberries: Fresh strawberries are best consumed within 2-3 days. Refrigerate them in a container lined with paper towels to absorb excess moisture.
- Vanilla Frosting: If you’re just using the vanilla frosting from a can like I do then there really is no expiration date but just be sure to store it in an airtight container for freshness!
For the freshest and most visually appealing Santa Hats, assemble them close to the time you plan to serve. If components are stored separately, they can be prepared ahead, and assembly takes just a few minutes before serving.
INSPIRATIONS FOR THIS RECIPE?
I was looking through different Santa hat recipes on Pinterest and saw other creators making different versions of these and they just looked so cute that I wanted to recreate my own version in the easiest possible way for everyone!
Some of the versions make everything from scratch which sounds so delish but honestly, I just love quick recipes to put together! I bought everything premade and just assembled everything within 10 minutes which is a WIN for me!
ANY OTHER NOTES?
No other notes for this recipe!
Strawberry Brownie Santa Hats
Ingredients
- 20 Two-bite Brownies
- 20 Strawberries preferrably all the same or similar sizes
- 1 Cup Vanilla Frosting
Instructions
- Cut the tops of all your strawberries and place each one on top in the middle of every brownie bite.
- Pipe frosting around the base of the strawberry touching the brownie then pipe a small circle on the top to complete the Santa hat.
- Place on a tray, serve and enjoy!
These Strawberry Brownie Santa Hats are a festive masterpiece, blending chocolatey richness with fruity freshness. Spread joy, savor the sweetness, and have a berry merry holiday season!
Xo,
Lynn
Are you adding this Strawberry Brownie Santa Hats recipe to your list?! Don’t forget to tag me if you do!

This blog post is all the details on Strawberry Brownie Santa Hats.
P.S: If you haven’t read my most recent post, click here!
PIN Strawberry Brownie Santa Hats FOR LATER:
If you liked reading Strawberry Brownie Santa Hats, you might like these are well!
Quick Sweet and Salty Christmas Popcorn
24 Delicious Christmas Cocktails
20+ Easy Christmas Breakfast Ideas
20 No-Bake Easy Christmas Treats
How to Make A Christmas Treat Charcuterie Board
This is the end of Strawberry Brownie Santa Hats.


The brownies are so cute, and my daughter would absolutely LOVE them! Thanks for sharing!