Read more for all the details on Canned Tuna Fried Rice.
Canned tuna is my saviour on weeks where I really want to stretch my groceries! I always buy canned tuna whenever it’s on sale eat it honestly on weeks where I’m more focused on saving money. It’s a great protein source and adding it to fried rice really fills me up!
This is my general fried rice recipe that I stick to and is so yummy and I just swap out the protein with whatever I have! Sometimes it’s spam or chicken or even ground beef!
PIN Canned Tuna Fried Rice FOR LATER:
This Canned Tuna Fried Rice recipe is accompanied by a YouTube Tutorial. If you haven’t subscribed to me on YouTube, don’t forget to!
HERE IS HOW TO MAKE CANNED TUNA FRIED RICE:
WHERE CAN I FIND THESE INGREDIENTS?
Hopefully you have these ingredients already on hand but if you don’t, not to worry! These ingredients are super easy to find at your local grocery store. Everything you’ll need will be in the pantry aisles of your grocery store then you’ll just need some eggs and mixed frozen vegetables from the dairy and freezer section.
What I love about this recipe is that most of this is pantry staples so you can truly whip this up anytime! I always throw this together when I want to skip getting a big grocery haul!
WHAT ARE THE INGREDIENTS?
The ingredients to make this delicious canned tuna fried rice are:
- Canned Tuna
- White Rice
- Mixed Frozen Veggies
- Eggs
- Pepper
- Soy Sauce
- Sesame Oil
- Olive Oil
- Onion
- Garlic
- Knorr Chicken Bouillon Powder
- Sesame Seeds
WHAT EQUIPMENT DO I NEED?
No special equipment is needed for this recipe! Hopefully, you already have the general kitchen equipment like some pots, pans, kitchen utensils, measuring cups and spoons but to be honest, I usually just season to taste so I have measurements of this recipe but you’re welcome to season to your taste!
Here are some of my Amazon kitchen favs!

CAN I SUBSTITUTE/ADD ANYTHING OUT?
Everyone has their own version of fried rice but this is mine! You’re completely welcome and encouraged to make any substitutions, additions or changes to the recipe! If you do, let me know what you do! I’m always looking for inspiration to spruce things up! Here are some fun additions and substitutions for this recipe!
- Adding some teriyaki sauce
- Substituting the canned tuna for any protein that you have or even adding tuna and another protein source like shrimp or tofu!
- Adding pineapple
- Adding green onions
- Adding spinach
- Adding chilli flakes or hot sauce
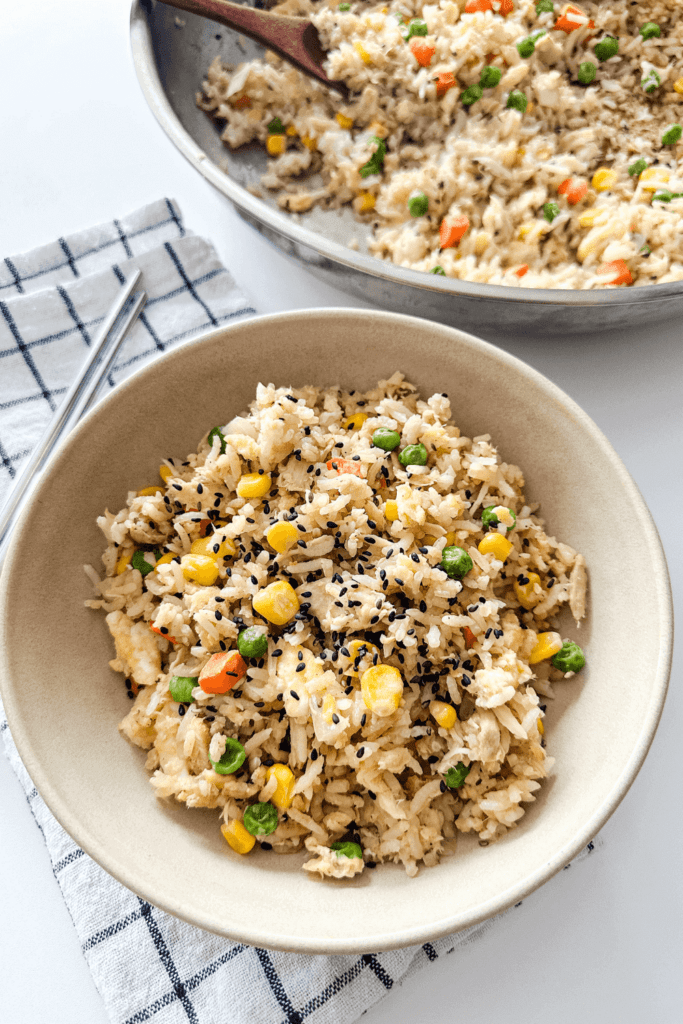
WHAT DOES CANNED TUNA FRIED RICE TASTE LIKE?
Ooh, every time I eat a spoonful of homemade fried rice, it really hits the spot! I act like I haven’t had fried rice in a long time but honestly, I make this quite often haha. You get the meaty and flaky pieces of tuna, sweetness from the frozen peas, corn, carrots and onions, some hearty egg pieces and a delicious combination of sesame oil and soy sauce all combined together in comforting white rice seriously makes this the perfect dish!
HOW LONG DOES IT KEEP FOR?
I usually have enough of this to make 2-3 meals! I like to sometimes pair it with a side salad, cooked veggies or protein on the side. Meal prep this in separate airtight containers and have it for lunch! It reheats really well and is truly a satisfying meal on a budget! Keep no longer than 5 days!
INSPIRATIONS FOR THIS RECIPE?
I like to do 2-3 big grocery hauls a month because I try to stick to a budget when it comes to spending money in all aspects of my life. On the weeks where I’m wanting to skip doing groceries or try to use up as much as I can with what I already have, I like to make easy meals like this tuna fried rice. I generally always have eggs, canned tuna, rice and frozen veggies so this is almost always a meal I can readily make!
ANY OTHER NOTES?
Make sure your rice is a day old! You can cook your rice, put it in an airtight container and make sure it is completely cooled before storing it in the fridge. You can also use new rice and just cook it with less water and low heat so it’s not too sticky!
Canned Tuna Fried Rice
Ingredients
- 1 Canned Tuna drained
- 2 Cups White Rice cooked
- 1/2 Cup Frozen Mixed Veggies
- 2 Eggs scrambled
- 1/4 Onion diced
- 2 Garlic Cloves minced
- 1 1/2 Tbsp Olive Oil
- 1/2 tsp Pepper
- 1 1/2 Tbsp Soy Sauce
- 1 tsp Knorr Chicken Bouillon Powder
- 1 Tbsp Sesame Oil
- 1 tsp Sesame Seeds or as much as you'd like <3
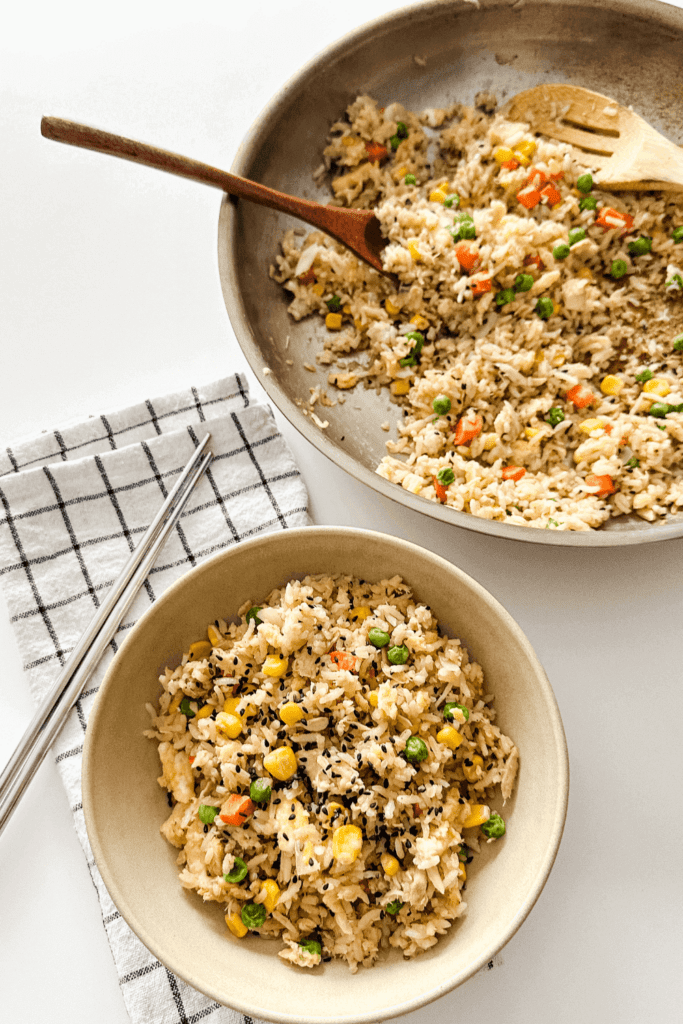
Instructions
- Turn your stove on to medium heat and place a large frying pan to heat up.
- Add in 1 Tbsp oil, garlic and onions and cook until onions are translucent. About 1-2 minutes.
- Next, add in your tuna and mix veggies to heat up.
- Push the tuna and veggies to the edges and create a circle in the middle of the pan. Add in 1/2 Tbsp of oil and add in your scrambled eggs to cook. Try to let it firm up so you get bigger pieces of egg.
- Once your eggs are cooked, combine everything together again and then once more, push the egg, tuna and veggies to the edges and create a circle in the middle of the pan.
- Add the rice and break apart so that there are no rice clumps. Let rice heat up then add in your pepper, soy sauce and Knorr chicken bouillon powder.
- Mix everything together so that the seasonings, rice, tuna, eggs and veggies are all well-corporated. Cook for about 5 minutes.
- Lastly, add your sesame oil and sesame seeds and give it one last toss.
- Cool, serve and enjoy!
Thank you so much for reading this recipe! I really hope you enjoy it and it becomes a staple meal for you like it is for me! <3
Xo,
Lynn
Are you going to try making this Canned Tuna Fried Rice recipe?! Don’t forget to tag me if you do!

This blog post is all the details on Canned Tuna Fried Rice.
P.S: If you haven’t read my most recent post, click here!
PIN Canned Tuna Fried Rice FOR LATER:
If you liked reading Canned Tuna Fried Rice, you might like these as well!
50+ High Protein Snack Box Ideas
Japanese-Inspired Spicy Kani Salad
Easy Asian Peanut Butter Chicken
Asian Sesame Air Fryer Frozen Brussels Sprouts
This is the end of Canned Tuna Fried Rice.