Hello! I'm Lynn.
  • About Me
  • Work With Me
  • Contact Me
  • Subscribe
  • Home
    • About
    • Contact
    • Disclaimer
    • Terms & Conditions
    • Privacy Policy
    • Subscribe
      • Work With Me
        • Media Kit
        • Portfolio and Samples
  • diy
  • lifestyle
    • home decor
  • recipes
  • gifts, parties & holidays
  • health & wellness with lynn

Lynn Mumbing Mejia

Crafting coziness, one recipe, DIY project, and holiday celebration at a time.

recipes · October 6, 2022

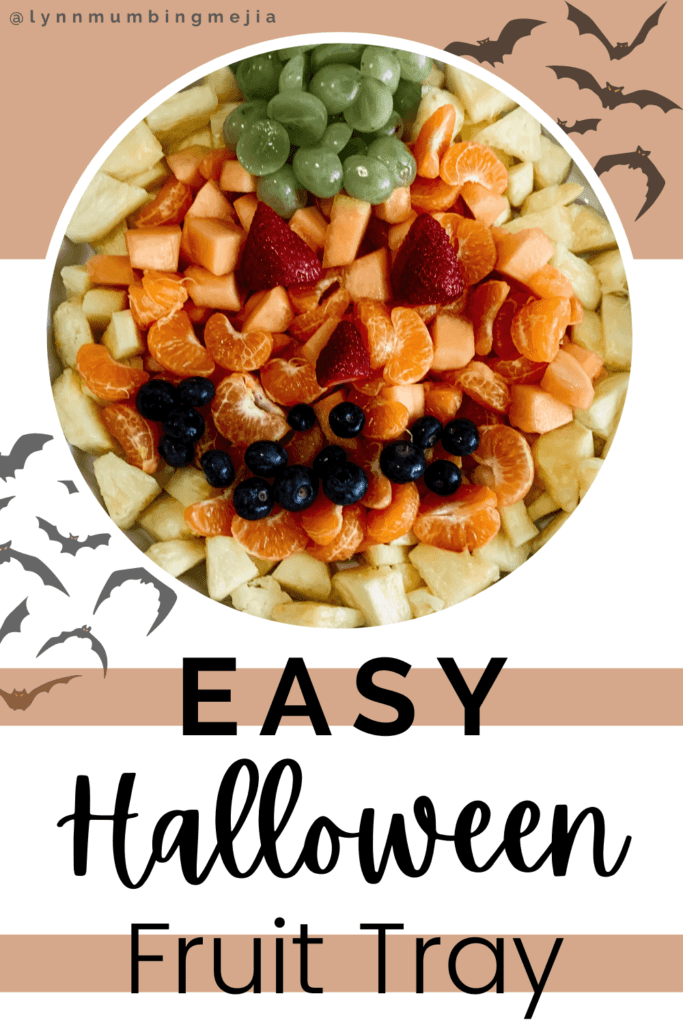
Easy Halloween Fruit Tray – Pumpkin Shaped

*This post may contain affiliate or sponsored links, which means I may get paid or receive a commission if you purchase through my link, at no extra cost to you!*
Jump to Recipe Print Recipe

Read more for all the details on Easy Halloween Fruit Tray.

I don’t make the rules but October means I try to make all my recipes into Halloween and Fall-themed foods. Fall is my favourite time of year so you know that I take advantage of it to THE FULLEST!

I love hosting or attending Halloween gatherings and this Halloween Fruit Tray is the most perfect way to elevate something as simple as a regular party fruit platter.

PIN Easy Halloween Fruit Tray FOR LATER:
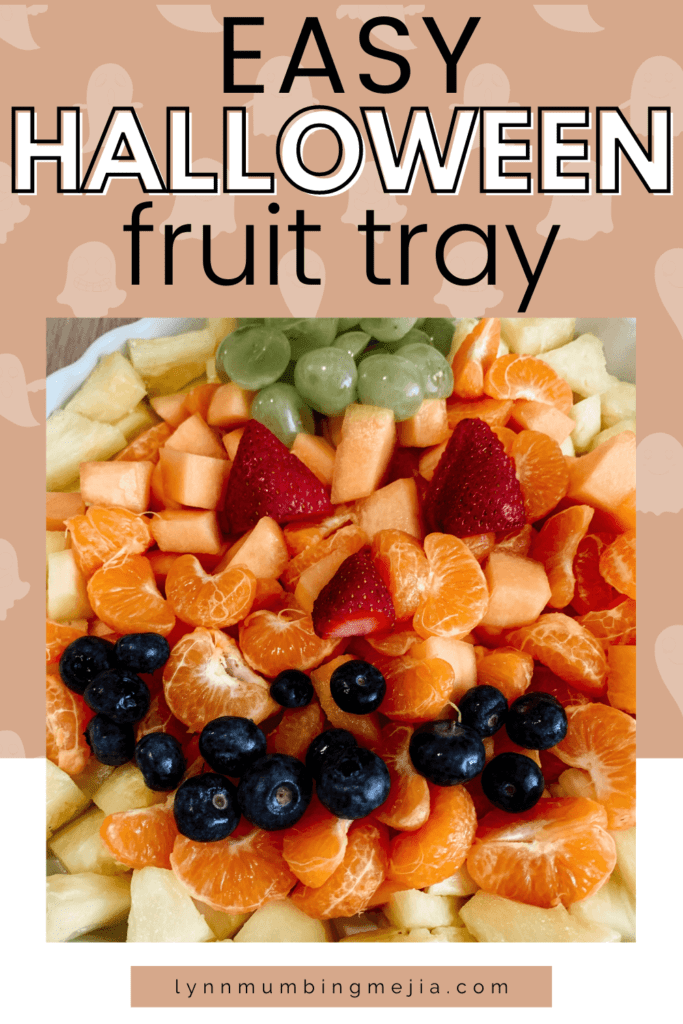
Easy Halloween Fruit Tray - Pumpkin Shaped - Lynn Mumbing Mejia - Pin 1

This Easy Halloween Fruit Tray recipe is accompanied by a YouTube. If you haven’t subscribed to me on YouTube, don’t forget to!

Table of Contents

Toggle
  • HERE IS HOW TO A EASY HALLOWEEN FRUIT TRAY:
    • WHERE CAN I FIND THESE INGREDIENTS?
    • WHAT ARE THE INGREDIENTS?
    • WHAT EQUIPMENT DO I NEED?
    • CAN I SUBSTITUTE/ADD ANYTHING OUT?
    • HOW LONG DOES IT KEEP FOR?
    • INSPIRATIONS FOR THIS EASY HALLOWEEN FRUIT TRAY?
    • ANY OTHER NOTES?
    • Easy Halloween Fruit Tray
      • Ingredients  
      • Instructions 

HERE IS HOW TO A EASY HALLOWEEN FRUIT TRAY:

WHERE CAN I FIND THESE INGREDIENTS?

This recipe is so awesome because all the ingredients are fruit! You can, of course, use all fruit available to you or maybe that are in season but you can find any of these items at your local grocery store or farmers market.

WHAT ARE THE INGREDIENTS?

The fruits that I use for this Halloween Fruit Tray are:

  • Pineapple
  • Mandarin
  • Cantalope
  • Green Grapes
  • Strawberries
  • Blueberries

WHAT EQUIPMENT DO I NEED?

You don’t need any equipment to make this besides an optional circular dish! I used my pie dish but you can use whatever size circle dish you like. This is definitely up to you and if available to you. You can alternatively just use any serving dish you have available to place your fruit in like a rectangle or square-shaped one.

CAN I SUBSTITUTE/ADD ANYTHING OUT?

Oh, 100%! You can substitute or add any fruit you’d like! I would strongly recommend keeping an orange and green fruit to make the pumpkin body and stem look more pumpkin-y but the beauty of this Halloween fruit tray is that you can be as creative as you’d like!

Some other fruits you can use but are not limited to are:

  • Green Apples
  • Blackberries
  • Raspberries
  • Pears
  • Kiwi
  • Purple Grapes
  • Mango

HOW LONG DOES IT KEEP FOR?

Depending on what fruit you decide to use, it may go brown so I would use judgment with that one. If you’re using the exact fruits that I use which are pineapples, green grapes, mandarin, cantaloupe, blueberries and strawberries, you can get away with making and storing this in the fridge the night before.

If you want to use fruits like bananas, apples, pears etc then I would err on the side of caution and use a browning prevention trick like lemon juice if you want to do this ahead of time or just slice and add in these fruits just before serving!

INSPIRATIONS FOR THIS EASY HALLOWEEN FRUIT TRAY?

I am always looking for fun ways to celebrate Halloween and Fall so I knew that everything I do in the months of September and October was going to be centred around that! I logged into Pinterest one day and saw a Halloween Fruit Tray and thought “I need to make this!”. I thought about the fruits I wanted to use and brought my vision to life!

This is just a great way to bring a fruit tray for any Fall or Halloween-themed parties and gatherings! This Easy Halloween Fruit Tray is easy to make and will impress guests for sure!

ANY OTHER NOTES?

No other notes for this one! I hope you enjoy creating your Halloween Fruit Tray masterpieces and if you stumble across social media, tag me in them because I’d love to take a look at your creations!!
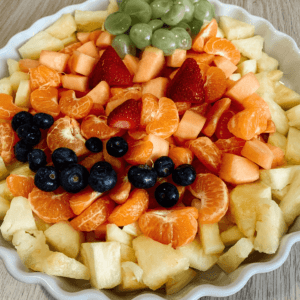
Easy Halloween Fruit Tray

This easy fruit tray is great to serve at your next Halloween or Fall gathering. Hand-crafted in the shape of the classic jack-o-lantern, it makes a fun centerpiece for any party or dessert table!
Print Recipe Pin Recipe
Prep Time 20 minutes mins
Course Snack
Servings 6

Ingredients
  

  • 1 Pineapple chopped
  • 8 Mandarins peeled, separated
  • 1/2 Cantalope chopped
  • 10 Green Grapes sliced in half
  • 3 Strawberries sliced in half
  • 1/2 Cup Blueberries

Instructions
 

  • First, make sure that all your fruit is washed, cut and prep as well as the serving tray that you are using.
  • Next, assemble your fruit tray into a pumpkin shape making sure to add in pumpkin eyes, a nose and a mouth.
  • Either chill for the event in the fridge or directly serve and enjoy!

Thank you for reading! Happy Spooky Season!

Xo,

Lynn

Are you adding this Easy Halloween Fruit Tray to your list?! Don’t forget to tag me if you do!

tag us - Easy Halloween Fruit Tray - Pumpkin Shaped - Lynn Mumbing Mejia

This blog post is all the details on Easy Halloween Fruit Tray.

P.S: If you haven’t read my most recent post, click here!

PIN Easy Halloween Fruit Tray FOR LATER:
Easy Halloween Fruit Tray - Pumpkin Shaped - Lynn Mumbing Mejia - Pin 2

If you liked reading Easy Halloween Fruit Tray, you might like these are well!

Baked Healthy Halloween Corn Tortilla Chips

Halloweentown’s Pumpkin Spice Chocolate Chip Cookies

Easy Halloween Treat Board

Halloween Party Punch with Fruity Eyeballs

Halloween Mummy Hot Dogs

Halloween Muddie Buddies Recipe

Easy Halloween Spider Cookies

Pumpkin Cream Cheese Hand Pies

40+ Last-Minute Halloween Treat Ideas

This is the end of Easy Halloween Fruit Tray.
Shop the post

Posted In: recipes · Tagged: Easy Halloween Fruit Tray, easy halloween party food, halloween food platters, halloween fruit platter ideas, halloween fruit salad recipe, halloween party fruit ideas, halloween recipes, halloween snacks for adults, halloween themes fruit platter, halloween treats, Pumpkin fruit tray, scary halloween snacks

Get on the List

You’ll Also Love

Easy Halloween Dessert Dip
Halloween Ghost Brownies
Easy Boo-Berry Ghost Hand Pies

Comments

  1. Melody Jacob says

    October 9, 2022 at

    Thank you for sharing with us

Trackbacks

  1. Cute and Cheap DIY McDonald's French Fries Costume | Lynn Mumbing Mejia says:
    October 14, 2022 at

    […] P.S: If you haven’t read my most recent post, click here! […]

  2. How To Plan a Spooky Halloween Bridal Shower - 10+ Things You Must-Have! | Lynn Mumbing Mejia says:
    June 16, 2023 at

    […] Easy Halloween Fruit Tray – Pumpkin Shaped […]

  3. Oat Pumpkin Chai Smoothie | Lynn Mumbing Mejia says:
    August 14, 2023 at

    […] Easy Halloween Fruit Tray – Pumpkin Shaped […]

  4. Mini Pumpkin Pizzas | Lynn Mumbing Mejia says:
    August 28, 2023 at

    […] Easy Halloween Fruit Tray – Pumpkin Shaped […]

  5. Halloween Ice Cream Sandwiches | Lynn Mumbing Mejia says:
    September 8, 2023 at

    […] Easy Halloween Fruit Tray – Pumpkin Shaped […]

  6. Halloween Candy Corn Pretzels | Lynn Mumbing Mejia says:
    September 10, 2023 at

    […] Easy Halloween Fruit Tray – Pumpkin Shaped […]

  7. Spooktacularly Easy Halloween Cake Mix Cookies | Lynn Mumbing Mejia says:
    September 27, 2023 at

    […] Easy Halloween Fruit Tray – Pumpkin Shaped […]

Next Post >

Pumpkin Spice Overnight Oats

About Photo
Hey there friend! My name is Lynn and I'm a Canadian Content Creator who's focused on Minimal & Neutral Home Decor Inspo, Simple & Budget Friendly DIY Projects, All Things Holidays and Quick & Easy Recipes. I'm so happy you're here and I hope you'll find something that you love!

Categories

follow lynn

  • Facebook
  • Instagram
  • Pinterest
  • Twitter
  • YouTube

Search

Join Us!

Trending Now

Popular Posts

Links

  • About
  • Contact
  • Disclaimer
  • Privacy Policy
  • Terms & Conditions

Socials

  • Instagram
  • Youtube
  • Facebook
  • Twitter
  • Pinterest

Shop

  • Home Wall Art
  • Recipe Cards
  • Greeting Cards
  • Planner Templates

JOIN THE INNER CIRCLE

This Dill Pickle Pasta Salad is creamy, tangy, and This Dill Pickle Pasta Salad is creamy, tangy, and packed with crunchy pickle goodness in every bite! Tossed with tender pasta and a flavorful, zesty dressing, it’s the perfect side dish for barbecues, potlucks, picnics, or easy weekday lunches. 🥗🥒

INGREDIENTS
3 Cups Cooked Pasta
1 Cup Dill Pickles diced
1 Cup Cheddar Cheese diced
1 Cup Crispy Bacon crumbled
1 Tbsp Fresh Dill
1/2 Cup Sour Cream
1/4 Cup Pickle Juice
1 Packet Ranch Dressing Seasoning Packet
2 Tbsp Mayo

INSTRUCTIONS
1. In a large bowl, whisk together the sour cream, pickle juice, ranch seasoning packet, and mayonnaise until smooth.
2. Next, combine the cooked pasta, chopped pickles, cheddar cheese, crispy bacon, and fresh dill.
3. Toss the pasta mixture with sauce and toss until everything is evenly coated.
4. Cover and refrigerate for at least 4 hours to allow the flavors to come together. (Though, you can eat it immediately if you’d like!)
5. Give the salad a final stir before serving and garnish with extra dill or chopped pickles if desired.
6. Serve and enjoy!

dill pickle pasta salad, dill pickle pasta salad recipe, dill pickle ranch pasta salad, dill pickle pasta salad spaceships, dill pickle pasta salad with cheese, pickle pasta salad, dill pickle pasta, pasta salad with pickles, dillpicklepastasalad, quick pasta salad, pasta salad, dill pickle, pickle salad, pasta salad meal prep, pasta salad ideas, dill pickles, pasta salad recipes tasty, pickle pasta recipe, easy pasta salad, cold pasta salad, best pasta salad, dill pickle food, homemade pasta salad, ranch pasta salad
This Dill Pickle Pasta Salad is creamy, tangy, and This Dill Pickle Pasta Salad is creamy, tangy, and packed with crunchy pickle goodness in every bite! Tossed with tender pasta and a flavorful, zesty dressing, it’s the perfect side dish for barbecues, potlucks, picnics, or easy weekday lunches. 🥗🥒

INGREDIENTS
3 Cups Cooked Pasta
1 Cup Dill Pickles diced
1 Cup Cheddar Cheese diced
1 Cup Crispy Bacon crumbled
1 Tbsp Fresh Dill
1/2 Cup Sour Cream
1/4 Cup Pickle Juice
1 Packet Ranch Dressing Seasoning Packet
2 Tbsp Mayo

INSTRUCTIONS
1. In a large bowl, whisk together the sour cream, pickle juice, ranch seasoning packet, and mayonnaise until smooth.
2. Next, combine the cooked pasta, chopped pickles, cheddar cheese, crispy bacon, and fresh dill.
3. Toss the pasta mixture with sauce and toss until everything is evenly coated.
4. Cover and refrigerate for at least 4 hours to allow the flavors to come together. (Though, you can eat it immediately if you’d like!)
5. Give the salad a final stir before serving and garnish with extra dill or chopped pickles if desired.
6. Serve and enjoy!

dill pickle pasta salad, dill pickle pasta salad recipe, dill pickle ranch pasta salad, dill pickle pasta salad spaceships, dill pickle pasta salad with cheese, pickle pasta salad, dill pickle pasta, pasta salad with pickles, dillpicklepastasalad, quick pasta salad, pasta salad, dill pickle, pickle salad, pasta salad meal prep, pasta salad ideas, dill pickles, pasta salad recipes tasty, pickle pasta recipe, easy pasta salad, cold pasta salad, best pasta salad, dill pickle food, homemade pasta salad, ranch pasta salad
Ube Rice Krispies Treats 💜 These Ube Rice Krispie Ube Rice Krispies Treats 💜

These Ube Rice Krispies Treats are chewy, buttery, and bursting with sweet ube flavor! With their vibrant purple color and soft marshmallow texture, this fun twist on a classic childhood treat is perfect for parties, holidays, or whenever you’re craving something unique and delicious.

INGREDIENTS
* 1/4 Cup Unsalted Butter
* 400 g Mini Marshmallows + extra for topping (optional)
* 2 tsp Ube Extract
* 4 Cups Rice Krispies Cereal

INSTRUCTIONS
* Line a 9×9-inch baking pan with parchment paper.
* In a large pot over low heat, melt the butter.
* Add the mini marshmallows and stir until completely melted and smooth.
* Stir in the ube extract until evenly incorporated and the mixture is a vibrant purple color.
* Remove from heat and gently fold in the Rice Krispies until fully coated.
* Transfer the mixture to the prepared pan and press it evenly into the corners using a spatula.
* If desired, sprinkle extra mini marshmallows on top and gently press them into the surface.
* Let cool at room temperature before slicing into 9 squares. Enjoy!


rice krispies treats, cereal rice krispies treats, homemade rice krispies treats, rice krispies treats recipe, how to make rice krispies treats, rice krispies treats homemade, best rice krispie treats, rice krispies treat, rice krispie treats, cereal rice krispie treats, rice krispies treats, rice krispie treats hack, easy rice krispie treats, baked rice krispie treats, rice krispie treats recipe, ube rice krispi, ube desserts, ube baked goods,
Ube Rice Krispies Treats 💜 These Ube Rice Krispie Ube Rice Krispies Treats 💜

These Ube Rice Krispies Treats are chewy, buttery, and bursting with sweet ube flavor! With their vibrant purple color and soft marshmallow texture, this fun twist on a classic childhood treat is perfect for parties, holidays, or whenever you’re craving something unique and delicious.

INGREDIENTS
* 1/4 Cup Unsalted Butter
* 400 g Mini Marshmallows + extra for topping (optional)
* 2 tsp Ube Extract
* 4 Cups Rice Krispies Cereal

INSTRUCTIONS
* Line a 9×9-inch baking pan with parchment paper.
* In a large pot over low heat, melt the butter.
* Add the mini marshmallows and stir until completely melted and smooth.
* Stir in the ube extract until evenly incorporated and the mixture is a vibrant purple color.
* Remove from heat and gently fold in the Rice Krispies until fully coated.
* Transfer the mixture to the prepared pan and press it evenly into the corners using a spatula.
* If desired, sprinkle extra mini marshmallows on top and gently press them into the surface.
* Let cool at room temperature before slicing into 9 squares. Enjoy!


rice krispies treats, cereal rice krispies treats, homemade rice krispies treats, rice krispies treats recipe, how to make rice krispies treats, rice krispies treats homemade, best rice krispie treats, rice krispies treat, rice krispie treats, cereal rice krispie treats, rice krispies treats, rice krispie treats hack, easy rice krispie treats, baked rice krispie treats, rice krispie treats recipe, ube rice krispi, ube desserts, ube baked goods,
Asian Sesame Vermicelli Salad 🥗 This Asian Sesam Asian Sesame Vermicelli Salad 🥗 

This Asian Sesame Vermicelli Salad is light, refreshing, and packed with flavor! Tender vermicelli noodles are tossed with crisp veggies and a savory sesame dressing for an easy, vibrant dish that’s perfect for lunches, meal prep, or summer gatherings.

INGREDIENTS
* 3 Bundles Vermicelli about 150g uncooked
* 1 Cup Purple Cabbage thinly shredded 
* 1 Cup Red Peppers thinly shredded 
* 1 Cup Carrots thinly shredded 
* 1/2 Cup Edamame
* 2 Stalks Green Onion thinly sliced 

Sauce
* 1 Clove Garlic grated
* 2 Tbsp Sesame Oil
* 1 tsp Sesame Oil
* 2 Tbsp Soy Sauce
* 1 Tbsp Brown Sugar
* 1 Tbsp Rice Vinegar

INSTRUCTIONS
* Cook the vermicelli noodles according to package instructions. Drain and rinse under cold water.
* In a large bowl, combine the cooked vermicelli, cabbage, red bell pepper, carrot, edamame, and green onions.
* In a small bowl, whisk together garlic, sesame oil, sesame seeds, soy sauce, brown sugar, and rice vinegar until well combined.
* Pour the sauce over the salad and toss until evenly coated.
* Chill in the fridge before serving for extra flavor for minimally 12 hours! Enjoy!

vietnamese vermicelli salad recipe, vermicelli noodle salad, vermicelli salad recipe, how to make vermicelli noodle salad, vermicelli noodles salad recipe, asian salad, asian salad dressing, how to make vietnamese vermicelli noodle salad recipe, asian noodle salad, asian salad recipe, easy sesame noodle salad, asian cold noodle salad, glass noodle salad with sesame dressing, bean vermicelli, ramen salad, vegan salad, vegetarian salad, sesame sauce, sesame sauce recipe
Asian Sesame Vermicelli Salad 🥗 This Asian Sesam Asian Sesame Vermicelli Salad 🥗 

This Asian Sesame Vermicelli Salad is light, refreshing, and packed with flavor! Tender vermicelli noodles are tossed with crisp veggies and a savory sesame dressing for an easy, vibrant dish that’s perfect for lunches, meal prep, or summer gatherings.

INGREDIENTS
* 3 Bundles Vermicelli about 150g uncooked
* 1 Cup Purple Cabbage thinly shredded 
* 1 Cup Red Peppers thinly shredded 
* 1 Cup Carrots thinly shredded 
* 1/2 Cup Edamame
* 2 Stalks Green Onion thinly sliced 

Sauce
* 1 Clove Garlic grated
* 2 Tbsp Sesame Oil
* 1 tsp Sesame Oil
* 2 Tbsp Soy Sauce
* 1 Tbsp Brown Sugar
* 1 Tbsp Rice Vinegar

INSTRUCTIONS
* Cook the vermicelli noodles according to package instructions. Drain and rinse under cold water.
* In a large bowl, combine the cooked vermicelli, cabbage, red bell pepper, carrot, edamame, and green onions.
* In a small bowl, whisk together garlic, sesame oil, sesame seeds, soy sauce, brown sugar, and rice vinegar until well combined.
* Pour the sauce over the salad and toss until evenly coated.
* Chill in the fridge before serving for extra flavor for minimally 12 hours! Enjoy!

vietnamese vermicelli salad recipe, vermicelli noodle salad, vermicelli salad recipe, how to make vermicelli noodle salad, vermicelli noodles salad recipe, asian salad, asian salad dressing, how to make vietnamese vermicelli noodle salad recipe, asian noodle salad, asian salad recipe, easy sesame noodle salad, asian cold noodle salad, glass noodle salad with sesame dressing, bean vermicelli, ramen salad, vegan salad, vegetarian salad, sesame sauce, sesame sauce recipe
Poppy Seed Almond Muffins 🤎 Have you ever tried C Poppy Seed Almond Muffins 🤎

Have you ever tried Costco’s almond poppy seed muffins? If you have, this is a copycat version of it! It’s my fav muffin and I knew I had to recreate it at home!

These Poppy Seed Almond Muffins are soft, fluffy, and bursting with sweet almond flavor. With a tender crumb and delicate crunch from the poppy seeds, they’re the perfect cozy bakery-style treat for breakfast, snacking, or coffee breaks.

INGREDIENTS
* 2 1/4 Cups Flour
* 1/2 tsp Salt
* 1/2 tsp Baking Soda
* 1/2 tsp Baking Powder
* 3/4 Cup Oil 
* 1 Cup White Sugar
* 2 Eggs
* 1 tsp Vanilla Extract
* 1 Tbsp Almond Extract 
* 3/4 Cup Sour Cream
* 1/4 Cup Milk
* 2 Tbsp Poppy Seeds
* 1/4 Cup Slivered Almonds sprinkle on top

INSTRUCTIONS
* Preheat oven to 350°F and line a 12-cup muffin tin with liners or lightly grease it.
* In a large bowl, whisk together oil, sugar, eggs, vanilla extract, almond extract, sour cream, and milk until smooth.
* Add flour, salt, baking soda, and baking powder directly into the same bowl. Gently mix until just combined.
* Fold in the poppy seeds.
* Divide the batter evenly between the 12 muffin cups and sprinkle slivered almonds on top.
* Bake for 25 minutes, or until a toothpick inserted into the center comes out clean.
* Let cool slightly before serving.


almond poppy seed muffins, poppy seed muffins, costco copycat, costco copycat recipes, almond muffins, easy muffin recipes, simple muffins, poppy seed almond muffins
Poppy Seed Almond Muffins 🤎 Have you ever tried C Poppy Seed Almond Muffins 🤎

Have you ever tried Costco’s almond poppy seed muffins? If you have, this is a copycat version of it! It’s my fav muffin and I knew I had to recreate it at home!

These Poppy Seed Almond Muffins are soft, fluffy, and bursting with sweet almond flavor. With a tender crumb and delicate crunch from the poppy seeds, they’re the perfect cozy bakery-style treat for breakfast, snacking, or coffee breaks.

INGREDIENTS
* 2 1/4 Cups Flour
* 1/2 tsp Salt
* 1/2 tsp Baking Soda
* 1/2 tsp Baking Powder
* 3/4 Cup Oil 
* 1 Cup White Sugar
* 2 Eggs
* 1 tsp Vanilla Extract
* 1 Tbsp Almond Extract 
* 3/4 Cup Sour Cream
* 1/4 Cup Milk
* 2 Tbsp Poppy Seeds
* 1/4 Cup Slivered Almonds sprinkle on top

INSTRUCTIONS
* Preheat oven to 350°F and line a 12-cup muffin tin with liners or lightly grease it.
* In a large bowl, whisk together oil, sugar, eggs, vanilla extract, almond extract, sour cream, and milk until smooth.
* Add flour, salt, baking soda, and baking powder directly into the same bowl. Gently mix until just combined.
* Fold in the poppy seeds.
* Divide the batter evenly between the 12 muffin cups and sprinkle slivered almonds on top.
* Bake for 25 minutes, or until a toothpick inserted into the center comes out clean.
* Let cool slightly before serving.


almond poppy seed muffins, poppy seed muffins, costco copycat, costco copycat recipes, almond muffins, easy muffin recipes, simple muffins, poppy seed almond muffins

Copyright © 2026 Lynn Mumbing Mejia · Theme by 17th Avenue