DIY Painted Tote Bags
You know that I love you when you get a handmade DIY gift! DIY gifts are my love language, and I’ll always craft things for the people I love! I was thinking of what gift to give my family as I was seeing them soon, and I thought, you know what, I’ve always wanted to paint tote bags! Let me try to DIY painted tote bags and personalize them with things and characters they love!
If you love cute and personalized accessories, these DIY Painted Tote Bags are such a fun and easy craft to try! With a plain canvas tote bag and some fabric paint, you can create a one-of-a-kind bag covered in your favourite doodles, characters, flowers, fruits, or patterns.
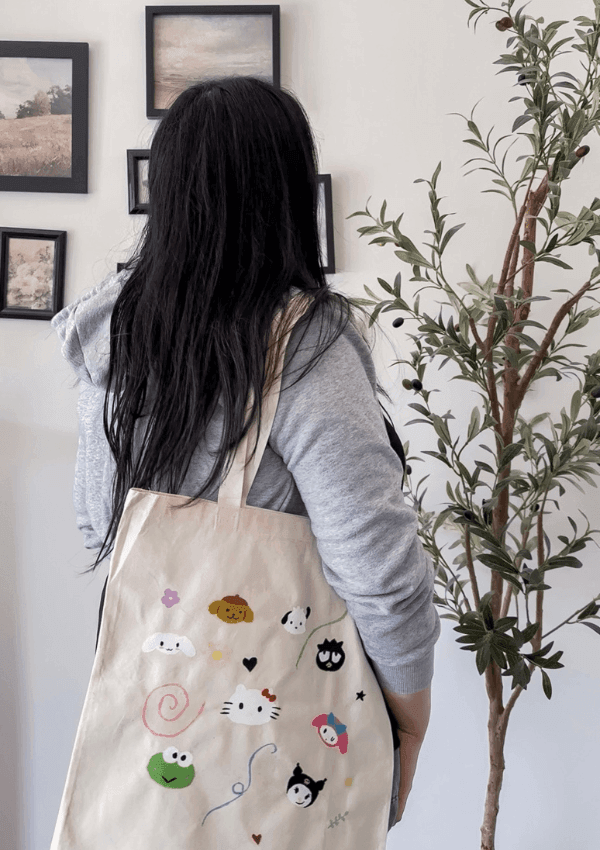
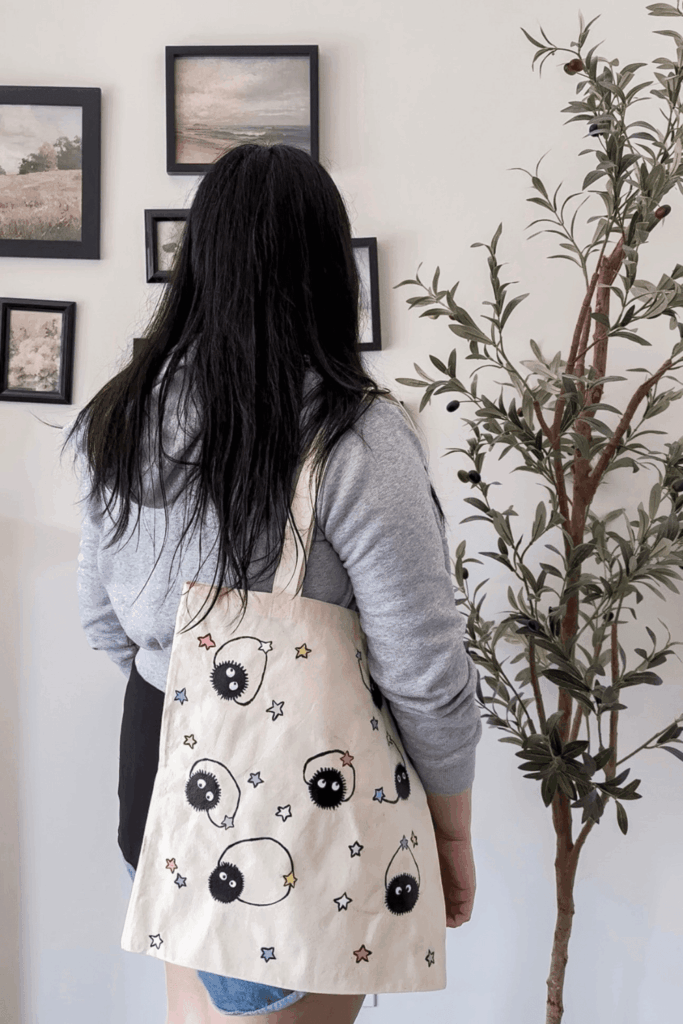
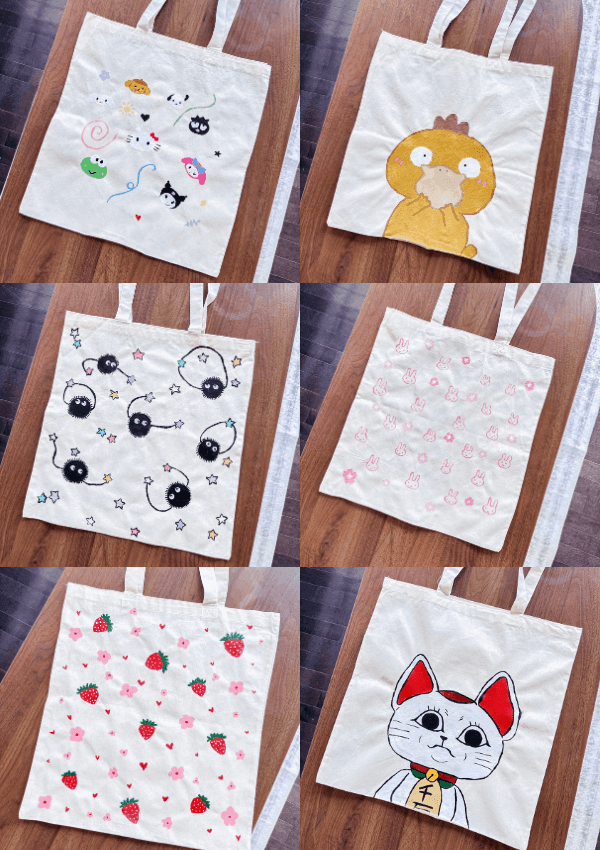
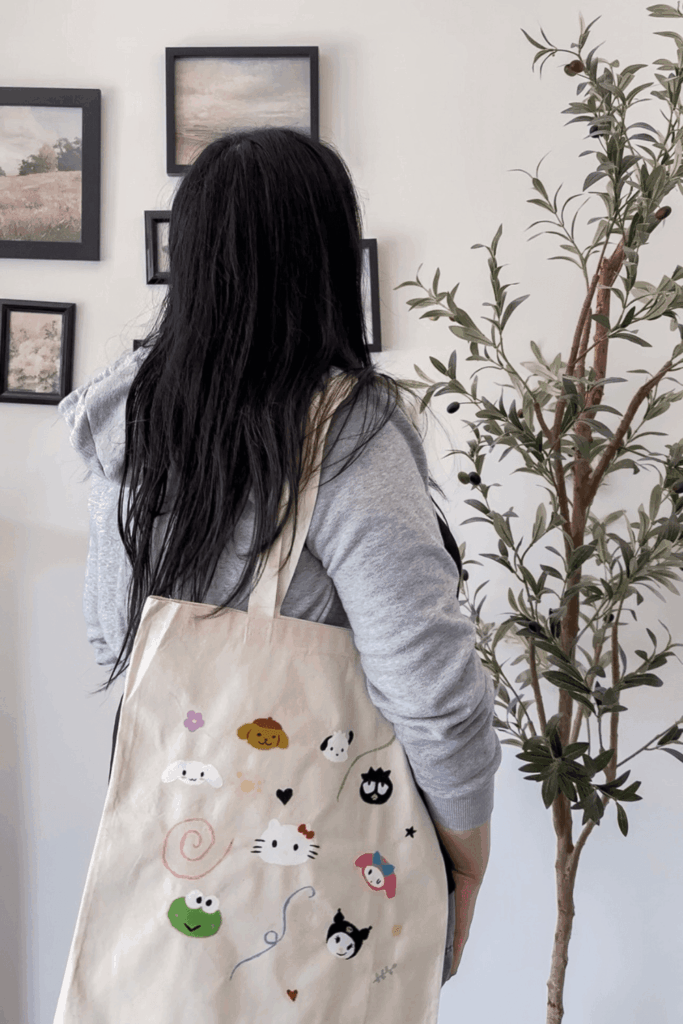
I love this DIY because you don’t need to be an amazing artist to make something cute. You can keep your design simple with little stars and flowers or go all out with a larger illustration or characters like I did. They’re also a fun project to make with friends, and the finished tote makes a cute handmade gift!
PIN DIY Painted Tote Bags FOR LATER:
This DIY Painted Tote Bags post is accompanied by a YouTube Tutorial. If you haven’t subscribed on YouTube, don’t forget to!
HERE IS HOW TO MAKE DIY PAINTED TOTE BAGS:
WHERE CAN YOU FIND THE MATERIALS TO MAKE THESE DIY PAINTED TOTE BAGS?
Most of the supplies for this DIY can be found at your local dollar store, craft store, or art supply store. You can also easily find blank canvas tote bags and fabric paints online.
For an inexpensive option, check your local dollar store for plain canvas tote bags. Craft stores are also great if you’re looking for different sizes and styles of totes or a larger selection of fabric paint colours.
WHAT ARE THE MATERIALS NEEDED TO MAKE THESE DIY PAINTED TOTE BAGS?
For these DIY Painted Tote Bags, you’ll need:
- Plain canvas tote bag
- Fabric/acrylic paint
- Paint brushes in different sizes
- Water-based sealer and finish for fabric
- Cardboard
You can choose whatever paint colors you’d like depending on the design you’re creating. I love using pastel pinks, blues, yellows, and reds for a cute and playful look.
WHAT EQUIPMENT DO I NEED?
You don’t need any fancy equipment for this DIY aside from the materials above. I wash my brushes in between colours just to make sure that there is no colour bleed!
The cardboard is especially important because it helps prevent the paint from bleeding through to the other side of the bag.
CAN I SUBSTITUTE ANY MATERIALS OUT?
Yes! There are quite a few substitutions you can make depending on what you have at home.
Instead of fabric paint, you can use fabric paint markers, which are especially helpful if you’re creating small details, outlines, or lettering.
Honestly, I just used acrylic paint, but I really had to work with it. It was a bit finicky to use! Fabric paint I feel would be way smoother to use.
For the tote itself, you don’t have to use a traditional canvas tote. You can paint:
- Canvas pouches
- Pencil cases
- Drawstring bags
- Aprons
- Denim bags
- Fabric hats
DOES THIS DIY LAST TO USE FOR THE FOLLOWING YEARS?
Yes! When you use fabric paint and seal and allow it to properly dry and set, your painted tote can last for years with proper care.
For the longest-lasting design, follow the instructions on your specific fabric paint for setting the paint. It’s also best to wash the tote gently and avoid harsh detergents or high heat whenever possible.
Because these bags are meant to be reusable, they’re a cute way to add some personality to an everyday item while also reducing the need for disposable shopping bags.
HOW LONG DOES IT TAKE TO PUT TOGETHER?
The actual painting can take anywhere from 30 minutes to a few hours to a few days, depending on how detailed your design is. The character ones I did took a few days, while the simple freehanded designs took an hour or less!
You’ll also want to allow enough time for the paint and seal to completely dry before using the tote.
INSPIRATIONS FOR THIS DIY?
I absolutely love making gifts for my loved ones! It’s a gift for me and a gift for them tbh! Crafting has always been a relaxing hobby for me but I do spend hours handcrafting things so it’s a labour of love! I also pride myself on listening and observing what my people love so I try my best to personalize it as best as I can.
We honestly can never have too many tote bags! I personally love tote bags and use them for anything and even home decor!.
Some design inspiration includes:
- Cartoons and characters
- Animals
- Flowers
- Fruits
- Food
- Kawaii illustrations
- Vintage designs
- Children’s drawings
- Favorite colors
- Seasonal themes
- Initials or names
One of my favorite things about this DIY is that there’s no right or wrong design. Even simple little doodles can make a plain tote feel completely different!
TIPS FOR MAKING PAINTED TOTE BAGS
- Put cardboard inside the bag before painting to prevent bleeding.
- Start with lighter colors and add darker details afterward.
- Don’t overload your paintbrush with paint—you’ll have more control with thinner layers.
- Practice complicated designs on paper first.
- Fabric paint markers are great for adding tiny details and outlines.
- Let each layer dry before adding another color to prevent muddying.
- Don’t worry about making your design perfect! The handmade look is part of the charm.
- Try creating a matching set of totes with different designs using the same color palette.
STEPS TO PUT TOGETHER THESE DIY PAINTED TOTE BAGS:
1. Choose Your Tote Bag
Start with a clean, plain canvas tote bag. Make sure the fabric is free of dust, lint, or debris before you begin painting.
2. Plan Your Design
Before putting paint onto the tote, decide what you’d like your design to look like.
You can lightly sketch your design onto the fabric with a pencil first. For an all-over pattern, you can simply start placing your small designs around the bag without sketching everything out.
3. Protect the Inside of the Bag
Place a piece of cardboard or thick paper inside the tote bag. This prevents the paint from soaking through to the back of the bag.
4. Start Painting
Begin painting your design onto the tote using fabric paint and a small paintbrush.
For the bags pictured, you can create anything from little stars and flowers to strawberries, bunnies, cute characters, or other whimsical illustrations.
Start with the larger areas of your design first and work your way toward the smaller details.
5. Add the Details
Once the base colours have dried slightly, add your smaller details.
This is where you can really personalize your tote! Add outlines, little stars, faces, hearts, bows, dots, or other small decorations to make your design unique.
6. Let the Paint Dry
Allow the tote to dry completely according to the instructions on your fabric paint.
Try not to fold or use the tote while the paint is still wet.
7. Seal the Paint
Use a fabric seal to seal the paint so that it’ll last longer and even remain in tact after a wash!
This will help the paint adhere to the fabric and make your tote more durable.
8. Enjoy Your New Tote!
Once everything is completely dry and set, your DIY Painted Tote Bag is ready to use!
Take it grocery shopping, bring it to the library, use it as an everyday purse, or give it to a friend as a cute handmade gift.
Thank you for reading to the end of this post! I hope you make DIY painted tote bags as well ❤️
Xo,
Lynn
Are you going to try making these DIY Painted Tote Bags?! Don’t forget to tag me if you do!

This blog post is all the details on how to make DIY Painted Tote Bags.
P.S: If you haven’t read my most recent post, click here!
PIN DIY Painted Tote Bags FOR LATER:
If you liked reading this DIY Painted Tote Bags post, you might like these are well!
Easy DIY Pink Coquette Bookmarks
DIY All-year Round Neutral Wreath
This is the end of this DIY Painted Tote Bags post.